HP PSC 500 HP PSC 500 - (English) Customer Care Guide - Page 21
Start, Settings, Control Panel, Add/Remove Programs, Add/Remove - windows 7
 |
View all HP PSC 500 manuals
Add to My Manuals
Save this manual to your list of manuals |
Page 21 highlights
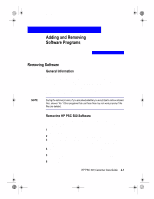
WLCC.book Page 1 Wednesday, May 17, 2000 4:34 PM 4 When you install a software program on your computer, many files on your system are either added or shared because of the new program. When you remove a program, you need to remove all files associated with that program, not just the files you see in a particular program folder. Do not simply remove the executable file from your hard drive. Be sure to properly uninstall it, using the Add/Remove Programs feature in the Windows Control Panel. Use the Add/Remove Programs feature to remove the HP PSC 500 product software (printing and scanning software) and other third-party software programs. To do this: On the Windows taskbar, click Start, point to Settings, and then choose Control Panel. In Control Panel, double-click the Add/Remove Programs icon. In the Add/Remove Programs Properties dialog box, click the name of the program you want to uninstall, and then click the Add/Remove button. Follow the directions on the screen until the Add/Remove program finishes. In the Add/Remove Programs Properties dialog box, click OK to close the dialog box. Restart Windows.
-
 1
1 -
2
-
3
-
4
-
5
-
6
-
7
-
8
-
9
-
10
-
11
-
12
-
13
-
14
-
15
-
 16
16 -
 17
17 -
 18
18 -
 19
19 -
 20
20 -
 21
21 -
 22
22 -
 23
23 -
 24
24 -
 25
25 -
 26
26 -
27
-
28
-
29
-
30
-
31
-
32
-
33
-
34
 |
 |