HP Pavilion 15-ab100 Pavilion Notebook AMD Maintenance and Service Guide - Page 70
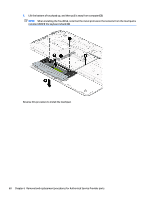
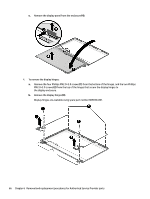
Remove the two screw covers, that secure the display
 |
View all HP Pavilion 15-ab100 manuals
Add to My Manuals
Save this manual to your list of manuals |
Page 70 highlights
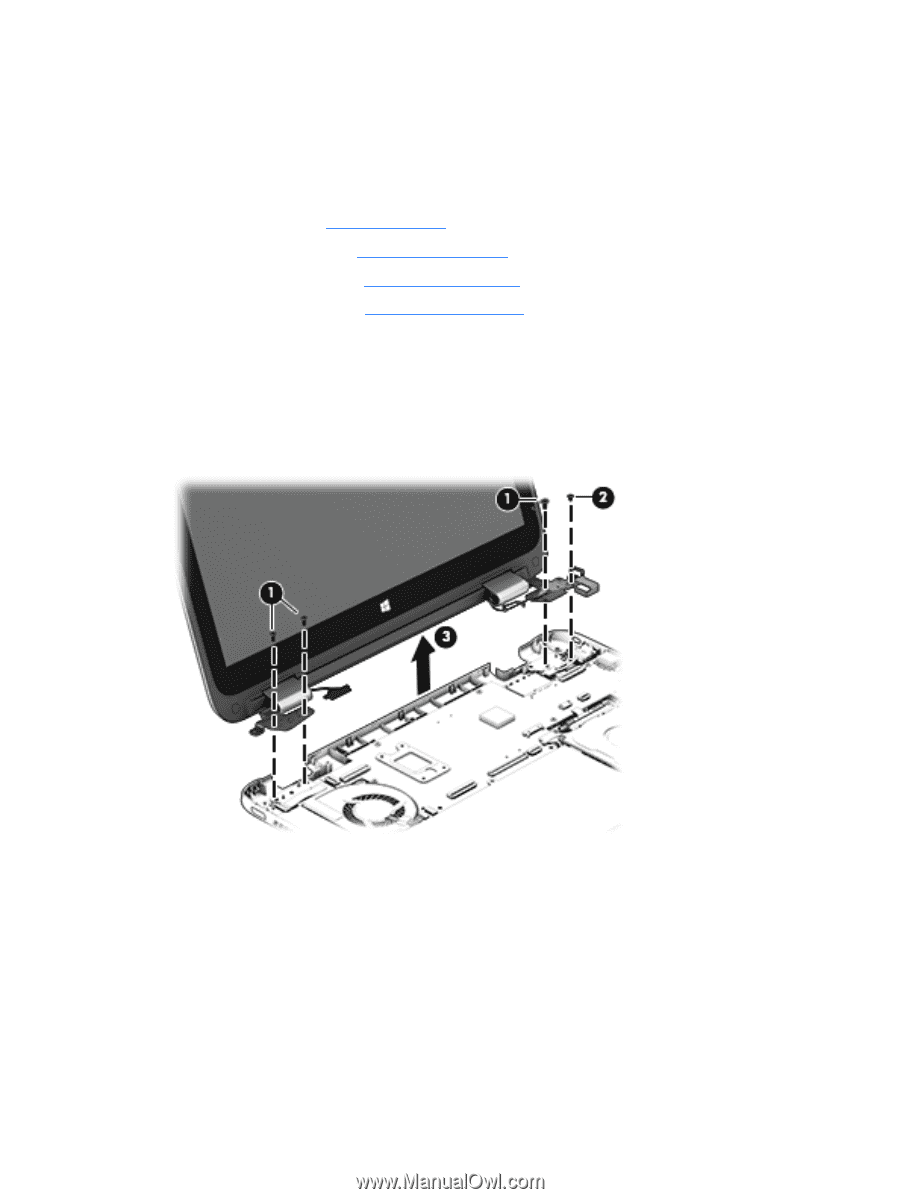
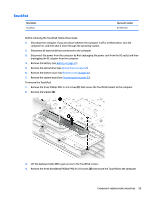
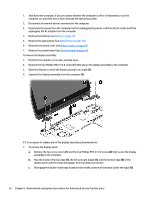
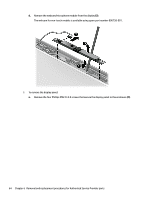
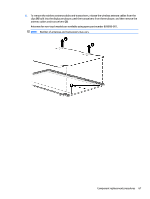
1. Shut down the computer. If you are unsure whether the computer is off or in Hibernation, turn the computer on, and then shut it down through the operating system. 2. Disconnect all external devices connected to the computer. 3. Disconnect the power from the computer by first unplugging the power cord from the AC outlet and then unplugging the AC adapter from the computer. 4. Remove the battery (see Battery on page 31). 5. Remove the optical drive (see Optical drive on page 32). 6. Remove the bottom cover (see Bottom cover on page 36). 7. Remove the system board (see System board on page 53). To remove the display assembly: 1. Position the computer on its side, partially open. 2. Remove the two Phillips PM2.5×5.0 screws (1) that secure the display assembly to the computer. 3. Open the display to rotate the hinges upward to an angle (2). 4. Separate the display assembly from the computer (3). If it is necessary to replace any of the display assembly subcomponents: 1. To remove the display bezel: a. Remove the two screw covers (1) and the two Phillips PM2.0×3.0 screws (2) that secure the display assembly to the computer. b. Flex the inside of the top edge (3), the left and right edges (4), and the bottom edge (5) of the display bezel until the bezel disengages from the display enclosure. c. Disengage the double-sided tape located in the middle, bottom of the bezel (under the logo) (6). 62 Chapter 6 Removal and replacement procedures for Authorized Service Provider parts
-
 1
1 -
2
-
3
-
4
-
5
-
6
-
7
-
8
-
9
-
10
-
11
-
12
-
13
-
14
-
15
-
16
-
17
-
18
-
19
-
20
-
21
-
22
-
23
-
24
-
25
-
26
-
27
-
28
-
29
-
30
-
31
-
32
-
33
-
34
-
35
-
36
-
37
-
38
-
39
-
40
-
41
-
42
-
43
-
44
-
45
-
46
-
47
-
48
-
49
-
50
-
51
-
52
-
53
-
54
-
55
-
56
-
57
-
58
-
59
-
60
-
61
-
62
-
63
-
64
-
 65
65 -
 66
66 -
 67
67 -
 68
68 -
 69
69 -
 70
70 -
 71
71 -
 72
72 -
 73
73 -
 74
74 -
 75
75 -
76
-
77
-
78
-
79
-
80
-
81
-
82
-
83
-
84
-
85
-
86
-
87
-
88
-
89
-
90
-
91
-
92
-
93
-
94
-
95
-
96
-
97
-
98
-
99
-
100
-
101
-
102
-
103
-
104
-
105
-
106
-
107
-
108
-
109
-
110
-
111
-
112
-
113
-
114
-
115
-
116
-
117
-
118
-
119
-
120
-
121
-
122
-
123
-
124
-
125
-
126
-
127
-
128
 |
 |