HP Pavilion 15-ab100 Pavilion Notebook AMD Maintenance and Service Guide - Page 73
: TOP Touch On Panel, 001: BrightView HD panels
 |
View all HP Pavilion 15-ab100 manuals
Add to My Manuals
Save this manual to your list of manuals |
Page 73 highlights
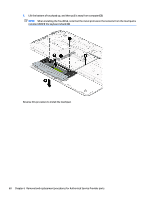
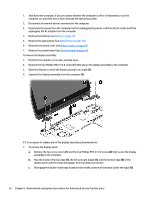
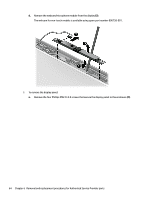
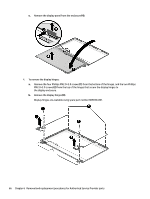
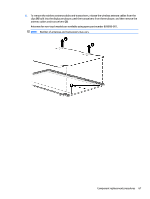
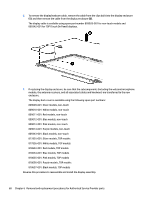
b. Lift the top of the panel (2). Raw display panels are available using the following spare part numbers: 809371-001: BrightView HD panels 809372-001: AntiGlare FHD panels 819999-001: AntiGlare UWVA panels 813109-001: TOP (Touch On Panel) c. Rotate the display panel until it is upside-down next to the display enclosure (1). d. On the back of the display panel, release the adhesive strip (2) that secures the display panel cable to the display panel, and then disconnect the cable (3). Component replacement procedures 65
-
 1
1 -
2
-
3
-
4
-
5
-
6
-
7
-
8
-
9
-
10
-
11
-
12
-
13
-
14
-
15
-
16
-
17
-
18
-
19
-
20
-
21
-
22
-
23
-
24
-
25
-
26
-
27
-
28
-
29
-
30
-
31
-
32
-
33
-
34
-
35
-
36
-
37
-
38
-
39
-
40
-
41
-
42
-
43
-
44
-
45
-
46
-
47
-
48
-
49
-
50
-
51
-
52
-
53
-
54
-
55
-
56
-
57
-
58
-
59
-
60
-
61
-
62
-
63
-
64
-
65
-
66
-
67
-
 68
68 -
 69
69 -
 70
70 -
 71
71 -
 72
72 -
 73
73 -
 74
74 -
 75
75 -
 76
76 -
 77
77 -
 78
78 -
79
-
80
-
81
-
82
-
83
-
84
-
85
-
86
-
87
-
88
-
89
-
90
-
91
-
92
-
93
-
94
-
95
-
96
-
97
-
98
-
99
-
100
-
101
-
102
-
103
-
104
-
105
-
106
-
107
-
108
-
109
-
110
-
111
-
112
-
113
-
114
-
115
-
116
-
117
-
118
-
119
-
120
-
121
-
122
-
123
-
124
-
125
-
126
-
127
-
128
 |
 |
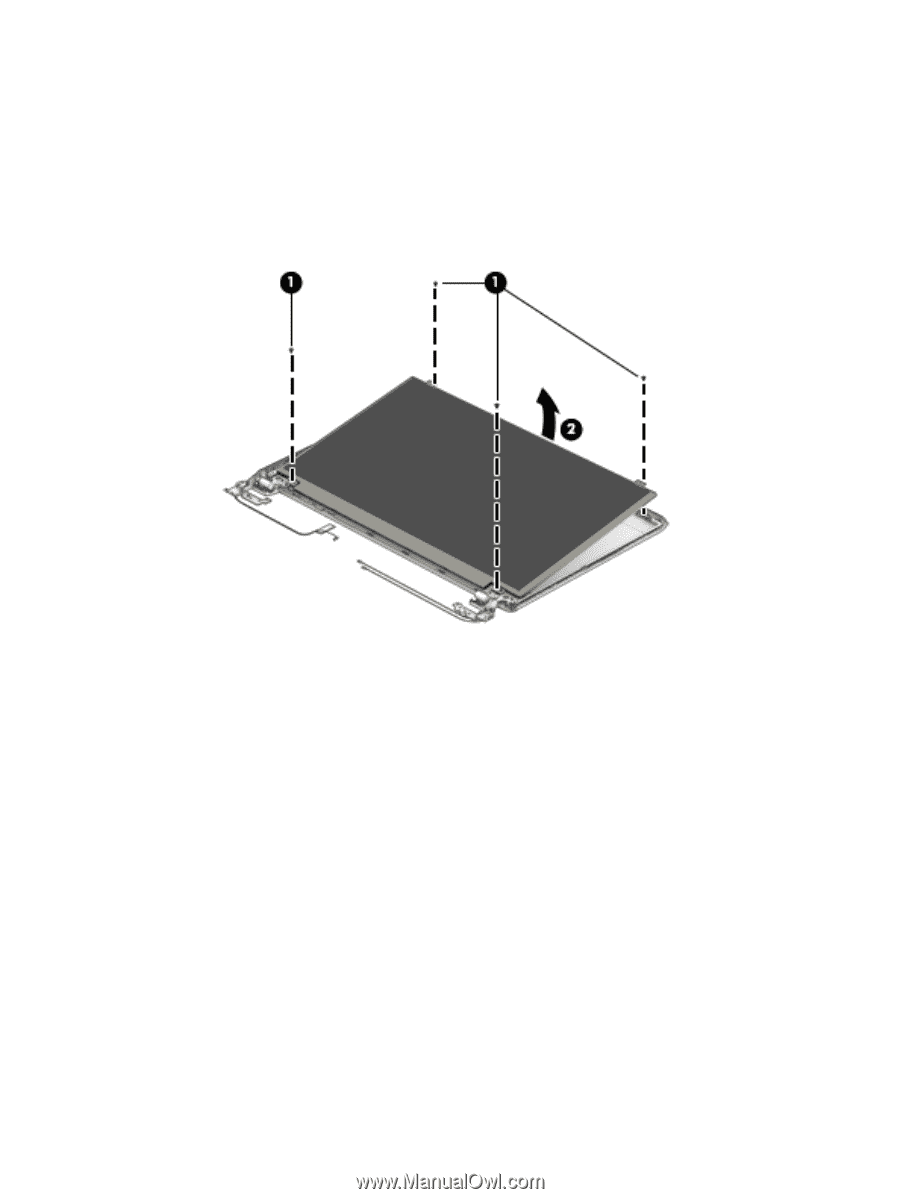
b.
Lift the top of the panel
(2)
.
Raw display panels are available using the following spare part numbers:
809371-001: BrightView HD panels
809372-001: AntiGlare FHD panels
819999-001: AntiGlare UWVA panels
813109-001: TOP (Touch On Panel)
c.
Rotate the display panel until it is upside-down next to the display enclosure
(1)
.
d.
On the back of the display panel, release the adhesive strip
(2)
that secures the display panel cable
to the display panel, and then disconnect the cable
(3)
.
Component replacement procedures
65