HP Pavilion Slimline s5-1300 Upgrading and Servicing Guide - Page 6
Gently lift and remove the hard disk drive from, Remove the four screws that secure the hard disk
 |
View all HP Pavilion Slimline s5-1300 manuals
Add to My Manuals
Save this manual to your list of manuals |
Page 6 highlights
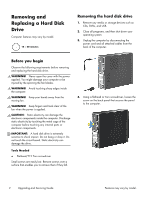
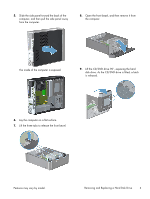
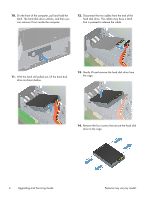
10. On the front of the computer, pull and hold the latch. The hard disk drive unlocks, and then you can remove it from inside the computer. 12. Disconnect the two cables from the end of the hard disk drive. The cables may have a latch that is pressed to release the cable. 11. With the latch still pulled out, lift the hard disk drive as shown below. 13. Gently lift and remove the hard disk drive from the cage. 14. Remove the four screws that secure the hard disk drive to the cage. 4 Upgrading and Servicing Guide Features may vary by model.
-
 1
1 -
 2
2 -
 3
3 -
 4
4 -
 5
5 -
 6
6 -
 7
7 -
 8
8 -
 9
9 -
 10
10 -
 11
11 -
 12
12 -
13
-
14
-
15
-
16
-
17
-
18
-
19
-
20
-
21
-
22
-
23
-
24
-
25
-
26
-
27
-
28
-
29
-
30
 |
 |
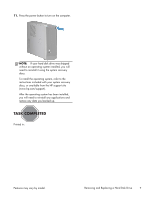
10.
On the front of the computer, pull and hold the
latch. The hard disk drive unlocks, and then you
can remove it from inside the computer.
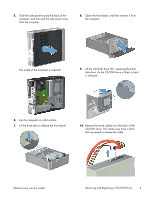
11.
With the latch still pulled out, lift the hard disk
drive as shown below.
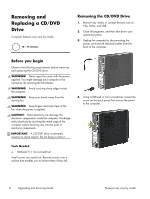
12.
Disconnect the two cables from the end of the
hard disk drive. The cables may have a latch
that is pressed to release the cable.
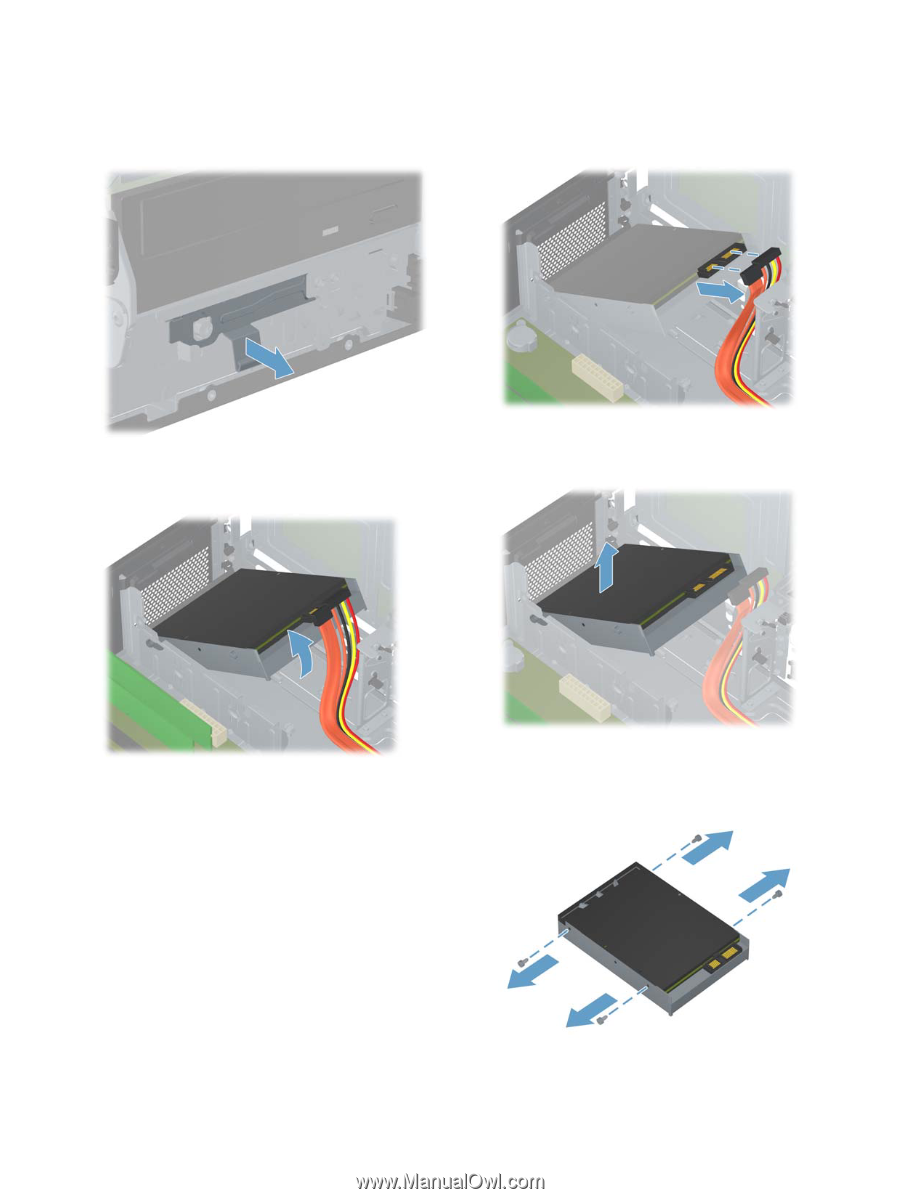
13.
Gently lift and remove the hard disk drive from
the cage.
14.
Remove the four screws that secure the hard disk
drive to the cage.
4
Upgrading and Servicing Guide
Features may vary by model.