HP Pavilion Slimline s5-1300 Upgrading and Servicing Guide - Page 8
Tighten the screw, securing the side panel to the, to bend slightly outward and not close securely.
 |
View all HP Pavilion Slimline s5-1300 manuals
Add to My Manuals
Save this manual to your list of manuals |
Page 8 highlights
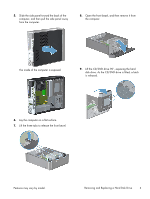
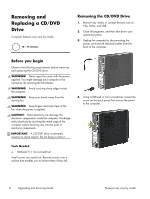
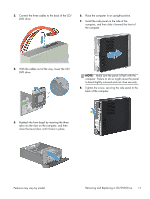
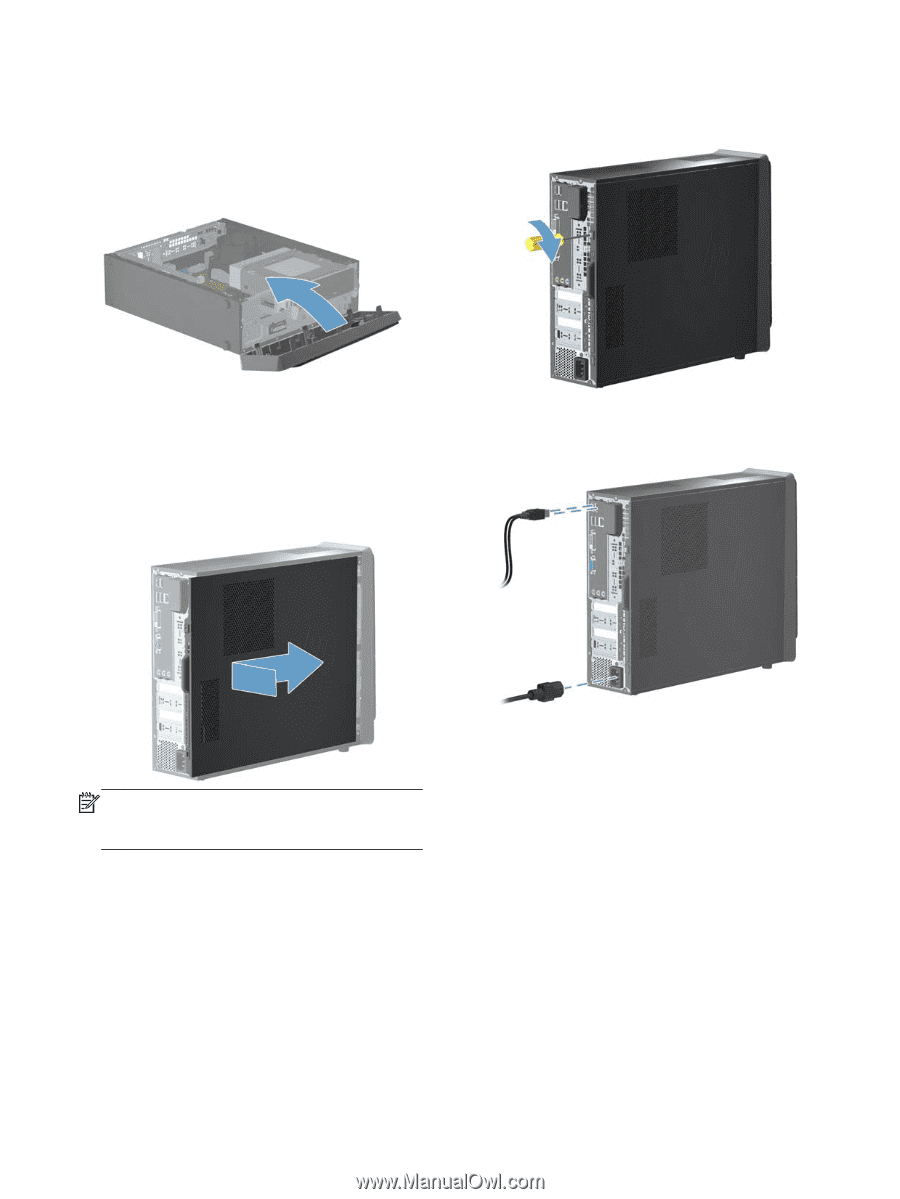
6. Reattach the front bezel by inserting the three tabs into the slots on the computer, and then close the bezel door until it locks in place. 9. Tighten the screw, securing the side panel to the back of the computer. 7. Place the computer in an upright position. 8. Install the side panel on the side of the computer, and then slide it toward the front of the computer. 10. Plug the power cord and any additional cables into the back of the computer. NOTE: Make sure the panel is flush with the computer. Failure to do so might cause the panel to bend slightly outward and not close securely. 6 Upgrading and Servicing Guide Features may vary by model.
-
 1
1 -
2
-
 3
3 -
 4
4 -
 5
5 -
 6
6 -
 7
7 -
 8
8 -
 9
9 -
 10
10 -
 11
11 -
 12
12 -
 13
13 -
14
-
15
-
16
-
17
-
18
-
19
-
20
-
21
-
22
-
23
-
24
-
25
-
26
-
27
-
28
-
29
-
30
 |
 |
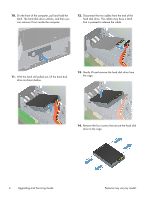
6.
Reattach the front bezel by inserting the three
tabs into the slots on the computer, and then
close the bezel door until it locks in place.
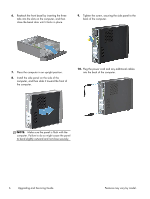
7.
Place the computer in an upright position.
8.
Install the side panel on the side of the
computer, and then slide it toward the front of
the computer.
NOTE:
Make sure the panel is flush with the
computer. Failure to do so might cause the panel
to bend slightly outward and not close securely.
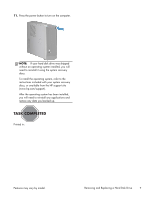
9.
Tighten the screw, securing the side panel to the
back of the computer.
10.
Plug the power cord and any additional cables
into the back of the computer.
6
Upgrading and Servicing Guide
Features may vary by model.