HP Pavilion xl900 HP Pavilion Desktop PCs - (English) Upgrading and Servicing - Page 55
Drive Cage In and Out
 |
View all HP Pavilion xl900 manuals
Add to My Manuals
Save this manual to your list of manuals |
Page 55 highlights
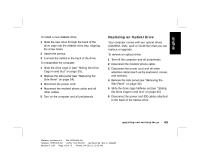
English To install a new optical drive: Note: Make sure the jumper on the new drive is in the CS (Cable Select) position. 1 Slide the new drive through the optical drive bay in the drive cage. 2 Connect the cables to the back of the drive. 3 Align the screw holes and attach the screws. To reassemble the computer: 1 Slide the drive cage back in (see "Sliding the Drive Cage In and Out" on page 35). 2 Replace the side panel (see "Replacing the Side Panel" on page 54). 3 Reconnect the power cord and all other cables. 4 Reconnect the modem/phone cable. 5 Turn on the computer and all peripherals. 6 Install any software drivers supplied by the drive manufacturer. Replacing the Battery A lithium battery on the motherboard provides backup power for the computer's timekeeping capability. The battery has an estimated life expectancy of seven years. When the battery starts to weaken, the date and time may be incorrect. If the battery fails, replace it with a CR2032 lithium battery (3 volt, 220mAH rating) or an equivalent battery. Warning: There is a danger of explosion if the battery is incorrectly replaced. Replace only with the same, or equivalent, type of battery. Discard used batteries according to the manufacturer's instructions. Avertissement : Le remplacement incorrect de la pile peut provoquer une explosion. Utilisez uniquement une pile de même type ou de type équivalent. Éliminez les piles usées conformément aux instructions du fabricant. upgrading and servicing the pc 51 Filename: ma1rwsc.doc Title: HP-Print2k.dot Template: HP-Print2K.dot Author: Ann Schmidt Last Saved By: Jerry C. Stogsdill Revision #: 198 Page: 51 of 70 Printed: 04/26/01 11:33 AM
-
 1
1 -
2
-
3
-
4
-
5
-
6
-
7
-
8
-
9
-
10
-
11
-
12
-
13
-
14
-
15
-
16
-
17
-
18
-
19
-
20
-
21
-
22
-
23
-
24
-
25
-
26
-
27
-
28
-
29
-
30
-
31
-
32
-
33
-
34
-
35
-
36
-
37
-
38
-
39
-
40
-
41
-
42
-
43
-
44
-
45
-
46
-
47
-
48
-
49
-
 50
50 -
 51
51 -
 52
52 -
 53
53 -
 54
54 -
 55
55 -
 56
56 -
 57
57 -
 58
58 -
 59
59 -
 60
60 -
61
-
62
-
63
-
64
-
65
-
66
-
67
-
68
-
69
-
70
-
71
-
72
-
73
-
74
-
75
-
76
-
77
-
78
-
79
-
80
-
81
-
82
-
83
-
84
-
85
-
86
-
87
-
88
-
89
-
90
-
91
-
92
-
93
-
94
-
95
-
96
-
97
-
98
-
99
-
100
-
101
-
102
-
103
-
104
-
105
-
106
-
107
-
108
-
109
-
110
-
111
-
112
-
113
-
114
-
115
-
116
-
117
-
118
-
119
-
120
-
121
-
122
-
123
-
124
-
125
-
126
-
127
-
128
-
129
-
130
-
131
-
132
-
133
-
134
-
135
-
136
-
137
-
138
-
139
-
140
 |
 |
