HP Photosmart 7520 User Guide - Page 36
Set up and change speed-dial entries, Delete speed-dial entries, Print a list of speed-dial entries - fax
 |
View all HP Photosmart 7520 manuals
Add to My Manuals
Save this manual to your list of manuals |
Page 36 highlights
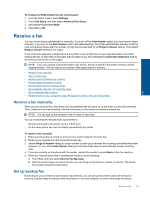
Fax Chapter 7 • Set up and change speed-dial entries • Delete speed-dial entries • Print a list of speed-dial entries Set up and change speed-dial entries You can store fax numbers as speed-dial entries. To set up speed-dial entries 1. From the Home screen, touch Settings. 2. Touch Fax Setup, and then select Speed Dial Setup. 3. Touch Add/Edit Speed Dial, and then touch an unused entry number. 4. Type the fax number and a name, and then touch Next. NOTE: Be sure to include any pauses or other required numbers, such as an area code, an access code for numbers outside a PBX system (usually a 9 or 0), or a long-distance prefix. 5. Verify the information, and then touch OK. To change speed-dial entries 1. From the Home screen, touch Settings. 2. Touch Fax Setup, and then select Speed Dial Setup. 3. Touch Add/Edit Speed Dial. 4. Make your changes in the fax number or the name, and then touch Next. NOTE: Be sure to include any pauses or other required numbers, such as an area code, an access code for numbers outside a PBX system (usually a 9 or 0), or a long-distance prefix. Delete speed-dial entries To delete speed-dial entries, complete the following steps: 1. From the Home screen, touch Settings. 2. Touch Fax Setup, and then touch Speed Dial Setup. 3. Touch Delete Speed Dial, touch the entry you want to delete, and then touch Delete to confirm. Print a list of speed-dial entries To print a list of all of the speed-dial entries that have been set up, complete the following steps: 1. Load paper in the tray. For more information, see Load media on page 13. 2. From the Home screen, touch Settings. 3. Touch Fax Setup, and then touch Speed Dial Setup. 4. Touch Print Speed Dial List. Change fax settings After completing the steps in the getting started guide that came with the printer, use the following steps to change the initial settings or to configure other options for faxing. • Configure the fax header • Set the answer mode (Auto answer) • Set the number of rings before answering • Change the answer ring pattern for distinctive ring • Set the dial type • Set the redial options • Set the fax speed 34 Fax
-
 1
1 -
2
-
3
-
4
-
5
-
6
-
7
-
8
-
9
-
10
-
11
-
12
-
13
-
14
-
15
-
16
-
17
-
18
-
19
-
20
-
21
-
22
-
23
-
24
-
25
-
26
-
27
-
28
-
29
-
30
-
 31
31 -
 32
32 -
 33
33 -
 34
34 -
 35
35 -
 36
36 -
 37
37 -
 38
38 -
 39
39 -
 40
40 -
 41
41 -
42
-
43
-
44
-
45
-
46
-
47
-
48
-
49
-
50
-
51
-
52
-
53
-
54
-
55
-
56
-
57
-
58
-
59
-
60
-
61
-
62
-
63
-
64
-
65
-
66
-
67
-
68
-
69
-
70
-
71
-
72
-
73
-
74
-
75
-
76
-
77
-
78
-
79
-
80
-
81
-
82
-
83
-
84
-
85
-
86
-
87
-
88
-
89
-
90
-
91
-
92
-
93
-
94
-
95
-
96
-
97
-
98
-
99
-
100
-
101
-
102
 |
 |
