HP Photosmart 7600 HP Photosmart 7600 series - (English) Basics Guide - Page 20
set printer preferences
 |
View all HP Photosmart 7600 manuals
Add to My Manuals
Save this manual to your list of manuals |
Page 20 highlights
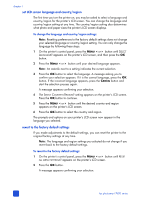
chapter 1 set printer preferences Your printer stores default settings for features such as paper settings, date and time stamp, and borderless printing. You can change your printer's default settings to your own preferences using the printer's control panel. Note: When you print from your computer, the control panel settings on the printer do not apply. The software on your computer overrides the printer preferences you set using the printer's control panel. Press the MENU or button on the printer's control panel to display the default setting to be changed, then press the OK button to open the menu. Press the MENU or button to scroll through the sub-menu options, and then press the OK button to select a setting. Press the CANCEL button to cancel an action. The following is a list of some of the settings you can change using the MENU button on the printer's control panel: • Adjust the photo brightness • Set the date and time stamp • Print borderless photos • Set Exif printing • Select paper settings • Set print quality • Set LCD screen language and country/region • Revert to the factory default settings adjust the photo brightness To print your photos lighter or darker than the originals, adjust the photo brightness. To change the default brightness setting: 1 On the printer's control panel, press the MENU or button until ADJUST PHOTO BRIGHTNESS? appears on the printer's LCD screen, then press the OK button. 2 Press the MENU button to lighten your photos, or press the MENU button to darken your photos. 3 Press the OK button. A message appears confirming your selection. Note: The new setting remains in effect until you change it again. 16 hp photosmart 7600 series
-
 1
1 -
2
-
3
-
4
-
5
-
6
-
7
-
8
-
9
-
10
-
11
-
12
-
13
-
14
-
 15
15 -
 16
16 -
 17
17 -
 18
18 -
 19
19 -
 20
20 -
 21
21 -
 22
22 -
 23
23 -
 24
24 -
 25
25 -
26
-
27
-
28
-
29
-
30
-
31
-
32
-
33
-
34
-
35
-
36
-
37
-
38
-
39
-
40
-
41
-
42
-
43
-
44
-
45
-
46
-
47
-
48
-
49
-
50
-
51
-
52
-
53
-
54
-
55
-
56
-
57
-
58
-
59
-
60
-
61
-
62
-
63
-
64
 |
 |