HP ProLiant DL380 Compaq ProLiant DL380 Generation 2 Server High-Density Deplo - Page 26
Telco Rack Solution, Installation Procedures
 |
View all HP ProLiant DL380 manuals
Add to My Manuals
Save this manual to your list of manuals |
Page 26 highlights
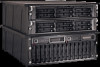
Compaq ProLiant DL380 Generation 2 Server High-Density Deployment in Compaq Racks 26 Compaq Confidential - Need to Know Required Telco Rack Solution Many data centers use Telco racks. The ProLiant DL380 Generation 2 server design supports deployment in Telco racks. Compaq offers a Telco Rack kit designed to install ProLiant DL380 Generation 2 servers in Telco racks. This kit includes rack rails and screws that are compatible with a variety of Telco racks. The Telco rack kit includes replacement server rails designed to fit on the ProLiant DL380 Generation 2 server. Before deploying ProLiant DL380 Generation 2 servers into a Telco rack, remove the standard server rails and replace them with the Telco server rails included in the Telco Rack kit. IMPORTANT: Always install the Compaq Telco Rack kit when deploying a ProLiant DL380 Generation 2 server in a Telco rack. Installation Procedures This section describes preparation and basic installation procedures common to various configurations outlined in "Planning Rack Configurations." Compaq recommends performing the preparation and installation procedures in the order that they are presented in this section. This section discusses the following procedures: • Preparing the ProLiant DL380 Generation 2 server • Installing Power Distribution Units (PDUs) • Routing the Power Cords • Installing the Rack Rails • Installing a Server in a Rack • Connecting Cables • Completing the Installation See the safety guidelines at the beginning of this paper before beginning any installation procedures. Preparing the ProLiant DL380 Generation 2 Server for Rack Installation This section briefly describes preparing the server for rack installation. Standard Rack Rails and Cable Management Arm 1. If the server is still in the shipping container, remove the server and all included components from the box. Ensure that all parts and components ordered with the server are present and undamaged. Place the server on a stable, flat surface. 2. Install any optional hardware components ordered with the server. Unpack and install one option kit at a time to reduce the risk of damage to any option kit or component. 3. The documentation included with each option kit contains detailed installation instructions for that option. Refer to the setup and installation guide included with the server for additional information on any hardware installation procedure. 14UH-0701A-WWEN
-
 1
1 -
2
-
3
-
4
-
5
-
6
-
7
-
8
-
9
-
10
-
11
-
12
-
13
-
14
-
15
-
16
-
17
-
18
-
19
-
20
-
 21
21 -
 22
22 -
 23
23 -
 24
24 -
 25
25 -
 26
26 -
 27
27 -
 28
28 -
 29
29 -
 30
30 -
 31
31 -
32
-
33
-
34
-
35
-
36
-
37
-
38
-
39
-
40
-
41
-
42
-
43
-
44
 |
 |
