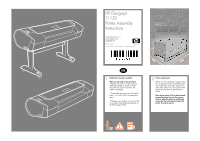
HP T1120ps HP Designjet T1120 Printer Assembly Instructions: English - Page 2
Unpack the printer
 |
UPC - 884420611936
View all HP T1120ps manuals
Add to My Manuals
Save this manual to your list of manuals |
Page 2 highlights
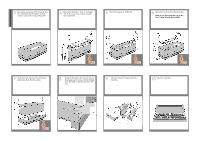
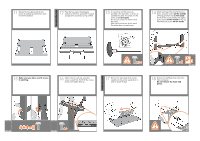
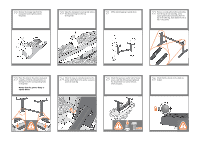
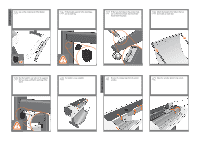
Unpack the printer 3 Remove the accessories from the printer box. You will find the documentation and software for your printer on top of the printer. 4 Remove the stand box, which is the largest one. To do so you may need two people, one at each end. 5 Remove the pieces of cardboard. 6 Remove the rear tray from the printer box. Note: If you don't find the tray in the box, it may already be installed. 7 Lift up the sides and top of the printer box, and remove them from the printer. 8 Dismantle the bottom of the printer box by disengaging each corner and then folding down the sides so that they are out of the way. 9 Cut and remove the straps around the stand box. 10 Open the stand box.
-
 1
1 -
 2
2 -
 3
3 -
 4
4 -
 5
5 -
 6
6 -
 7
7 -
 8
8 -
9
-
10
-
11
-
12
 |
 |

Remove the accessories from the printer box.
You will find the documentation and soft-
ware for your printer on top of the printer.
Remove the stand box, which is the largest
one. To do so you may need two people,
one at each end.
Remove the pieces of cardboard.
Remove the rear tray from the printer box.
Note: If you don’t find the tray in the
box, it may already be installed.
3
4
5
6
8
Unpack the printer
Lift up the sides and top of the printer box,
and remove them from the printer.
7
Dismantle the bottom of the printer box by
disengaging each corner and then folding
down the sides so that they are out of the
way.
10
Open the stand box.
Cut and remove the straps around the
stand box.
9