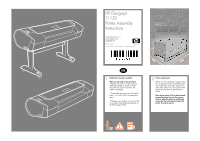
HP T1120ps HP Designjet T1120 Printer Assembly Instructions: English - Page 5
Turn the printer over - 44
 |
UPC - 884420611936
View all HP T1120ps manuals
Add to My Manuals
Save this manual to your list of manuals |
Page 5 highlights
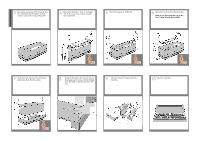
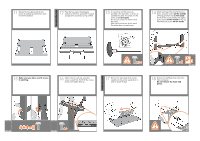
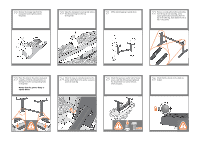
Turn the printer over 27 Turning the printer over is done in two stages. For the first stage, hold the printer by its feet and rotate the feet until they touch the floor. The printer weighs 60 kg (132 lb) (24" model) or 80 kg (167 lb) (44" model). 28 If the full weight of the printer rests on the wheel lock, it may break. 29 If necessary, rotate the wheel. 31 The lock on each wheel should be facing inwards (away from the floor). 24:60kg 44:80kg 31 Now hold the printer by the foam end pieces and by the center rear, and continue to rotate it until it stands on its feet, all four wheels in contact with the floor. 32 Remove the foam end pieces. 33 Remove the transparent covering from the printer. Note: If your printer is 24-in without stand, go to step 41. 34 Unlock the brake lever on each of the four wheels by lifting the lever.
-
 1
1 -
 2
2 -
 3
3 -
 4
4 -
 5
5 -
 6
6 -
 7
7 -
 8
8 -
 9
9 -
 10
10 -
 11
11 -
12
 |
 |
