HP T5540 Hardware Reference Guide: HP t5145/t5540/t5545/t5630 Thin Clients - Page 19
Replacing the Secure USB Compartment Cover
 |
UPC - 884420407706
View all HP T5540 manuals
Add to My Manuals
Save this manual to your list of manuals |
Page 19 highlights
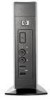
2. Push the compartment cover about .6 cm (1/4 inch) toward the front of the unit (2) and lift it off the unit (3). Figure 2-1 Removing the secure USB compartment cover Replacing the Secure USB Compartment Cover To replace the secure compartment cover: 1. Place the cover on top of the unit so it is offset about 0.6 cm (1/4 inch) toward the front of the unit, allowing the tabs on the cover to align with the slots on the chassis (1). 2. Slide the cover toward the back of the unit until the cover is flush with the back panel of the chassis (2). 3. Replace the screw (3). Figure 2-2 Replacing the secure compartment cover Removing and Replacing the Secure USB Compartment Cover 13
-
 1
1 -
2
-
3
-
4
-
5
-
6
-
7
-
8
-
9
-
10
-
11
-
12
-
13
-
 14
14 -
 15
15 -
 16
16 -
 17
17 -
 18
18 -
 19
19 -
 20
20 -
 21
21 -
 22
22 -
 23
23 -
 24
24 -
25
-
26
-
27
-
28
-
29
-
30
-
31
-
32
-
33
-
34
-
35
-
36
-
37
-
38
-
39
 |
 |
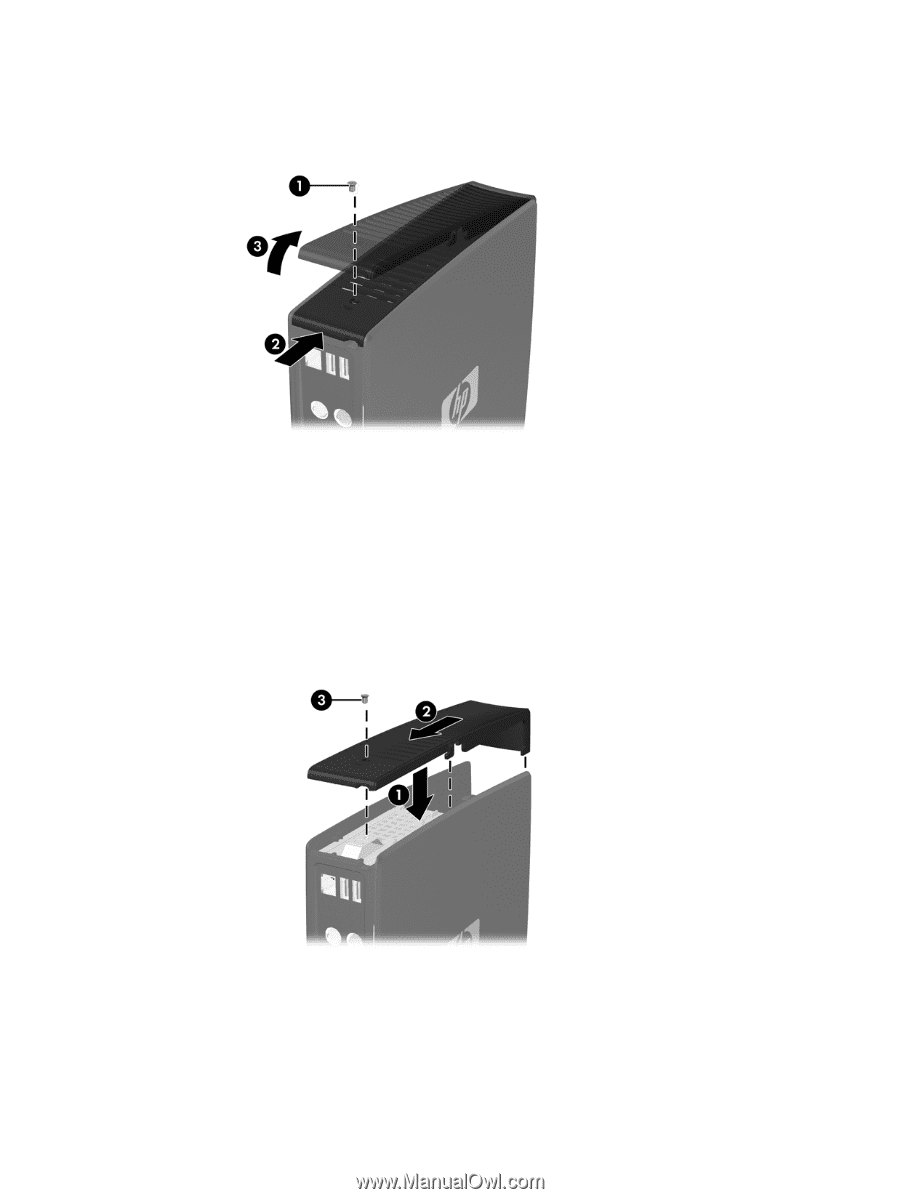
2.
Push the compartment cover about .6 cm (1/4 inch) toward the front of the unit (2) and lift it off the
unit (3).
Figure 2-1
Removing the secure USB compartment cover
Replacing the Secure USB Compartment Cover
To replace the secure compartment cover:
1.
Place the cover on top of the unit so it is offset about 0.6 cm (1/4 inch) toward the front of the unit,
allowing the tabs on the cover to align with the slots on the chassis (1).
2.
Slide the cover toward the back of the unit until the cover is flush with the back panel of the chassis
(2).
3.
Replace the screw (3).
Figure 2-2
Replacing the secure compartment cover
Removing and Replacing the Secure USB Compartment Cover
13