HP Tc2100 HP Windows Server 2003 for IA-32 General Installation Guide - Page 3
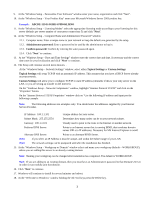
ABCDE-12345-FGHIJ-67890-KLMNO, Administrator password, Confirm password, Typical Settings, Custom
 |
View all HP Tc2100 manuals
Add to My Manuals
Save this manual to your list of manuals |
Page 3 highlights
9. At the "Windows Setup - Personalize Your Software" window enter your name, organization and click "Next". 10. At the "Windows Setup - Your Product Key" enter your Microsoft Windows Server 2003 product key. Example: ABCDE-12345-FGHIJ-67890-KLMNO 11. At the "Windows Setup - Licensing Modes" select the appropriate licensing mode according to your licensing for this server (default: per server number of concurrent connections 5) and click "Next". 12. At the "Windows Setup - Computer Name and Administrator Password" window. 12.1. Computer name: Enter a unique name to your network or keep the default one generated by the setup. 12.2. Administrator password: Enter a password to be used by the administrator to log in. 12.3. Confirm password: Confirm by entering the same password again. 12.4. Click "Next" to continue. 13. At the "Windows Setup - Date and Time Settings" window enter the correct date and time, if necessary and the correct time zone for your localization and click "Next" to continue. 14. The Setup will continue several more minutes. . At the "Windows Setup - Network Settings" window, select either Typical Settings or Custom Settings. Typical Settings will setup TCP/IP with an automatic IP address. This assumes that you have a DHCP Server already on your network. Custom Settings will allow you to configure TCP/IP to static IP address (desirable if this is your only server on the LAN, or you are setting up outside on the Internet). On the "Windows Setup - Network Components" window, highlight "Internet Protocol TCP/IP" and click on the "Properties" button. On the "Internet Protocol TCP/IP Proprieties" window click on "Use the following IP address and Input per the following example. Note: The following addresses are examples only. You should enter the addresses supplied by your Internet Service Provider. IP Address: 100.1.1.101 Unique address for your server. Subnet Mask: 255.255.255.0 Determines how many nodes can be on your network subnet. Gateway: 100.1.1.101 Usually used to point to the route to the Internet or another network. Preferred DNS Server: Points to an Internet server that is running BIND, that translates domain names URLs to IP addresses. Necessary for MS Internet Explorer to work! Alternate DNS Server: Points to an alternate BIND Server. Note: If you select an IP Address it must be unique, and within the Subnet range of your LAN. Note: The network settings can be postponed until after the installation has finished. 15. At the "Windows Setup - Workgroup or Domain" window select and name your workgroup (default - WORKGROUP), unless you are adding this server to an already existing domain. Note: Naming your workgroup can be changed after installation has completed. The default is WORKGROUP. Note: If you are adding to an existing domain, then you must have an Administrator's password to that Domain's Server in order to successfully join that domain. 16. Click "Next" to continue. 17. Windows will continue to install for several minutes and reboot. 18. At the "Welcome to Windows" window holding the Alt+Ctrl keys press the Delete key. 3
-
 1
1 -
 2
2 -
 3
3 -
 4
4 -
 5
5 -
 6
6 -
 7
7 -
 8
8 -
 9
9
 |
 |
