HP TouchSmart IQ840 Upgrading and Servicing Guide - Page 9
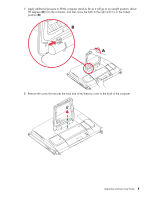
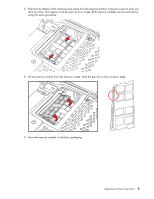
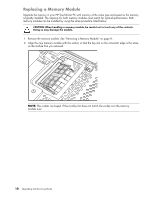
Remove the screw that secures the hard disk drive/memory cover to the back of the computer.
 |
View all HP TouchSmart IQ840 manuals
Add to My Manuals
Save this manual to your list of manuals |
Page 9 highlights
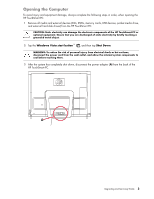
7 Apply additional pressure to lift the computer stand as far as it will go to an upright position, about 90 degrees (A) from the computer, and then move the latch to the right until it is in the locked position (B). B A 8 Remove the screw that secures the hard disk drive/memory cover to the back of the computer. Upgrading and Servicing Guide 5
-
 1
1 -
2
-
3
-
 4
4 -
 5
5 -
 6
6 -
 7
7 -
 8
8 -
 9
9 -
 10
10 -
 11
11 -
 12
12 -
 13
13 -
 14
14 -
15
-
16
-
17
-
18
-
19
-
20
-
21
-
22
-
23
-
24
-
25
-
26
-
27
-
28
 |
 |

Upgrading and Servicing Guide
5
7
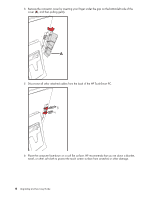
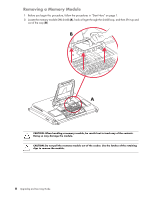
Apply additional pressure to lift the computer stand as far as it will go to an upright position, about
90 degrees (
A
) from the computer, and then move the latch to the right until it is in the locked
position (
B
).
8
Remove the screw that secures the hard disk drive/memory cover to the back of the computer.
B
A