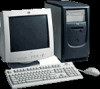
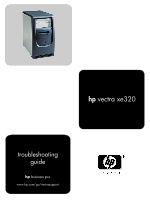
HP Vectra XE320 hp vectra xe320, troubleshooting guide
HP Vectra XE320 Manual
 |
View all HP Vectra XE320 manuals
Add to My Manuals
Save this manual to your list of manuals |
HP Vectra XE320 manual content summary:
- HP Vectra XE320 | hp vectra xe320, troubleshooting guide - Page 1
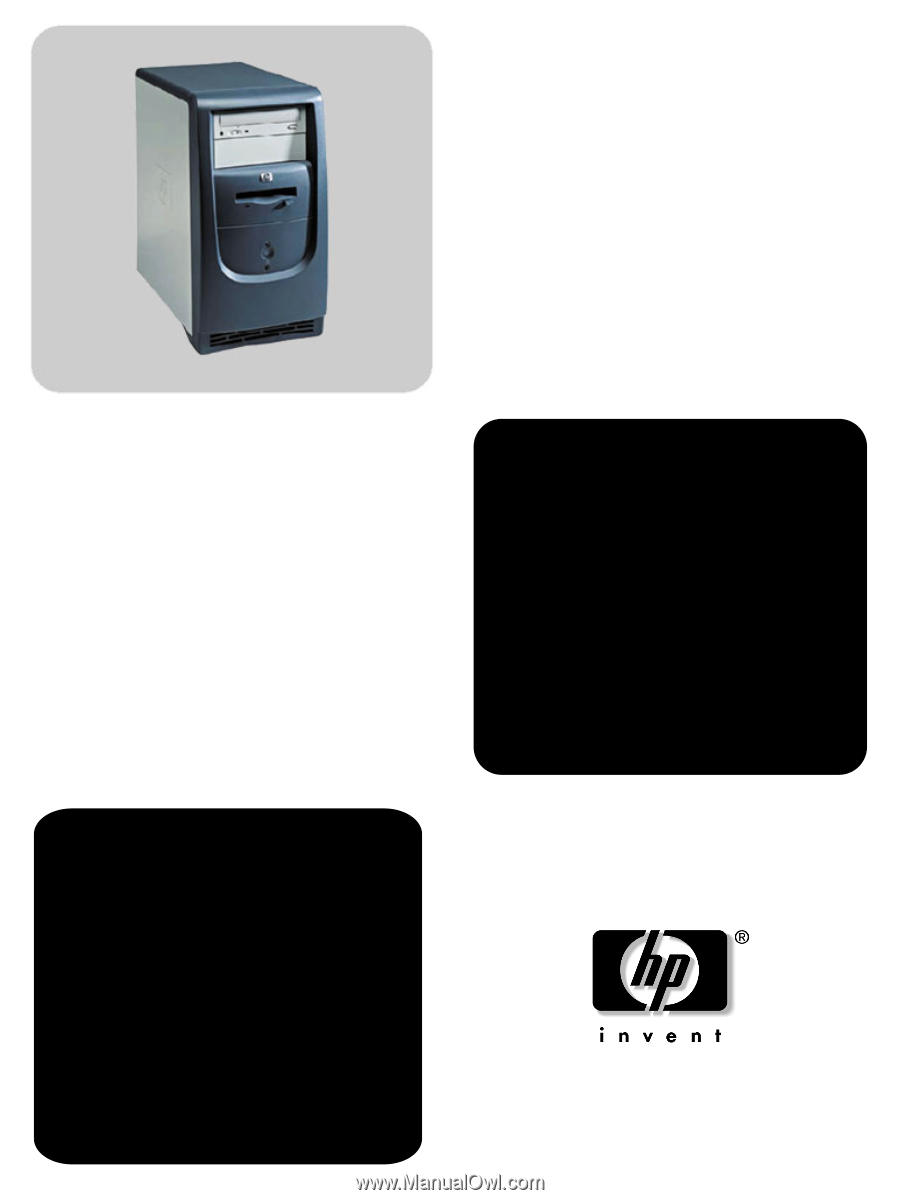
hp vectra xe320 troubleshooting guide hp business pcs www.hp.com/go/vectrasupport - HP Vectra XE320 | hp vectra xe320, troubleshooting guide - Page 2
information that is protected by copyright. All rights are reserved. No part of this document may be photocopied, reproduced, or translated to Incorporated. Microsoft, MS-DOS, Windows and Windows NT are U.S registered trademarks of Microsoft Corporation. HP France Business Desktop Division 38053 - HP Vectra XE320 | hp vectra xe320, troubleshooting guide - Page 3
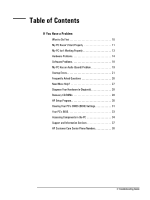
My PC Has an Audio (Sound) Problem 19 Startup Errors 21 Frequently Asked Questions 26 Need More Help 27 Diagnose Your Hardware (e-Diagtools 28 Recovery CD-ROMs 28 HP Setup Program 30 Clearing Your PC's CMOS (BIOS) Settings 31 Your PC's BIOS 33 Accessing Components in the PC 34 Support and - HP Vectra XE320 | hp vectra xe320, troubleshooting guide - Page 4
Power Supply Unit. There are no serviceable parts inside. For your safety only replace with a Power Supply Unit provided by HP Support Services. Ensure that the electrical power Some parts inside the computer may be hot, please wait for them to cool down before touching them. Troubleshooting Guide 4 - HP Vectra XE320 | hp vectra xe320, troubleshooting guide - Page 5
The drivers, software and BIOS used in your computer. Installing, Configuring, Upgrading See the HP Upgrade Guide or the HP Service Handbook Chapter. The HP Upgrade Guide will help you upgrade and replace components in your HP Business PC, including the hard drive, memory, battery, power supply, and - HP Vectra XE320 | hp vectra xe320, troubleshooting guide - Page 6
HP Vectra Support Web Site Go to the HP Vectra support web site (www.hp.com/go/vectrasupport) for a wide range of information, including: • Downloadable documentation • Service and support options • The latest BIOS, drivers and utilities • Answers to Frequently Asked Questions. Troubleshooting Guide - HP Vectra XE320 | hp vectra xe320, troubleshooting guide - Page 7
, CD-ROM, etc. • Memory expansion and replacing devices • LAN configuration • LAN controller • Identifying the problem • Information on errors • Problem solving • Troubleshooting • Parts list • Accessories list • BIOS • Connectors • IRQ • POST setup • Specifications • System board layout • Technical - HP Vectra XE320 | hp vectra xe320, troubleshooting guide - Page 8
Troubleshooting Guide 8 - HP Vectra XE320 | hp vectra xe320, troubleshooting guide - Page 9
Status If You Have a Problem - HP Vectra XE320 | hp vectra xe320, troubleshooting guide - Page 10
Center numbers, refer to page 38. • For a wide range of information and support, refer to the HP Web at: www.hp.com/go/vectrasupport. • For information on your warranty, refer to the Quick User's Guide provided with your PC or the HP Web at: www.hp.com/go/vectrasupport. 10 Troubleshooting Guide - HP Vectra XE320 | hp vectra xe320, troubleshooting guide - Page 11
Have you checked that... How The part of your configuration with which the Power-On Self Test has detected an error For more specific troubleshooting information, refer to "Software Problems" on page 18 If you still have a problem Run HP e-Diagtools (refer to page 28) 11 Troubleshooting Guide - HP Vectra XE320 | hp vectra xe320, troubleshooting guide - Page 12
the expansion card (see the HP Vectra XE320 Upgrade Guide, details on page 5). 4 Reconnect the PC's power cord and start up the PC. That you have not made any changes to the PC's Setup program that may be causing the problem 1 Press F8 just after the computer powers-on, then select Enter Setup - HP Vectra XE320 | hp vectra xe320, troubleshooting guide - Page 13
computer powers-on, then select Enter setup. Check the information on RAM, then press Esc and select Exit discarding changes. 1 Disconnect the PC's power cord. 2 Remove the PC's cover (see page 34). 3 Make sure the heatsink fan connector is properly connected. Refer to the HP Vectra XE320 Upgrade - HP Vectra XE320 | hp vectra xe320, troubleshooting guide - Page 14
the Primary Master field. Check that the drive's power and data cables are correctly connected at both ends (hard drive and system board). Refer to the HP Vectra XE320 Upgrade Guide (details on page 5). Check that the jumpers on the hard drive are in CS (cable select) mode. 14 Troubleshooting Guide - HP Vectra XE320 | hp vectra xe320, troubleshooting guide - Page 15
internal cables for bent pins and poor connection • External devices: Check any connections to external devices for bent pins or poor connection • Press the device's power button if there is one, and check that the power cable is correctly connected 15 Troubleshooting Guide - HP Vectra XE320 | hp vectra xe320, troubleshooting guide - Page 16
in the Local Bus IDE Adapter field. Check that the drive's power and data cables are correctly connected at both ends (drive and system board). Refer to the HP Vectra XE320 Upgrade Guide (details on page 5). Check that the jumpers on the drive are in CS (cable select) mode 16 Troubleshooting Guide - HP Vectra XE320 | hp vectra xe320, troubleshooting guide - Page 17
PC by clicking on the Start menu, then selecting Settings Printers (Windows 2000) or Printers and Faxes (Windows XP). The driver for your printer should be displayed in the window that appears. Check the cables and, if it still does not work, check the product documentation 17 Troubleshooting Guide - HP Vectra XE320 | hp vectra xe320, troubleshooting guide - Page 18
accessed by pressing F8 just after the computer powers-on, then select Enter Setup. • Change the date and time by selecting Control Panel Date and Time from the Start menu (Windows XP). If necessary, install a new battery. Refer to the HP Vectra XE320 Upgrade Guide (details on page 5). You Get the - HP Vectra XE320 | hp vectra xe320, troubleshooting guide - Page 19
Audio (Sound) Problem If You Have a Problem No Sound When Running Applications Have you checked that... The volume, mute, and balance settings are correct Advanced Troubleshooting The problem CD-ROM drive in Analog mode (on Windows 2000 or XP) select (Settings) Control Panel from the Start menu. - HP Vectra XE320 | hp vectra xe320, troubleshooting guide - Page 20
or IRQ setting Audio Input From Microphone Too Low Have you checked that... The microphone specifications meet the requirements of the 16-bit sound components. The microphone should be a 600-ohm electret type. How Check the documentation that came with your microphone 20 Troubleshooting Guide - HP Vectra XE320 | hp vectra xe320, troubleshooting guide - Page 21
provide immediate and effective assistance. For more information on BIOS beep codes and BIOS error codes, refer to the Technical Reference Manual for the HP Vectra XE320 PC, available in PDF (Adobe Acrobat) format on the HP support web site at: www.hp.com/go/vectrasupport. 21 Troubleshooting Guide - HP Vectra XE320 | hp vectra xe320, troubleshooting guide - Page 22
PC. Refer to the HP Vectra XE320 Upgrade Guide (details on page 5) 4 Close the PC, reconnect the power cord and check that the PC boots (starts). Run e-Diagtools. Refer to page 28. Advanced Troubleshooting You are using the latest BIOS for your PC Download the latest BIOS and instructions for its - HP Vectra XE320 | hp vectra xe320, troubleshooting guide - Page 23
to the HP Vectra XE320 Upgrade Guide (see page 5). 4 Close the PC then switch it on and check it works. 5 If the drive works, replace the defective drive. Refer to page 16 for more information on troubleshooting floppy drives. If the problem persists, contact your authorized support provider 23 - HP Vectra XE320 | hp vectra xe320, troubleshooting guide - Page 24
operating system manual). 2 Switch off and unplug the PC for an hour. 3 Restart the PC and check the time is correct. 4 If the time is incorrect, replace the PC's battery. Refer to the HP Vectra XE320 Upgrade Guide (details on page 5). Download the latest BIOS and instructions for its installation - HP Vectra XE320 | hp vectra xe320, troubleshooting guide - Page 25
after the computer powers-on, then select Enter Setup. You are using the latest BIOS for your PC Download the latest BIOS and instructions for its installation from HP's Web at: www.hp.com/go/vectrasupport If the problem persists, contact your authorized support provider 25 Troubleshooting Guide - HP Vectra XE320 | hp vectra xe320, troubleshooting guide - Page 26
. Use an antivirus utility to erase any viruses. Or, update your PC's BIOS. You can download the BIOS and updating instructions from www.hp.com/go/vectrasupport. Uninstall the software to see whether this solves the problem. If the problem continues, contact the software manufacturer for help or - HP Vectra XE320 | hp vectra xe320, troubleshooting guide - Page 27
at www.hp.com/go/instantsupport. For automated diagnostics and solutions, software solutions, and the troubleshooting knowledge base. • The HP Vectra support web site at: www.hp.com/go/vectrasupport. For downloads, documentation, support and troubleshooting information. 27 Troubleshooting Guide - HP Vectra XE320 | hp vectra xe320, troubleshooting guide - Page 28
CD-ROM and HP Image Library & Diagnostics CD-ROM to recover the PC's factory configuration by restoring the operating system (OS), drivers and HP supplied applications. This will return the PC's software configuration to a state similar to when the PC was originally shipped. 28 Troubleshooting Guide - HP Vectra XE320 | hp vectra xe320, troubleshooting guide - Page 29
on HP's Vectra support website at www.hp.com/go/vectrasupport. 1 Insert the HP Image Library & Diagnostics CD-ROM in the CD-ROM drive while your operating system is running. 2 Using Windows Explorer, select the driver(s) you need to reinstall. 3 Follow the installation instructions contained - HP Vectra XE320 | hp vectra xe320, troubleshooting guide - Page 30
the Exit menu of the Setup program. This should enable the computer to boot properly. Note If an Administrator password is set, you need to enter the password to set system defaults. HP strongly recommends you make a note of any changes you make while in the Setup program. 30 Troubleshooting Guide - HP Vectra XE320 | hp vectra xe320, troubleshooting guide - Page 31
F2 or F8 just after the computer powers-on. Refer to page 30. 2 From within the Setup program, press F9 to load Setup defaults. 3 Press F10 to exit Setup saving changes. Note If you load CMOS default settings from within the Setup program, this will not clear passwords. 31 Troubleshooting Guide - HP Vectra XE320 | hp vectra xe320, troubleshooting guide - Page 32
Have a Problem Manually Clearing CMOS and Passwords 1 Disconnect the power cord and saying that the configuration has been cleared. 6 Shut down the PC. Set the Clear CMOS & Passwords or Clear Passwords switch to OFF to re computer powers on, then select Enter Setup program. 32 Troubleshooting Guide - HP Vectra XE320 | hp vectra xe320, troubleshooting guide - Page 33
Diagtools You can also use e-Diagtools to automatically download and install the latest BIOS. To use this feature, your PC must be correctly set up, as described in the e-Diagtools User's Guide. This guide is available on HP's support website at www.hp.com/go/vectrasupport. 33 Troubleshooting Guide - HP Vectra XE320 | hp vectra xe320, troubleshooting guide - Page 34
If You Have a Problem Accessing Components in the PC This section provides basic information on accessing internal components in your PC. More detailed information is available in the HP Vectra XE320 Upgrade Guide, a PDF document that can be downloaded from the HP PC support website (www.hp.com/go/ - HP Vectra XE320 | hp vectra xe320, troubleshooting guide - Page 35
, DVD, Zip or Tape drive One Free Hard Disk Drive Shelf Floppy drive Hard drive Main memory modules - 3 slots Processor fan Main Power connector Status Panel System board switches CD-ROM, DVD, CD-RW, Tape or Zip drive Floppy drive Primary IDE connector for Hard drive(s) 35 Troubleshooting Guide - HP Vectra XE320 | hp vectra xe320, troubleshooting guide - Page 36
If You Have a Problem Serviceability This label demonstrating XE320 serviceability is stuck to the inside side panel of the PC. 36 Troubleshooting Guide - HP Vectra XE320 | hp vectra xe320, troubleshooting guide - Page 37
computer powers-on, then selecting the Summary option. Any BIOS parameter changes? Did the problem occur after changes were made to the BIOS the operating system version? Select Settings ➪ Control Panel from the Start menu (Windows 2000) or just Control Panel (Windows XP), then click on the System - HP Vectra XE320 | hp vectra xe320, troubleshooting guide - Page 38
Problem HP Customer Care Center Phone Numbers HP Customer Care Centers can help you solve hardware issues related to HP products and, if necessary, initiate appropriate service procedures. In the U.S.A, telephone support is 880 1111 (+90) 216 579 7171 (+44) 0870 842 2339 38 Troubleshooting Guide - HP Vectra XE320 | hp vectra xe320, troubleshooting guide - Page 39
- HP Vectra XE320 | hp vectra xe320, troubleshooting guide - Page 40
Produced: 02/2002
-
 1
1 -
 2
2 -
 3
3 -
 4
4 -
 5
5 -
 6
6 -
 7
7 -
8
-
9
-
10
-
11
-
12
-
13
-
14
-
15
-
16
-
17
-
18
-
19
-
20
-
21
-
22
-
23
-
24
-
25
-
26
-
27
-
28
-
29
-
30
-
31
-
32
-
33
-
34
-
35
-
36
-
37
-
38
-
39
-
40
 |
 |
troubleshooting
guide
hp
vectra xe320
hp
business pcs
www.hp.com/go/vectrasupport