HP Workstation xw6000 Optical Drive Installation for HP Workstations - Page 5
Refer to the documentation included with your workstation for specific instructions on securing an
 |
View all HP Workstation xw6000 manuals
Add to My Manuals
Save this manual to your list of manuals |
Page 5 highlights
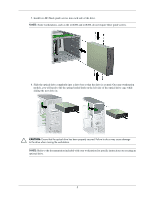
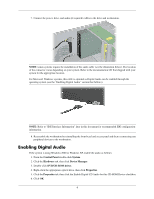
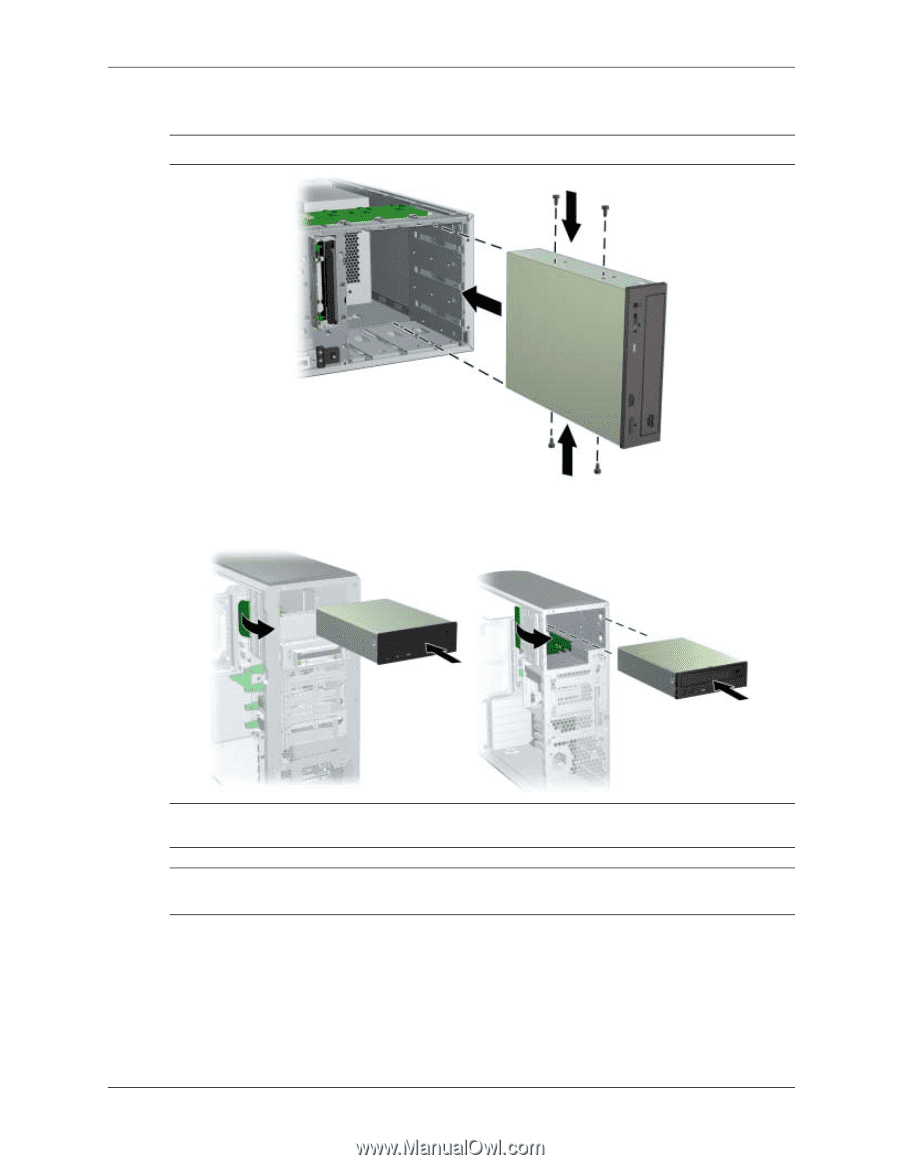
5. Install two M3 black guide screws into each side of the drive. NOTE: Some workstations, such as the xw6200 and xw8200, do not require these guide screws. 6. Slide the optical drive completely into a drive bay so that the drive is secured. On some workstation models, you will need to lift the spring-loaded latch on the left side of the optical drive cage while sliding the new drive in. Ä CAUTION: Ensure that the optical drive has been properly secured. Failure to do so may cause damage to the drive when moving the workstation. NOTE: Refer to the documentation included with your workstation for specific instructions on securing an optional drive. 5
-
 1
1 -
 2
2 -
 3
3 -
 4
4 -
 5
5 -
 6
6 -
 7
7 -
 8
8 -
 9
9 -
 10
10 -
 11
11 -
12
-
13
-
14
-
15
-
16
-
17
-
18
 |
 |
5
5.
Install two M3 black guide screws into each side of the drive.
NOTE:
Some workstations, such as the xw6200 and xw8200, do not require these guide screws.
6.
Slide the optical drive completely into a drive bay so that the drive is secured. On some workstation
models, you will need to lift the spring-loaded latch on the left side of the optical drive cage while
sliding the new drive in.
Ä
CAUTION:
Ensure that the optical drive has been properly secured. Failure to do so may cause damage
to the drive when moving the workstation.
NOTE:
Refer to the documentation included with your workstation for specific instructions on securing an
optional drive.