HP Xw25p Rapid Deployment Pack Windows Edition User Guide 3.70 - Page 9
Using the Rapid Deployment Pack, Connecting server blades - target
 |
View all HP Xw25p manuals
Add to My Manuals
Save this manual to your list of manuals |
Page 9 highlights
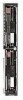
2 Using the Rapid Deployment Pack This section provides information about the following topics: • Connecting server blades • Creating a reference server and image • Deploying a captured image to other similar servers • Reconfiguring the new servers • Maintaining server blades with rip-and-replace • Performing a Boot from SAN installation Connecting server blades 1. Connect the enclosure to the network that contains your Deployment Server, and power up the enclosure. 2. Insert the server blades into the enclosure, but do not power on the server blades. 3. Change the default rack and enclosure names. 4. Power up the server blades. 5. Open the Deployment Server Console to view target servers available for deployment and management. The following panes appear in the console: • Computers-This pane is located on the upper-left side of the console and displays, by default, New Computers and All Computers. Virtual Machines and Physical Devices are also displayed (if enabled). • Jobs-This pane is located on the lower-left side of the console and lists the jobs provided with the Rapid Deployment Pack. • Details-This pane is located on the right side of the console and displays details for the selections highlighted within the Computers pane or the Jobs pane. Using the Rapid Deployment Pack 9
-
 1
1 -
2
-
3
-
 4
4 -
 5
5 -
 6
6 -
 7
7 -
 8
8 -
 9
9 -
 10
10 -
 11
11 -
 12
12 -
 13
13 -
 14
14 -
15
-
16
-
17
-
18
-
19
-
20
-
21
-
22
-
23
-
24
-
25
-
26
-
27
-
28
-
29
-
30
-
31
-
32
-
33
-
34
-
35
-
36
-
37
 |
 |
