HP Xw9300 HP User Manual for the Integrated NVIDIA SATA RAID Array for Microso - Page 6
Step 2—Configuring RAID, Your choices are Mirroring, Striping, Spanning, or Stripe Mirroring. - workstation review
 |
View all HP Xw9300 manuals
Add to My Manuals
Save this manual to your list of manuals |
Page 6 highlights
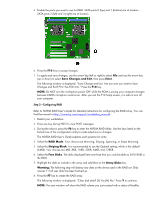
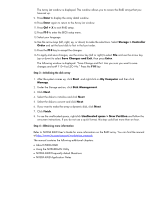
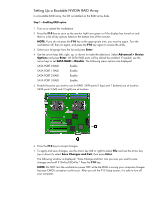
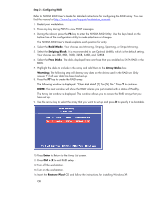
Step 2-Configuring RAID Refer to NVIDIA RAID User's Guide for detailed instructions for configuring the RAID array. You can find the manual at http://www.hp.com/support/workstation_manuals 1. Restart your workstation. 2. Press any key during POST to view POST messages. 3. During the reboot, press the F6 key to enter the NVIDIA RAID Utility. Use the keys listed on the bottom line of the configuration utility to make selections or changes. The NVIDIA RAID User's Guide explains each position for entry. 4. Select the Raid Mode. Your choices are Mirroring, Striping, Spanning, or Stripe Mirroring. 5. Select the Striping Block. It is recommended to use Optimal (64KB), which is the default setting. Your choices are 4KB, 8KB, 16KB, 32KB, 64KB, and 128KB. 6. Select the Free Disks. The disks displayed here are those that you enabled as SATA RAID in the BIOS. 7. Highlight the disks to include in the array and add them to the Array Disks box. Warning: The following step will destroy any data on the drives used in the RAID set. Only answer Y if all user data has been backed up. 8. Press the F7 key to create the RAID array. The following window is displayed: "Clear disk data? [Y] Yes [N] No." Press Y to continue. NOTE: The next window will show the RAID volume you just created with a status of Healthy. The Array List window is displayed. This window allows you to review the RAID arrays that you have set up. 9. Use the arrow key to select the array that you want to set up and press B to specify it as bootable. 10.Press Enter to Return to the Array List screen. 11.Press Ctrl + X to exit RAID setup. . 12.Turn off the workstation. 13.Turn on the workstation. 14.Insert the Restore Plus! CD and follow the instructions for installing Windows XP. OR
-
 1
1 -
 2
2 -
 3
3 -
 4
4 -
 5
5 -
 6
6 -
 7
7
 |
 |
