HP b2600 HP Workstation b2600 - Getting Started Guide and Warranty Statement ( - Page 37
Turning on the Power - not responding
 |
View all HP b2600 manuals
Add to My Manuals
Save this manual to your list of manuals |
Page 37 highlights
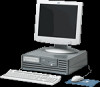
NOTE Getting Your System Running Powering Up Your System Turning on the Power 1. Turn on the monitor and any external peripherals (for example, printers) connected to the workstation. 2. Turn on the workstation. The workstation will run a series of self-tests. If you are using an old monitor and you are not sure if it works with your system, you need to press the Tab key several times until you see the message Monitor Type Selection. Select the appropriate monitor type from the list of monitors that are displayed, and press Enter. In response to the next prompt, press y and wait for 15 seconds for the system to continue its boot process. 3. After two or three minutes, a series of messages are displayed as various hardware and software subsystems are activated. Unless something is wrong with your system, you are not asked to respond to these messages. 4. A series of windows appears requesting the information you gathered in Table 2-1, such as your host name, IP address, and time zone. Enter the information as it is requested. You should enter the host name when requested; otherwise, you will get an error message when you log in. If you do not have other pieces of information, press Enter to use the default value. You can provide missing information later by logging into a terminal emulator window as superuser and executing this command: /sbin/set_parms 5. You are now asked if you want to set a root password. Specify the root password now. The root password is the password used for the superuser account. The superuser is a special user who has permission to perform all system administration tasks. The user name for the superuser is root. 6. When you have finished answering all of the questions, the workstation completes its start-up sequence and displays the CDE login screen. Chapter 2 37
-
 1
1 -
2
-
3
-
4
-
5
-
6
-
7
-
8
-
9
-
10
-
11
-
12
-
13
-
14
-
15
-
16
-
17
-
18
-
19
-
20
-
21
-
22
-
23
-
24
-
25
-
26
-
27
-
28
-
29
-
30
-
31
-
 32
32 -
 33
33 -
 34
34 -
 35
35 -
 36
36 -
 37
37 -
 38
38 -
 39
39 -
 40
40 -
 41
41 -
 42
42 -
43
-
44
-
45
-
46
-
47
-
48
-
49
-
50
-
51
-
52
-
53
-
54
-
55
-
56
-
57
-
58
-
59
-
60
-
61
-
62
-
63
-
64
-
65
 |
 |
