HP iPAQ Music Center MC-1 iPAQ Music Center Addendum A - Page 32
A/V Connections, Setting up your A/V Connections
 |
View all HP iPAQ Music Center MC-1 manuals
Add to My Manuals
Save this manual to your list of manuals |
Page 32 highlights
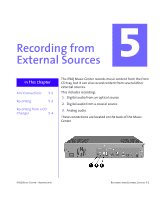
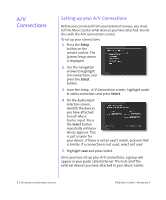
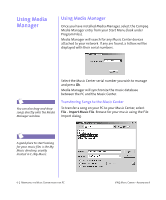
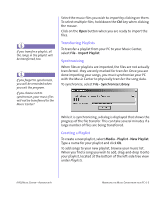
A/V Connections Setting up your A/V Connections Before you can record from your external sources, you must tell the Music Center what devices you have attached. You do this with the A/V connections screen. To set up your connections: 1. Press the Setup button on the remote control. The System Setup screen is displayed. 2. Use the navigation arrows to highlight A/V connections, and press the Select button. 3. From the Setup - A/V Connections screen, highlight audio & video connections and press Select. 4. On the Audio Input Selection screen, identify the devices you have attached to each Music Center input. Press the Select button repeatedly until your device appears. This is just a name for your device...if there is not an exact match, pick one that is similar. If a connection is not used, select not used. 5. Highlight save and press Select. Once you have set up your A/V connections, a group will appear in your guide called External. This lists all of the external devices you have attached to your Music Center. 5-2 RECORDING FROM EXTERNAL SOURCES IPAQ MUSIC CENTER-ADDENDUM A
-
 1
1 -
2
-
3
-
4
-
5
-
6
-
7
-
8
-
9
-
10
-
11
-
12
-
13
-
14
-
15
-
16
-
17
-
18
-
19
-
20
-
21
-
22
-
23
-
24
-
25
-
26
-
 27
27 -
 28
28 -
 29
29 -
 30
30 -
 31
31 -
 32
32 -
 33
33 -
 34
34 -
 35
35 -
 36
36 -
 37
37 -
38
 |
 |
