HP t310 Using PCoIP Host Cards with VMware View - Page 17
Installing the PCoIP Host Driver Software - rdp
 |
View all HP t310 manuals
Add to My Manuals
Save this manual to your list of manuals |
Page 17 highlights
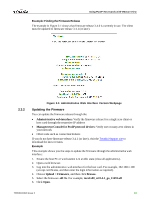
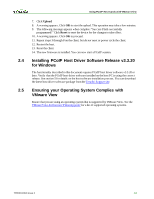
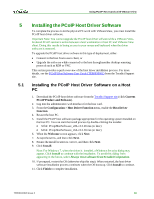
Using PCoIP Host Cards w ith VMw are View 5 Installing the PCoIP Host Driver Software To complete the process to let the physical PC work with VMwareView, you must install the PCoIP host driver software. Important Note: You cannot upgrade the PCoIP host driver sofware while a VMware Viewbrokered PCoIP session is active between a host workstation or host PC and VMware View client. Doing this results in losing access to your mouse and keyboard when the driver software is removed. To upgrade the PCoIP host driver sofware in this type of deployment, either: • Connect to the host from a zero client, or • Upgrade the software while connected to the host through another desktop-remoting protocol such as RDP or VNC This section provides a quick overview of the host driver installation process. For more details, see the PCoIP Host Sof tware User Guide (TER0810001) from the Teradici Support site. 5.1 Installing the PCoIP Host Driver Software on a Host PC 1. Download the PCoIP host driver software from the Teradici Support site (click Current PCoIP Product and Releases). 2. Log into the administrative web interface for the host card. 3. From the Configuration > Host Driver Function menu, enable the Host Driver Function. 4. Restart the host PC. 5. Install the PCoIP host software package appropriate for the operating system installed on the host PC. You can start the install process by double-clicking the installer. o 32 bit: PCoipHostSoftware_x86-v3.3.20.msi (or later) o 64 bit: PCoipHostSoftware_x64-v3.3.20.msi (or later) 6. When the Welcome screen appears, click Next. 7. Accept the terms, and then click Next. 8. Ensure the install location is correct, and then click Next. 9. Click Install. Note: For Windows 7, when the driver is installed, a Windows Security dialog may appear. Click Install to continue with the installation. To avoid this dialog from appearing in the future, select Always trust software from Teradici Corporation. 10. If prompted, restart the OS (otherwise skip this step). When restarted, the host driver software installation process continues when the OS boots up. Click Install to continue. 11. Click Finish to complete installation. TER0911004 Issue 2 18
-
 1
1 -
2
-
3
-
4
-
5
-
6
-
7
-
8
-
9
-
10
-
11
-
 12
12 -
 13
13 -
 14
14 -
 15
15 -
 16
16 -
 17
17 -
 18
18 -
 19
19 -
 20
20 -
 21
21 -
 22
22
 |
 |
