HoMedics EL-200 User Manual - Page 4
Enjoying Your Chair and General, Assembly Instructions
 |
View all HoMedics EL-200 manuals
Add to My Manuals
Save this manual to your list of manuals |
Page 4 highlights
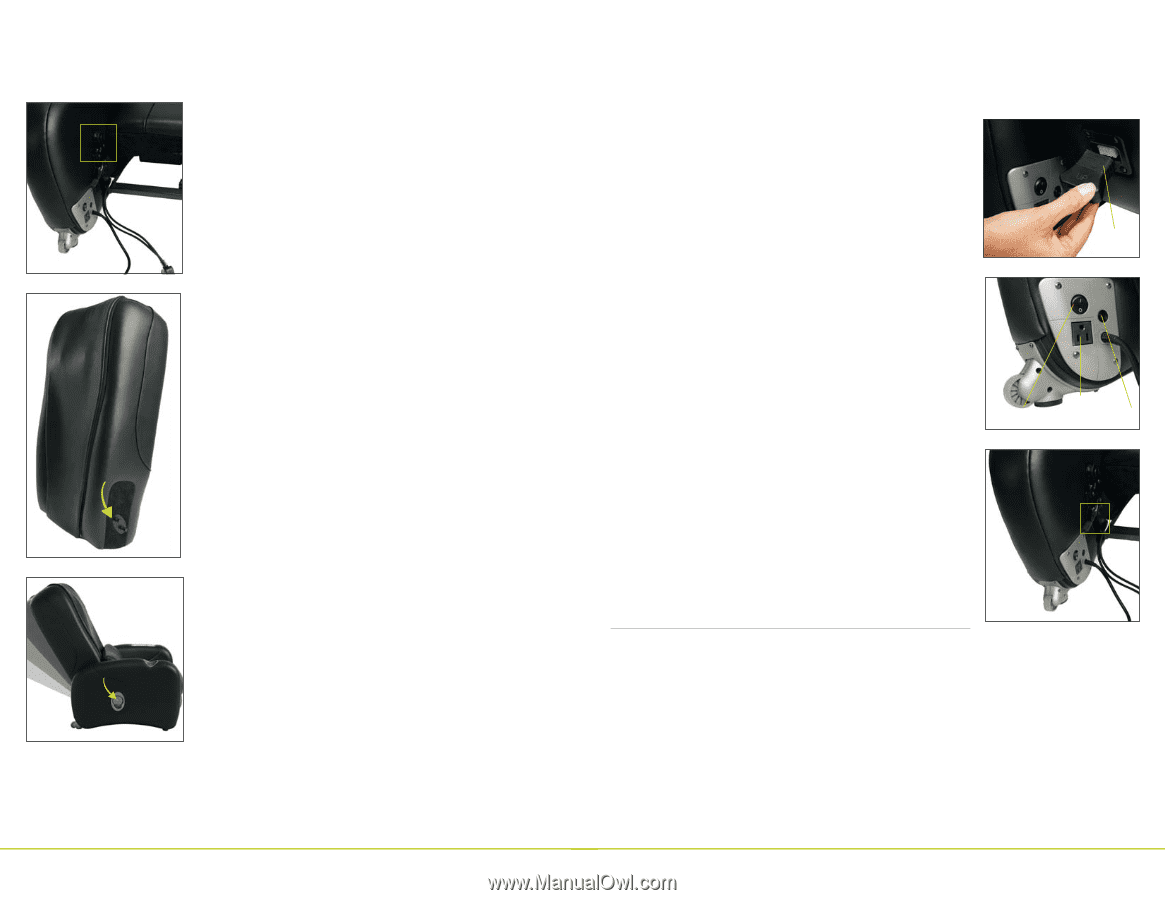
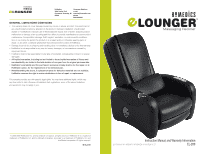
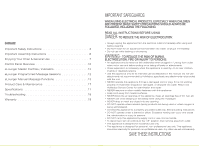
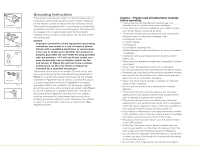
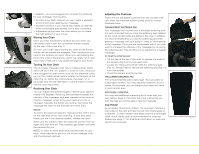
Assembly Instructions Setting up your massage chair is easy to do. Your massage chair is almost completely assembled. After carefully removing all the contents from the packaging, inspect the chair and its components to make sure everything has been received. Figure 1 Figure 2 Figure 3 Components: • Chair back • Chair seat • Seat cushion Step 1 • Lumbar/Headrest pillow *Removable softening pad currently in the backrest. Attaching the Seat Cushion • First, clip the ties holding the power cord to the back of the seat frame. • Next, attach the seat cushion to the seat by placing the cushion fully in the seat and lining up the fabric fasteners. There is one fastener strip in the seat and the second wraps around the back edge. Step 2 Attach the back of the chair to the seat. • First, locate the 2 cords that are attached to the left side of chair seat (power cord and output jack) and make sure they exit from the rear of the seat as shown in Figure 1 • Next you will need to place the chair back into the seat. Pick up the chair back with the zipper side facing the front of the chair and lower the back into the seat so that the knobs on either side of the back (Fig. 2) lock into the latches in the chair seat (Fig. 1). The latches are marked with bright green paint. • The back will click into place and will sit evenly in the seat. Once the back is sitting evenly in the chair seat, confirm that the back and seat are attached correctly by sitting in the chair and pulling the recline lever on the right side of the chair (Fig. 3). The chair should recline easily. NOTE: If the back does not appear even or the chair does not recline easily, then you may have engaged the latches on only one side. To correct this you will need to release the back as noted below and begin Step 2 again. Step 3 Connect the power source. • First, securely connect the output jack that is located on the left rear of the chair seat to the input jack (Fig. 1) in the lower left rear of the chair back (Fig. 4). Be sure that the output jack is inserted with the word "Up" facing upwards. When inserted correctly, the third or middle horizontal line on the connector will meet the edge of the input jack (Fig. 4). • Plug the power cord into a grounded 120-volt outlet. This product is equipped with a grounded plug and should only be used with the appropriate outlet. Once all pieces of the massage chair are in place and the main power line is plugged in, you may turn the power switch on (Fig. 5). • The eLounger contains a pass-through electrical outlet with a maximum wattage of 300W as a convenience feature (Fig. 5). NOTE: This outlet is an added convenience for use with items such as the coordinating massaging ottoman, a laptop, lamp or similar device. It will not power the chair. Removing the Back from the Seat To remove the chair back from the seat: • First, turn off the main power switch and unplug the unit. Then remove the output jack from the chair back. • Locate the levers along both sides of the rear of the chair seat (Fig. 6). • Push both at once and lean the chair back forward to release it from the seat. Tip: Use your body or shoulder to lean against the back as you depress the levers. • To reconnect the back to the seat, repeat Step 2. Enjoying Your Chair and General Use Choosing a Location It is important to choose a location that will allow you to best enjoy the chair's benefits. The following is required for the massage chair: • The chair back should be approximately 1 foot from the nearest object to recline fully. • An electrical outlet that is a maximum of 8 feet from the chair. Power Switch Insert to this line Figure 4 Outlet Fuse Figure 5 Figure 6 6 7
-
 1
1 -
 2
2 -
 3
3 -
 4
4 -
 5
5 -
 6
6 -
 7
7 -
 8
8 -
 9
9 -
 10
10 -
11
-
12
-
13
-
14
-
15
-
16
-
17
-
18
-
19
-
20
 |
 |