Honeywell CT8775A Owner's Manual - Page 11
Fahrenheit/Celsius Indication
 |
UPC - 085267244138
View all Honeywell CT8775A manuals
Add to My Manuals
Save this manual to your list of manuals |
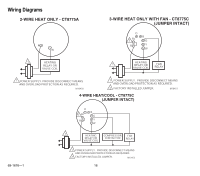
Page 11 highlights
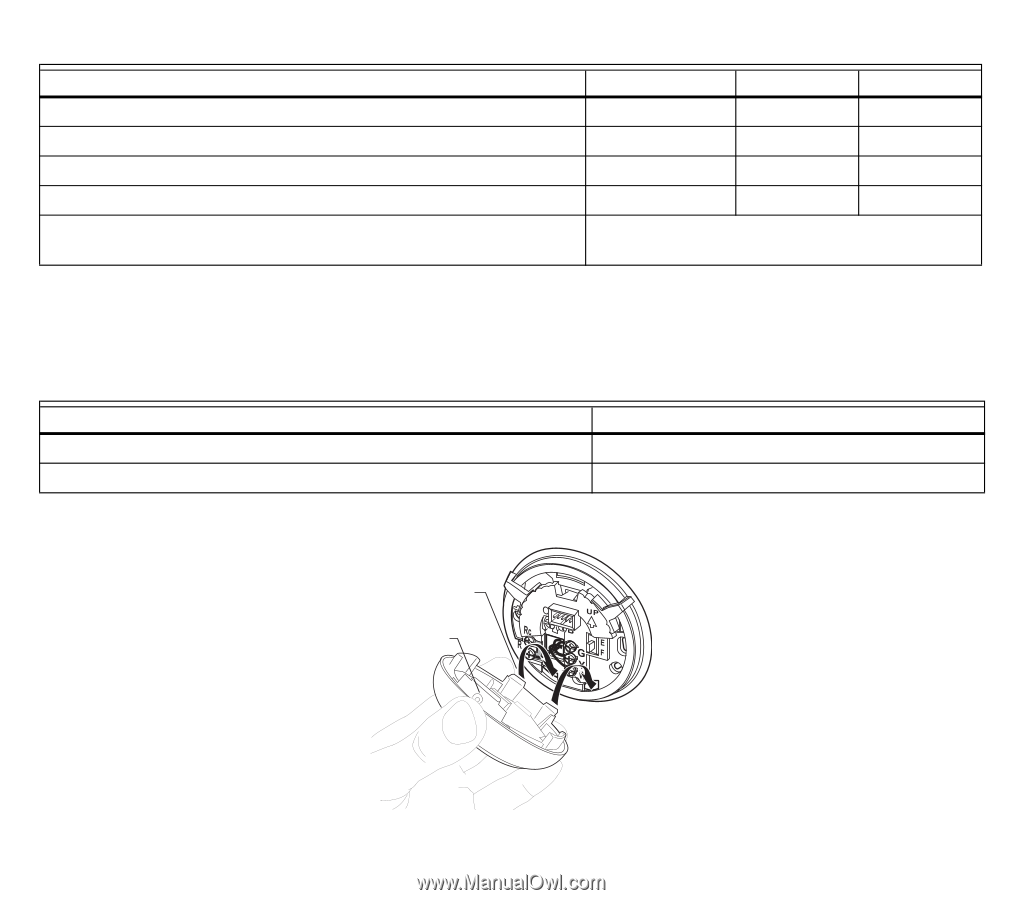
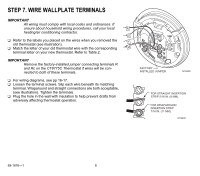
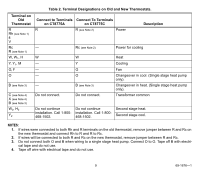
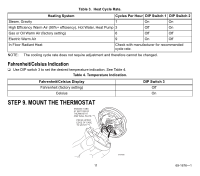
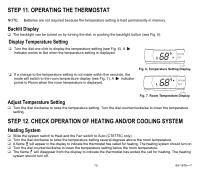
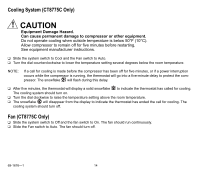
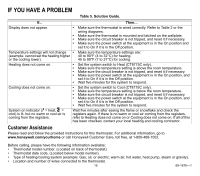
Table 3. Heat Cycle Rate. Heating System Cycles Per Hour DIP Switch 1 DIP Switch 2 Steam, Gravity 1 High Efficiency Warm Air (90%+ efficiency), Hot Water, Heat Pump 3 On On Off On Gas or Oil Warm Air (factory setting) Electric Warm Air In Floor Radiant Heat 6 Off Off 9 On Off Check with manufacturer for recommended cycle rate. NOTE: The cooling cycle rate does not require adjustment and therefore cannot be changed. Fahrenheit/Celsius Indication ❑ Use DIP switch 3 to set the desired temperature indication. See Table 4. Table 4. Temperature Indication. Fahrenheit/Celsius Display Fahrenheit (factory setting) Celsius DIP Switch 3 Off On STEP 9. MOUNT THE THERMOSTAT ENGAGE TABS AT BOTTOM OF THERMOSTAT AND WALL PLATE. PRESS UPPER EDGE OF CASE TO LATCH M19498 11 69-1676-1
-
 1
1 -
2
-
3
-
4
-
5
-
 6
6 -
 7
7 -
 8
8 -
 9
9 -
 10
10 -
 11
11 -
 12
12 -
 13
13 -
 14
14 -
 15
15 -
 16
16 -
17
-
18
-
19
-
20
 |
 |