Hoover S3755 Manual - Page 7
Exhaust filter, Belt replacement - parts diagram
 |
UPC - 073502025260
View all Hoover S3755 manuals
Add to My Manuals
Save this manual to your list of manuals |
Page 7 highlights
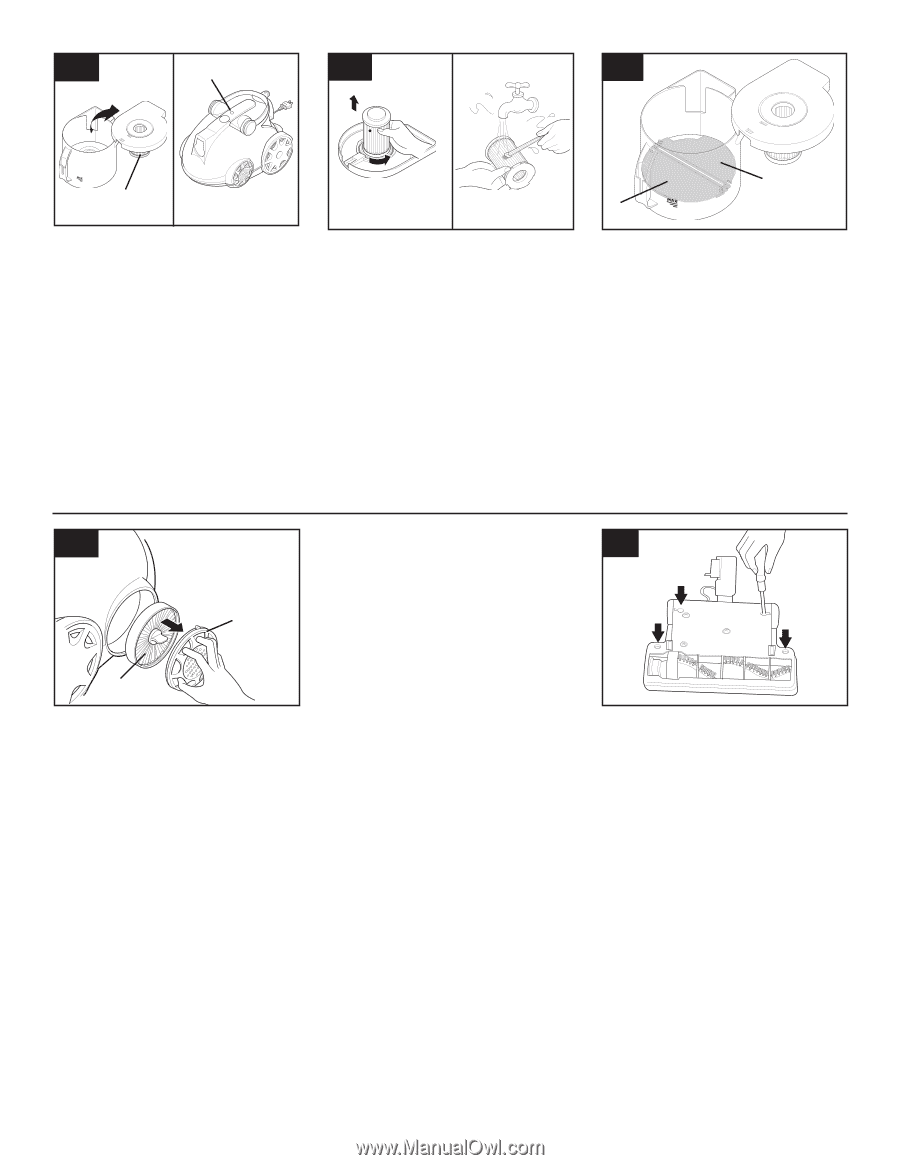
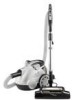
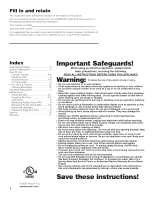
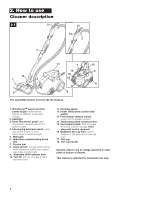
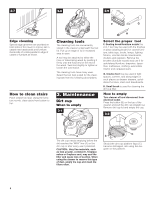
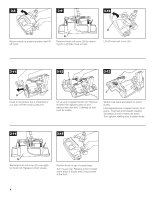
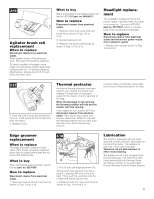
3-3 E 3-4 3-5 C D C Cleaning the filter The dirt cup filter (D) is located under the dirt cup lid. When the filter needs to be cleaned, the red light (E) will come on. Grasp the filter and rotate counter-clockwise. Clean the filter using the small brush located under the tool lid. If desired, the filter may be rinsed by running it under cold tap water. Do not use soap or detergent. Shake excess water from filter and allow to dry thoroughly before replacing it in cleaner. Replace the filter by lining up tabs on filter with grooves on lid and rotating clockwise. If the red light is still on after the filter has been cleaned, there may be a blockage in the hose or wands. Refer to "If you have a problem" section. Washing the dirt cup Turn cleaner off and disconnect from electrical outlet. Remove the dirt cup by pressing the button on the top of the cleaner and pulling the cup straight out. Remove lid. The cup may be rinsed by running it under cold tap water and dried with a soft cloth. Do not replace dirt cup on cleaner unless it has been dried thoroughly. Should the dirt cup platform flaps (C) become dislodged, refit using the diagram on the platform. 3-6 F G Exhaust filter How to clean Turn cleaner off and disconnect from electrical outlet. The exhaust filter, located behind the grill on the body of the cleaner, is washable. To clean, rotate grill (F) counterclockwise. Remove the exhaust filter (G). Wash filter by running it under cold tap water. Do not use soap or detergent. Do not use the small brush to clean this filter, as brushing will damage the effectiveness of the filter. Allow to dry thoroughly before replacing on cleaner. The exhaust filter should be cleaned at least once a year. The filter may become discolored with use, but the filtration efficiency will not be affected. Belt replacement The belt in your power nozzle drives the agitator. It has been designed specifically for use in this cleaner and is important for effective operation. What to buy There are other belts manufactured that are similar in shape and size, but are not designed for the HOOVER power nozzle. Such belts do not operate the agitator correctly and may create stress which could damage your power nozzle. Use only a genuine HOOVER Belt part no. 40201180 when a belt replacement is necessary. When to replace The belt should be checked from time to time to be sure it is in good condition. To check, remove the nozzle cover (see following section). Replace the belt if it is stretched, cut, or broken. 3-7 How to replace Disconnect cleaner from electrical outlet and disconnect power nozzle from extension wands. To remove hood, turn nozzle over and unscrew the 4 recessed Phillips head screws. Note: Do not remove the 3 screws in the triangle formation as these hold the motor in place. Continued ª 7
-
 1
1 -
 2
2 -
 3
3 -
 4
4 -
 5
5 -
 6
6 -
 7
7 -
 8
8 -
 9
9 -
 10
10 -
 11
11 -
 12
12 -
13
-
14
-
15
-
16
-
17
-
18
-
19
-
20
-
21
-
22
-
23
-
24
 |
 |