Hoover U6485100 Manual - Page 15
Caution, Warning
 |
View all Hoover U6485100 manuals
Add to My Manuals
Save this manual to your list of manuals |
Page 15 highlights
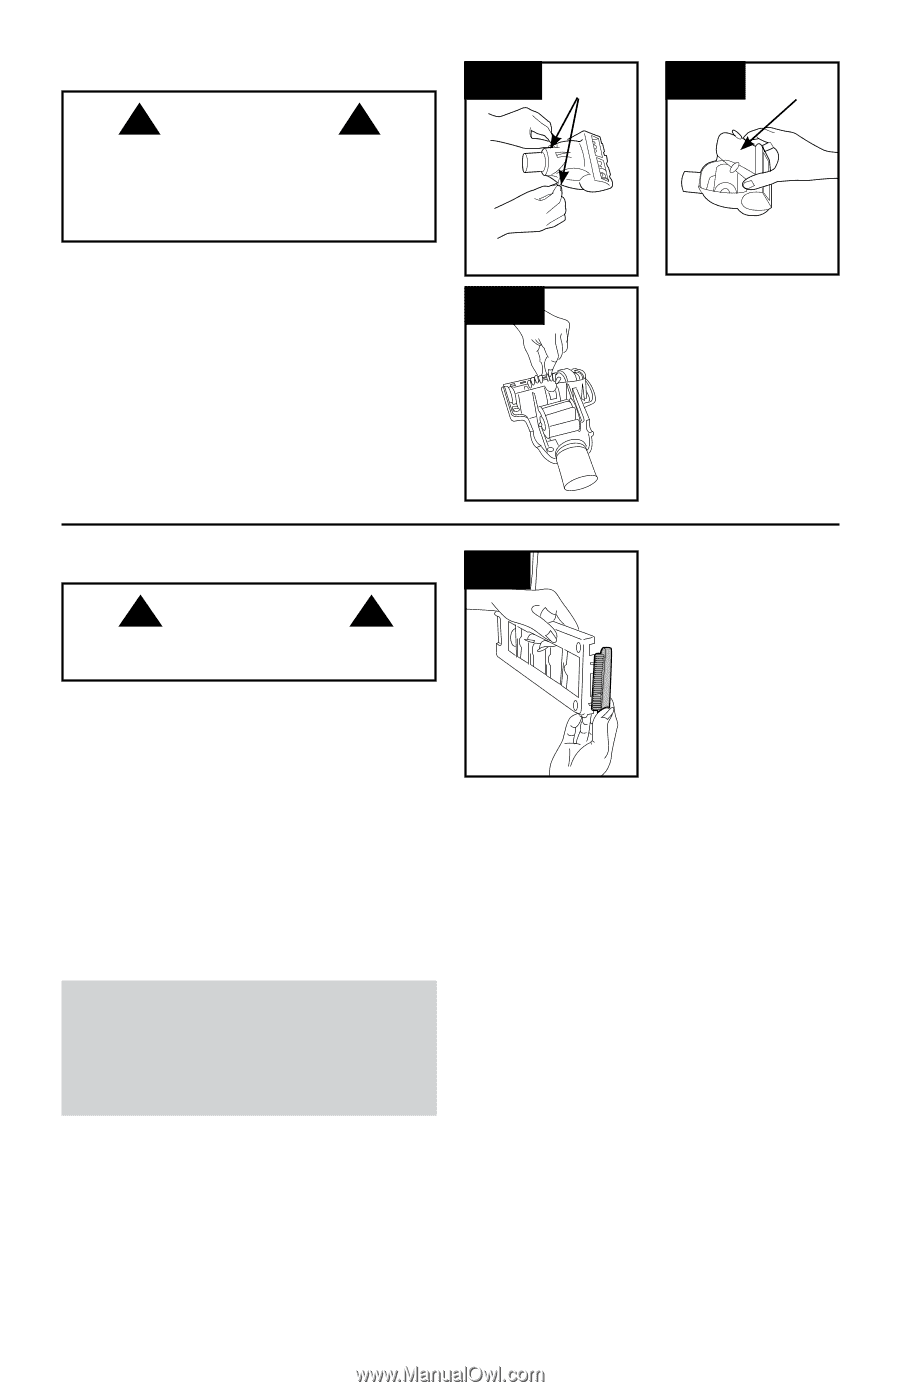
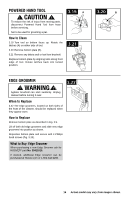
Powered Hand Tool ! CAUTION ! To reduce the risk of injury from moving parts, disconnect Powered Hand Tool from hose before servicing. Not to be used for grooming a pet. 3.19 A How to Clean 3.19 Turn tool so bottom faces up. Rotate the latches (A) on either side of tool. 3.20 Remove bottom plate (B). 3.21 Remove any debris and/ or hair from brushroll. Replace bottom plate by aligning tabs along front edge of tool. Rotate latches back into locked position. 3.21 3.20 B Edge groomer ! WARNING ! Agitator brushroll can start suddenly. Unplug cleaner before turning it over. 3.22 When to Replace 3.22 The edge groomers, located on both sides of the front of the cleaner, should be replaced when they appear worn. How to Replace Remove bottom plate as described in Fig. 3.9. Lift off both old edge groomers and slide new edge groomers into position as shown. Reposition bottom plate and secure with 4 Phillips head screws (Fig. 3.13). What to Buy: Edge Groomer When purchasing a new Edge Groomer ask for HOOVER® part No. 39411018. If desired, additional Edge Groomer can be purchased at Hoover.com or 1-800-944-9200. 15 Actual model may vary from images shown.
-
 1
1 -
2
-
3
-
4
-
5
-
6
-
7
-
8
-
9
-
 10
10 -
 11
11 -
 12
12 -
 13
13 -
 14
14 -
 15
15 -
 16
16 -
 17
17 -
 18
18 -
 19
19 -
 20
20 -
21
-
22
-
23
-
24
-
25
-
26
-
27
-
28
-
29
-
30
-
31
-
32
-
33
-
34
-
35
-
36
-
37
-
38
-
39
-
40
-
41
-
42
-
43
-
44
-
45
-
46
-
47
-
48
-
49
-
50
-
51
-
52
-
53
-
54
 |
 |