Hoover U6485100 Manual - Page 6
HOW TO USE - carpet cleaner
 |
View all Hoover U6485100 manuals
Add to My Manuals
Save this manual to your list of manuals |
Page 6 highlights
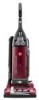
Position tools 1.8 Place smaller diameter end of wand, into bottom of rack. Snap wand into clip at the top. Repeat with other wand. 1.8 1.9 Snap dusting brush (H), crevice tool (I) and furniture nozzle (J) into storage area on back of cleaner. 1.10 1.10 Insert turbo tool into holder bristles first, push on the neck of the turbo tool to snap in place. Turbo tool should fit securely inside turbo tool holder. 1.9 J Cord Storage 1.11 Wrap cord on cord hooks for convenient I storage. Attach the plug to end of cord. H 1.11 2. HOW TO USE Cleaner Description 2.1 1. Handle 1 2. Self-Propel Button 2 3. ON-OFF Switch 4. Hose 3 5. Powered Hand Tool Holder 5 6. Powered Hand Tool 6 7. Final Filter Door 4 8. Handle Release Lever 9. Edge Groomers 19 10. Furniture Guard 17 11. Brushroll Control 7 20 12. Carpet Height Control 16 13. Headlight* 14. 'Dirt FINDER' Display* 14 15. Embedded 'Dirt FINDER' Sensitivity Switch* 13 16. Check Bag Indicator 12 23 15 18 21 8 22 17. Bag Door 11 9 18. Cord Hooks 19. Carrying Handle 10 20. Extension Wand 21. Dusting Brush* 22. Upholstery Tool* 23. Crevice Tool* *Accessories not included with your model may be purchased separately by visiting www.hoover.com, or your local HOOVER® service center. ON-OFF Switch 2.2 Plug cord into electrical outlet. To turn cleaner ON, push switch up. To turn cleaner OFF, push switch down. 2.2 Actual model may vary from images shown. 6
-
 1
1 -
 2
2 -
 3
3 -
 4
4 -
 5
5 -
 6
6 -
 7
7 -
 8
8 -
 9
9 -
 10
10 -
 11
11 -
 12
12 -
13
-
14
-
15
-
16
-
17
-
18
-
19
-
20
-
21
-
22
-
23
-
24
-
25
-
26
-
27
-
28
-
29
-
30
-
31
-
32
-
33
-
34
-
35
-
36
-
37
-
38
-
39
-
40
-
41
-
42
-
43
-
44
-
45
-
46
-
47
-
48
-
49
-
50
-
51
-
52
-
53
-
54
 |
 |
