Hunter 23298 Owner's Manual - Page 12
To install the remote cradle on a switch plate, To install the remote cradle on the wall - parts
 |
View all Hunter 23298 manuals
Add to My Manuals
Save this manual to your list of manuals |
Page 12 highlights
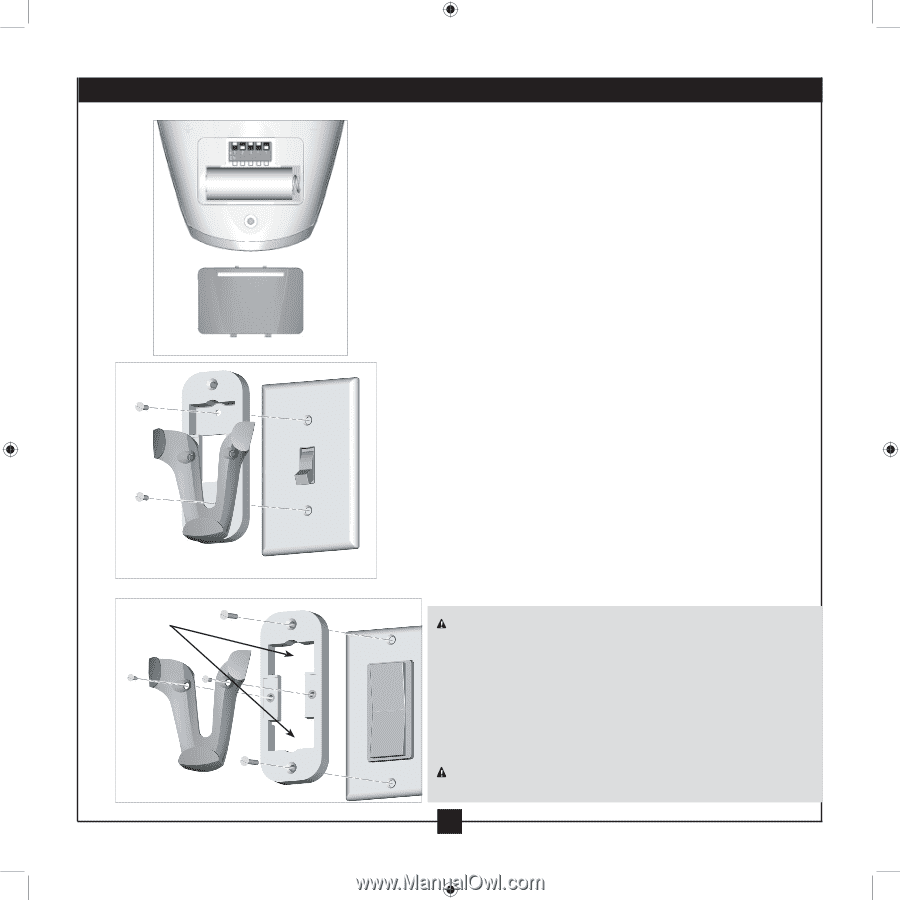
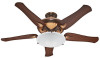
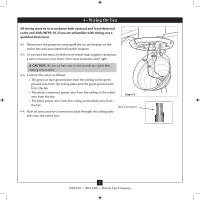
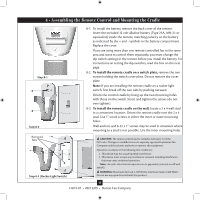
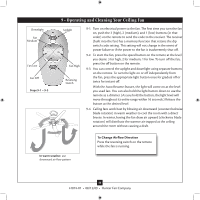
8 • Assembling the Remote Control and Mounting the Cradle Step 8-1 Step 8-2 8-1. To install the battery, remove the back cover of the remote. Insert the included 12 volt alkaline battery (Type 23A, MN-21 or equivalent) inside the remote, matching polarity on the battery as indicated by the + and - symbols in the battery compartment. Replace the cover. If you are using more than one remote controlled fan in the same area and want to control them separately, you must change the dip switch settings in the remote before you install the battery. For instructions on setting the dip switches, read the box on the next page. 8-2. To install the remote cradle on a switch plate, remove the two screws holding the switch cover plate. Do not remove the cover plate. Note: If you are installing the remote cradle on a rocker light switch, first break off the two tabs by pushing outward. Orient the control cradle by lining up the two mounting holes with those on the switch. Insert and tighten the screws (do not over tighten). 8-3. To install the remote cradle on the wall, locate a 2 x 4 wall stud in a convenient location. Orient the remote cradle over the 2 x 4 stud. Use 1" wood screws in either the inner or outer mounting holes. Wall anchors and 6-32 x 1" screws may be used in situations where mounting to a stud is not possible. Use the inner mounting holes. Removed Tabs Step 8-2 (Rocker Light Switch) CAUTION: The remote control device complies with part 15 of the FCC rules. Changes or modifications not expressly approved by Hunter Fan Company could void your authority to operate this equipment. Operation is subject to the following two conditions: 1. This device may not cause harmful interference. 2. This device must accept any interference received, including interference that may cause undesired operation. Note: Use with a fan that incorporates an air gap switch (normal on-off wall switch). WARNING: Maximum fan load is 100 Watts; maximum lamp is 300 Watts. Do not use any speed control with this product. 12 41874-01 • 08/13/09 • Hunter Fan Company
-
 1
1 -
2
-
3
-
4
-
5
-
6
-
 7
7 -
 8
8 -
 9
9 -
 10
10 -
 11
11 -
 12
12 -
 13
13 -
 14
14 -
 15
15 -
 16
16
 |
 |