Hunter 44110 Owner's Manual - Page 21
Attaching The Thermostat
 |
View all Hunter 44110 manuals
Add to My Manuals
Save this manual to your list of manuals |
Page 21 highlights
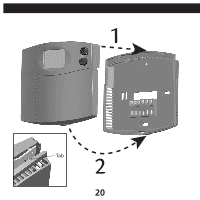
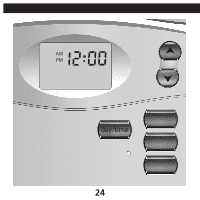
INSTALLING THE THERMOSTAT, CONT. ATTACHING THE THERMOSTAT 1. Lift the thermostat cover and set the SYSTEM to OFF and the FAN switch to AUTO. 2. Locate the HE/HG on the back of the thermostat. Set the switch to HG (default) for gas furnace and oil burners. Set the switch to HE for electric furnaces. (The switch has no effect when the system is set to cooling mode.) 3. Locate the A R switch on the back of the thermostat. If you wish to use the Energy Star compliant Auto Recovery feature, verify that the switch is in the ENABLE position. If you do not wish to use this feature, simply change the switch to the DISABLE position. See pages 44-45 for more information. 19
-
 1
1 -
2
-
3
-
4
-
5
-
6
-
7
-
8
-
9
-
10
-
11
-
12
-
13
-
14
-
15
-
 16
16 -
 17
17 -
 18
18 -
 19
19 -
 20
20 -
 21
21 -
 22
22 -
 23
23 -
 24
24 -
 25
25 -
 26
26 -
27
-
28
-
29
-
30
-
31
-
32
-
33
-
34
-
35
-
36
-
37
-
38
-
39
-
40
-
41
-
42
-
43
-
44
-
45
-
46
-
47
-
48
-
49
-
50
-
51
-
52
-
53
-
54
 |
 |

19
ATTACHING THE THERMOSTAT
1. Lift the thermostat cover and set the
SYSTEM
to
OFF
and the
FAN
switch to
AUTO
.
2. Locate the
HE/HG
on the back of the
thermostat. Set the switch to
HG
(default) for gas
furnace and oil burners. Set the switch to
HE
for
electric furnaces.
(The switch has no effect when the system is set to cooling
mode.)
3. Locate the
A R
switch on the back of
the thermostat. If you wish to use the Energy Star
compliant Auto Recovery feature, verify that the
switch is in the ENABLE position. If you do not
wish to use this feature, simply change the switch
to the DISABLE position. See pages 44-45 for more
information.
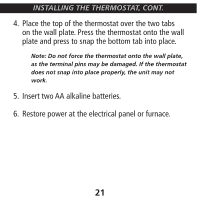
INSTALLING THE THERMOSTAT, CONT.