Husqvarna 520iHD60 Owner Manual - Page 11
To do before you start the product, To start the product, To operate the product
 |
View all Husqvarna 520iHD60 manuals
Add to My Manuals
Save this manual to your list of manuals |
Page 11 highlights
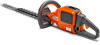
3. Make sure that the green charging light on the battery charger comes on. That means that the battery is connected correctly to the battery charger. To start the product 1. Push and hold the start/stop button until the green LED comes on. 4. When all LEDs on the battery come on, the battery is fully charged. 2. Push and hold the power trigger lockout on the front handle. 5. To disconnect the battery charger from the mains socket, pull the plug. Do not pull the cable. 6. Remove the battery from the battery charger. Note: Refer to the battery and battery charger manuals for more information. To do before you start the product 1. Examine the work area. Remove objects that can be thrown out. 2. Examine the cutting attachment. Make sure that the blades are sharp, and have no cracks and damages. 3. Make sure that the product works correctly. Examine that all nuts and screws are tight. 4. Make sure that the handle and safety devices are not damaged and are attached correctly. Do not operate a product with missing parts or is changed from its initial specification. Use protective gloves when it is necessary. 5. Make sure that the covers are not damaged and are attached correctly, before you operate the product. 3. To apply full speed, push the power trigger fully. To operate the product 1. Start near the ground and move the product up along the hedge when you cut the sides. 773 - 004 - 19.08.2020 2. Adjust the speed to align with the work load. 11
-
 1
1 -
2
-
3
-
4
-
5
-
 6
6 -
 7
7 -
 8
8 -
 9
9 -
 10
10 -
 11
11 -
 12
12 -
 13
13 -
 14
14 -
 15
15 -
 16
16 -
17
-
18
-
19
-
20
-
21
-
22
-
23
-
24
-
25
-
26
-
27
-
28
-
29
-
30
-
31
-
32
-
33
-
34
-
35
-
36
-
37
-
38
-
39
-
40
-
41
-
42
-
43
-
44
-
45
-
46
-
47
-
48
-
49
-
50
-
51
-
52
 |
 |
