Husqvarna AUTOMOWER 220 AC Owners Manual - Page 36
see It is therefore recommended to test
 |
View all Husqvarna AUTOMOWER 220 AC manuals
Add to My Manuals
Save this manual to your list of manuals |
Page 36 highlights
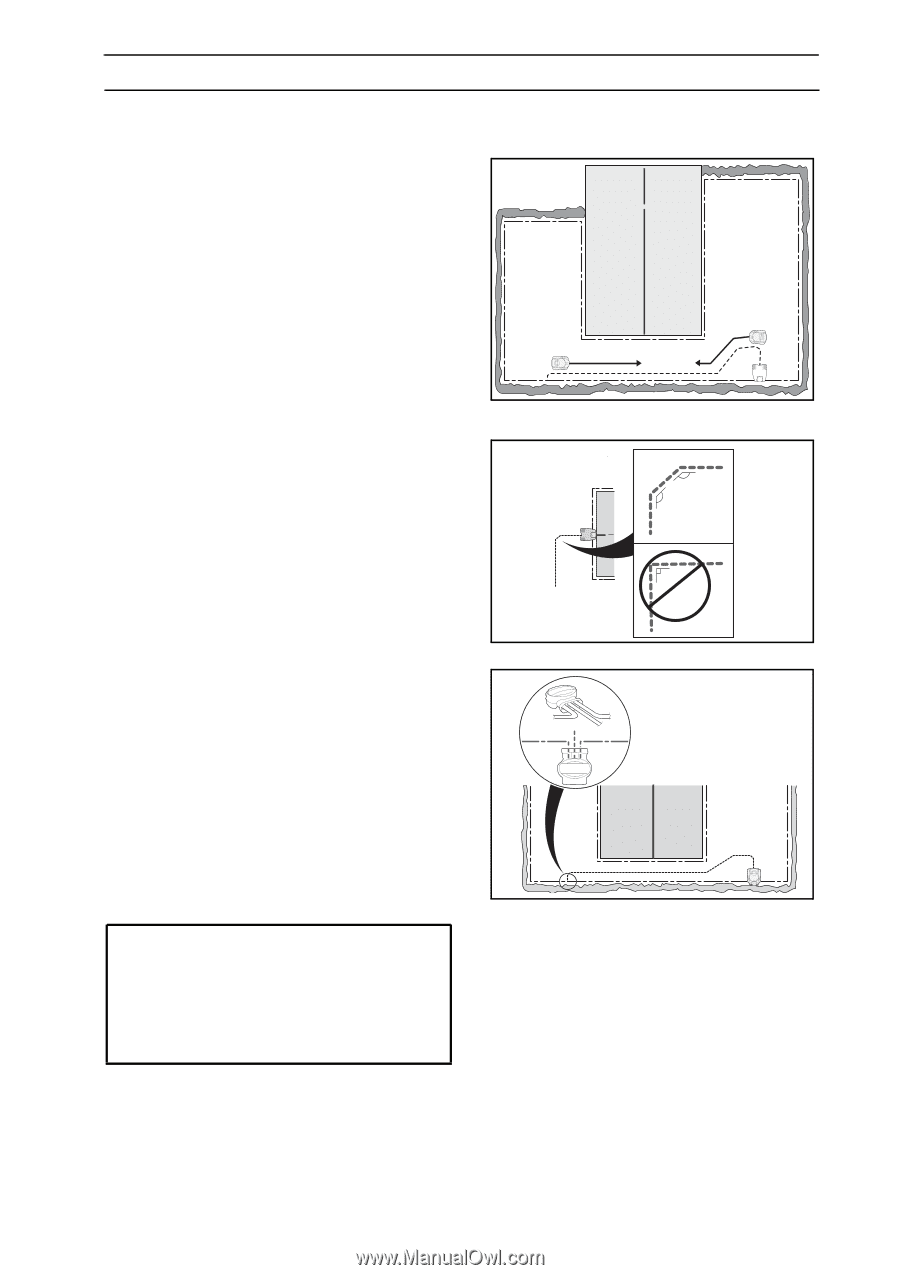
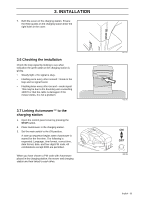
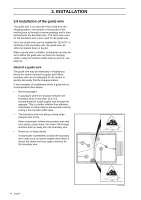
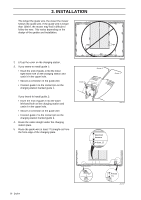
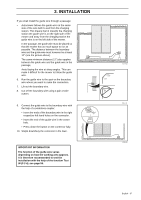
3. INSTALLATION If you shall install the guide wire through a passage: • Automower follows the guide wire on the same side of the wire both to and from the charging station. This means that in towards the charging station the guide wire is on the right side of the mower and away from the charging station the guide wire is on the left side of the mower. In the passage, the guide wire must be placed so that the mower has as much space to run as possible. The distance between the boundary wire and the guide wire must however be at least 12" (see the picture above). The same minimum distance (12") also applies between the guide wire and the guide wire in the passage, Avoid laying the wire at sharp angles. This can make it difficult for the mower to follow the guide wire. 6. Run the guide wire to the spot on the boundary wire where you want to make the connection. 7. Lift out the boundary wire. 8. Cut off the boundary wire using a pair of wire cutters. 9. Connect the guide wire to the boundary wire with the help of a solderless coupler: • Insert the ends of the boundary wire in the right respective left-hand holes on the connector. • Insert the end of the guide wire in the centre hole. • Press down the button on the connector fully. 10. Staple down/bury the connector in the lawn. IMPORTANT INFORMATION The function of the guide wire varies depending on how the working area appears. It is therefore recommended to test the installation with the help of the function Test IN (3-2-4), see page 56. 135º 135º 90º 3012-649 3012-742 3012-835 English - 37
-
 1
1 -
2
-
3
-
4
-
5
-
6
-
7
-
8
-
9
-
10
-
11
-
12
-
13
-
14
-
15
-
16
-
17
-
18
-
19
-
20
-
21
-
22
-
23
-
24
-
25
-
26
-
27
-
28
-
29
-
30
-
 31
31 -
 32
32 -
 33
33 -
 34
34 -
 35
35 -
 36
36 -
 37
37 -
 38
38 -
 39
39 -
 40
40 -
 41
41 -
42
-
43
-
44
-
45
-
46
-
47
-
48
-
49
-
50
-
51
-
52
-
53
-
54
-
55
-
56
-
57
-
58
-
59
-
60
-
61
-
62
-
63
-
64
-
65
-
66
-
67
-
68
-
69
-
70
-
71
-
72
-
73
-
74
-
75
-
76
-
77
-
78
-
79
-
80
-
81
-
82
 |
 |