IBM 8835 Installation Guide - Page 25
Removing the cover and bezel, critical system failure. - w 11
 |
UPC - 000435158314
View all IBM 8835 manuals
Add to My Manuals
Save this manual to your list of manuals |
Page 25 highlights
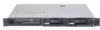
The server can be turned off in any of the following ways: v You can turn off the server from the operating system, if your operating system supports this feature. After an orderly shutdown of the operating system, the server will be turned off automatically. v You can press the power-control button to start an orderly shutdown of the operating system and turn off the server, if your operating system supports this feature. v If the operating system stops functioning, you can press and hold the power-control button for more than 4 seconds to turn off the server. v If the server is connected to an Advanced System Management interconnect network that contains at least one server with an optional Remote Supervisor Adapter II installed, the server can be turned off from the Remote Supervisor Adapter II user interface. v If an optional Remote Supervisor Adapter II is installed in the server, the server can be turned off from the Remote Supervisor Adapter II user interface. v If the Wake on LAN feature turned on the server, the Wake on LAN feature can turn off the server. v The service processor can turn off the server as an automatic response to a critical system failure. v You can turn off the server through a request from the service processor. Removing the cover and bezel Complete the following steps to remove the cover and bezel (with the server out of the rack): 1. Read the safety information beginning on page v, and "Installation guidelines" on page 9. 2. Turn off the server and all attached peripheral devices. Disconnect all power cords; then, disconnect all external signal cables from the server. 3. Remove the server from the rack. Lift the cover release latch; the cover slides to the rear approximately 13 mm (0.5 inch). Captive screws Bezel retention tabs USB option tray Bezel retention tabs Retention clip Chapter 2. Installing options 11
-
 1
1 -
2
-
3
-
4
-
5
-
6
-
7
-
8
-
9
-
10
-
11
-
12
-
13
-
14
-
15
-
16
-
17
-
18
-
19
-
 20
20 -
 21
21 -
 22
22 -
 23
23 -
 24
24 -
 25
25 -
 26
26 -
 27
27 -
 28
28 -
 29
29 -
 30
30 -
31
-
32
-
33
-
34
-
35
-
36
-
37
-
38
-
39
-
40
-
41
-
42
-
43
-
44
-
45
-
46
-
47
-
48
-
49
-
50
-
51
-
52
-
53
-
54
-
55
-
56
-
57
-
58
-
59
-
60
-
61
-
62
 |
 |
