IBM 8835 Installation Guide - Page 32
Installing a hard disk drive, SCSI ID 1.
 |
UPC - 000435158314
View all IBM 8835 manuals
Add to My Manuals
Save this manual to your list of manuals |
Page 32 highlights
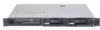
Installing a hard disk drive The following notes describe the types of hard disk drives that your server supports and other information that you must consider when installing a hard disk drive: v The server supports two 25.4-mm (1-inch), slim, 3.5-inch hard disk drives. SCSI server models come with a hot-swap SCSI backplane. v The SCSI server models support low voltage differential (LVD) hot-swap drives. Each hot-swap drive is in a tray, which has a green activity LED and an amber status LED in the upper-right corner. These LEDs are lit if the drive is active and, in some cases, if the drive fails. Each hot-swap drive has a single-connectorattached (SCA) connector, which is connected directly into the hot-swap SCSI backplane. The backplane is attached to connector J12 on the system board and controls the SCSI IDs for the hot-swap drives. Note: The drive in bay 1 is assigned SCSI ID 0; the drive in bay 2 is assigned SCSI ID 1. v A non-hot-swap hard disk drive does not require a backplane or tray and it does not have indicator LEDs. However, you must attach the blue rails that come with the drive before installing it in the server. v A non-hot-swap hard disk drive has a jumper block on the rear. Install a jumper in the cable-selection position of the jumper block. For details, see the notes under step 4 on page 20, and the documentation that comes with the drive. v If you install only one hard disk drive, for faster startup, install it in the primary startup device bay. For hot-swap SCSI drives, the drive in bay 1 is the primary startup device. For IDE drives, the drive in bay 2 is the primary startup device. v If you are installing a hot-swap drive, continue with "Installing a hot-swap hard disk drive" on page 19. If you are installing a non-hot-swap drive, go to "Installing a non-hot-swap hard disk drive" on page 20. 18 IBM 325 Type 8835: Option Installation Guide Eserver
-
 1
1 -
2
-
3
-
4
-
5
-
6
-
7
-
8
-
9
-
10
-
11
-
12
-
13
-
14
-
15
-
16
-
17
-
18
-
19
-
20
-
21
-
22
-
23
-
24
-
25
-
26
-
 27
27 -
 28
28 -
 29
29 -
 30
30 -
 31
31 -
 32
32 -
 33
33 -
 34
34 -
 35
35 -
 36
36 -
 37
37 -
38
-
39
-
40
-
41
-
42
-
43
-
44
-
45
-
46
-
47
-
48
-
49
-
50
-
51
-
52
-
53
-
54
-
55
-
56
-
57
-
58
-
59
-
60
-
61
-
62
 |
 |
