Insignia NS-P501Q-10A User Manual (English) - Page 23
Adjusting advanced picture settings - no power
 |
UPC - 600603123757
View all Insignia NS-P501Q-10A manuals
Add to My Manuals
Save this manual to your list of manuals |
Page 23 highlights
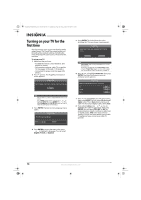
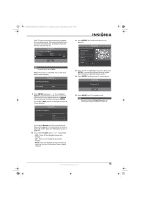
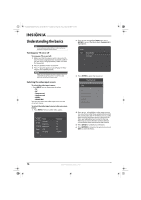
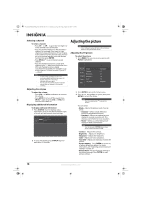
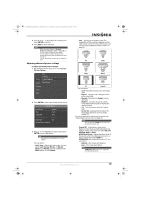
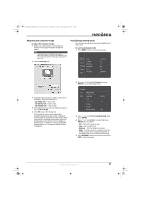
NS-P42Q-P501Q-P502Q-10A_09-0100_MAN_V1_English.book Page 19 Friday, March 20, 2009 3:11 PM 4 Press or , or to adjust the setting, then press ENTER to confirm. 5 Press EXIT to close the menu. Notes • • • When you make changes to Contrast, Brightness, Sharpness, Color, or Tint G/R), the on-screen menu is adjusted accordingly. You can adjust and store settings for each external device you have connected to an input of your TV. You can save power by reducing the brightness level. Adjusting advanced picture settings To adjust advanced picture settings: 1 On the Picture menu, press or to highlight Picture Options. Picture Color Tint (G/R) Picture Options Sound Picture Reset Channel Setup Input 2 Press ENTER to access the Picture Options menu. Picture Options Color Tone : Normal Size : 16:9 Digital NR : Auto HDMI Black Level : Normal Film Mode : Off Screen Burn Protection 3 Press or to highlight an option, then press ENTER to access the option. Note You may have to scroll down to see all the options. You can select: • Color Tone-Selects the color tone. You can select Cool, Normal, Warm1, or Warm2. Warm1 and Warm2 are only available if the Mode option is set to Movie. • Size-Sets the picture aspect ratio. The availability of these options depends on the video input source. For more information, see "Picture sizes available for input sources" on page 20. 16:9 Zoom1 Zoom2 Wide Fit 4:3 Screen Fit You can select: • 16:9-Sets the picture to the 16:9 aspect ratio. • Zoom1-Stretches the 16:9 aspect ratio picture vertically. • Zoom2-Stretches the Zoom1 picture vertically. • Wide Fit-Stretches the picture both horizontally and vertically to display the optimal picture. • 4:3-Sets the picture to the 4:3 aspect ratio. • Screen Fit-Displays the full native HD signal that cannot be viewed using a normal TV. For more information adjusting the picture, see "Adjusting the picture size" on page 20. Note You can also press ZOOM one or more times to select the picture size. • Digital NR-(Digital Noise Reduction) Reduces noise (static and ghosting) that may appear on the screen. You can select Off, Low, Medium, High, or Auto. • HDMI Black Level-Adjusts the black level of the picture when the video input source is a device connected to the HDMI1 or HDMI2(DVI) jack on the back of your TV. You can select: • Normal-The screen gets brighter. • Low-The screen gets darker. Note HDMI Black Level may not be compatible with all external devices. www.insigniaproducts.com 19
-
 1
1 -
2
-
3
-
4
-
5
-
6
-
7
-
8
-
9
-
10
-
11
-
12
-
13
-
14
-
15
-
16
-
17
-
 18
18 -
 19
19 -
 20
20 -
 21
21 -
 22
22 -
 23
23 -
 24
24 -
 25
25 -
 26
26 -
 27
27 -
 28
28 -
29
-
30
-
31
-
32
-
33
-
34
-
35
-
36
-
37
-
38
-
39
-
40
-
41
-
42
-
43
-
44
-
45
-
46
-
47
-
48
-
49
-
50
-
51
-
52
 |
 |