Intel A2400SATAKIT Installation Guide - Page 20
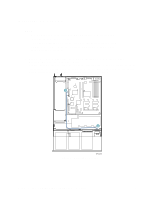
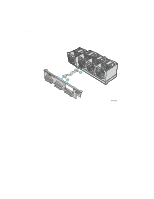
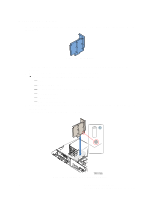
Installing 26-pin Floppy Drive Data Cable to Slimline Floppy Drive
 |
View all Intel A2400SATAKIT manuals
Add to My Manuals
Save this manual to your list of manuals |
Page 20 highlights
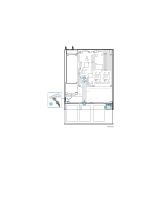
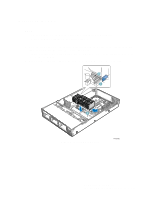
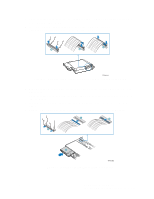
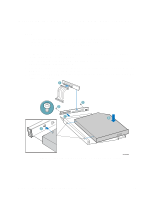
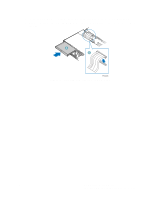
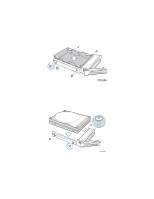
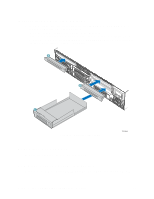
3. Open the connector on the rear of the floppy drive by pulling up on the connector cover. See letter "A" in the figure below. 4. Insert one end of the 26-pin floppy drive data cable end into the connector. 5. Push down on the connector cover to lock the cable into place. C A B TP01144 Figure 11. Installing 26-pin Floppy Drive Data Cable to Slimline Floppy Drive 6. Slide the floppy drive assembly into the chassis until it clicks into place. See letter "A" in the figure below. 7. Open the connector on the backplane by pulling out on the connector cover. See letter "B" in the figure below. 8. Insert the loose end of the floppy cable into the backplane connector. See letter "C" in the figure. 9. Push in on the connector cover to lock the cable into place. See letter "D" in the figure. Figure 12. Installing Slimline Floppy Drive into Chassis 14 Intel® Server Chassis SR2400 SCSI and SATA Backplane Installation Instructions
-
 1
1 -
2
-
3
-
4
-
5
-
6
-
7
-
8
-
9
-
10
-
11
-
12
-
13
-
14
-
 15
15 -
 16
16 -
 17
17 -
 18
18 -
 19
19 -
 20
20 -
 21
21 -
 22
22 -
 23
23 -
 24
24 -
 25
25
 |
 |
