Intel D845GVAD2 Product Guide - Page 24
Installing and Removing Memory, Installing DIMMs - specs
 |
UPC - 735858157902
View all Intel D845GVAD2 manuals
Add to My Manuals
Save this manual to your list of manuals |
Page 24 highlights
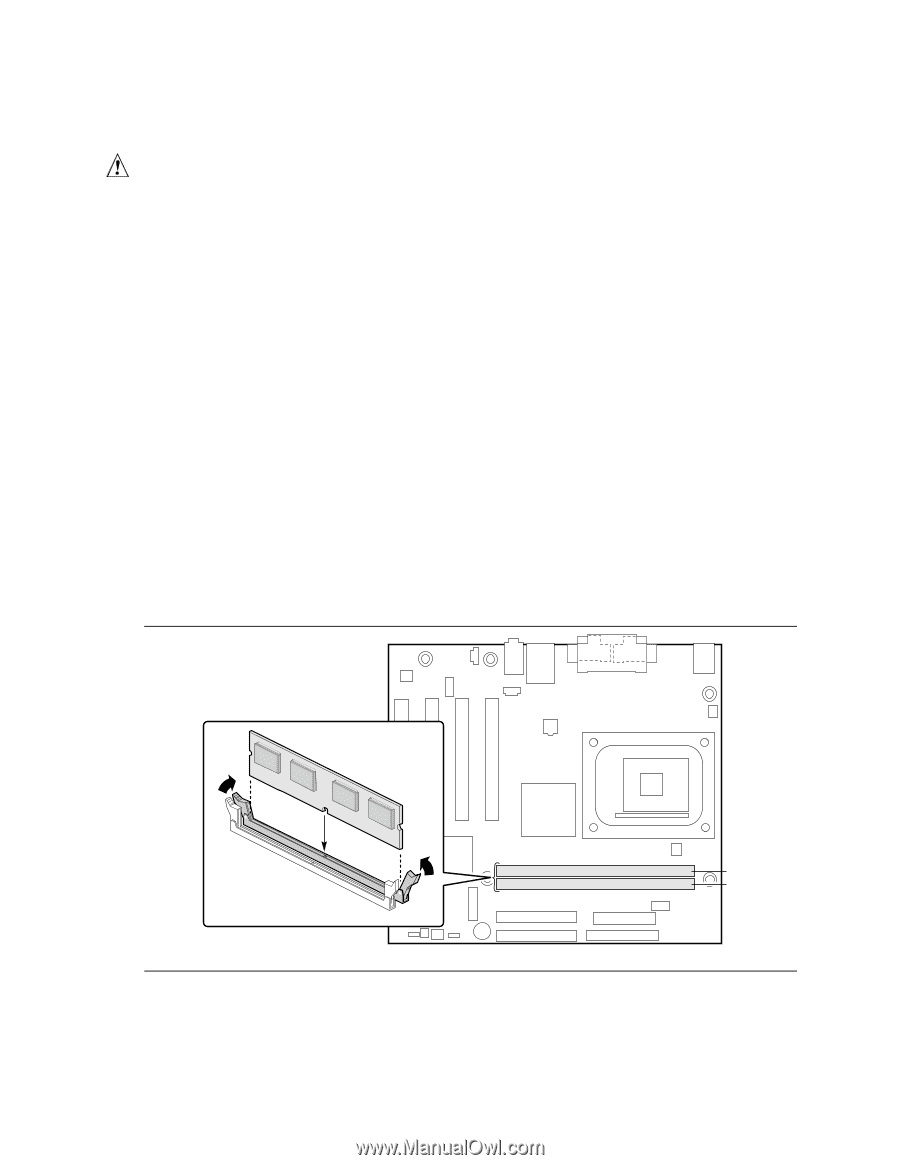
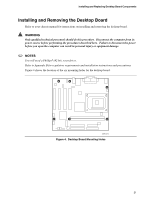
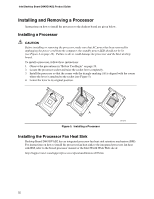
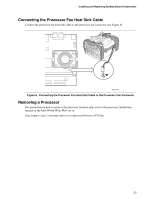
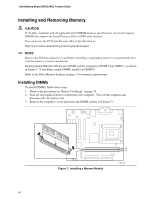
Intel Desktop Board D845GVAD2 Product Guide Installing and Removing Memory CAUTION To be fully compliant with all applicable Intel SDRAM memory specifications, the board requires DIMMs that support the Serial Presence Detect (SPD) data structure. You can access the PC Serial Presence Detect Specification at: http://www.intel.com/technology/memory/pcsdram/spec/ ✏ NOTE Remove the PCI bus connector 1 card before installing or upgrading memory to avoid interference with the memory retention mechanism. Desktop Board D845GVAD2 has two DIMM sockets arranged as DIMM 0 and DIMM 1, as shown in Figure 7. If installing a single DIMM, install it in DIMM 0. Refer to the Main Memory heading on page 11 for memory requirements. Installing DIMMs To install DIMMs, follow these steps: 1. Observe the precautions in "Before You Begin" on page 19. 2. Turn off all peripheral devices connected to the computer. Turn off the computer and disconnect the AC power cord. 3. Remove the computer's cover and locate the DIMM sockets (see Figure 7). Figure 7. Installing a Memory Module 0 1 OM13685 24
-
 1
1 -
2
-
3
-
4
-
5
-
6
-
7
-
8
-
9
-
10
-
11
-
12
-
13
-
14
-
15
-
16
-
17
-
18
-
 19
19 -
 20
20 -
 21
21 -
 22
22 -
 23
23 -
 24
24 -
 25
25 -
 26
26 -
 27
27 -
 28
28 -
 29
29 -
30
-
31
-
32
-
33
-
34
-
35
-
36
-
37
-
38
-
39
-
40
-
41
-
42
-
43
-
44
-
45
-
46
-
47
-
48
-
49
-
50
-
51
-
52
-
53
-
54
-
55
-
56
-
57
-
58
-
59
-
60
-
61
-
62
-
63
-
64
-
65
-
66
-
67
-
68
-
69
-
70
-
71
-
72
-
73
-
74
-
75
-
76
 |
 |