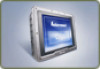
Intermec CV61 CV61 Vehicle Mount Computer (Windows 7) User Guide
Intermec CV61 Manual
 |
View all Intermec CV61 manuals
Add to My Manuals
Save this manual to your list of manuals |
Intermec CV61 manual content summary:
- Intermec CV61 | CV61 Vehicle Mount Computer (Windows 7) User Guide - Page 1
CV61 Vehicle Mount Computer (Windows 7) Model 1011CM01 User Guide - Intermec CV61 | CV61 Vehicle Mount Computer (Windows 7) User Guide - Page 2
Mobile Computing, SmartSystems, TE 2000, Trakker Antares, and Vista Powered are either trademarks or registered trademarks of Intermec Technologies Corporation. There are U.S. and foreign patents as well as U.S. and foreign patents pending. ii CV61 Vehicle Mount Computer (Windows 7) User Guide - Intermec CV61 | CV61 Vehicle Mount Computer (Windows 7) User Guide - Page 3
the Volume 9 About the Touch Screen 10 Adjust the Screen Brightness 10 Enable the Heated Touch Screen Defroster 11 Install an External Antenna 12 Force the Use of an External Antenna Connection 13 Attach an External Keyboard 14 CV61 Vehicle Mount Computer (Windows 7) User Guide iii - Intermec CV61 | CV61 Vehicle Mount Computer (Windows 7) User Guide - Page 4
the User Interface 16 About the Desktop Screen 16 Learn the Basic Skills 17 Use the Touch Screen 17 Calibrate the Screen 17 About the Taskbar 17 About Pop-Up Menus 18 Enter Information 18 Use Transcriber 19 About Intermec Applications 20 Applications Available on the CV61 20 Applications - Intermec CV61 | CV61 Vehicle Mount Computer (Windows 7) User Guide - Page 5
Troubleshoot Operating the Computer 67 Call Product Support 68 Find Your Configuration Number 68 Find Your System Component Versions 69 Find Your Operating System, BIOS and MCU Versions 69 Find Your Service Pack Version 70 Restart Your Computer 70 CV61 Vehicle Mount Computer (Windows 7) User - Intermec CV61 | CV61 Vehicle Mount Computer (Windows 7) User Guide - Page 6
Common Lockdown Service Settings 94 Device Monitor Settings 95 Port Pin Assignments 95 COM 1 and COM 2 Ports 95 USB Port 96 CANBUS Port 97 Power Connector 97 B ScanNGo Wi-Fi Configuration Bar Codes 99 Radio Configuration Bar Codes 100 vi CV61 Vehicle Mount Computer (Windows 7) User Guide - Intermec CV61 | CV61 Vehicle Mount Computer (Windows 7) User Guide - Page 7
Contents 2D Configuration Bar Codes 100 1D Configuration Bar Codes 101 CV61 Vehicle Mount Computer (Windows 7) User Guide vii - Intermec CV61 | CV61 Vehicle Mount Computer (Windows 7) User Guide - Page 8
Contents viii CV61 Vehicle Mount Computer (Windows 7) User Guide - Intermec CV61 | CV61 Vehicle Mount Computer (Windows 7) User Guide - Page 9
all faults." All warranties are expressly disclaimed, including the implied warranties of merchantability and fitness for a particular purpose. Web Support Visit the Intermec website at www.intermec.com to download our current manuals (in PDF). CV61 Vehicle Mount Computer (Windows 7) User Guide ix - Intermec CV61 | CV61 Vehicle Mount Computer (Windows 7) User Guide - Page 10
page, click Computers > Fixed Vehicle Computers > CV61. 4 Click the Manuals tab. If your product does not have its own product page, click Support > Manuals. Use the Product Category, the Product Family, and Product to find your documentation. x CV61 Vehicle Mount Computer (Windows 7) User Guide - Intermec CV61 | CV61 Vehicle Mount Computer (Windows 7) User Guide - Page 11
,201; 7,761,864; 7,888,913; 7,895,267; 7,924,346; 7,962,104; 8,002,173; 8,014,354; 8,064,924. There may be other U.S. and foreign patents pending. CV61 Vehicle Mount Computer (Windows 7) User Guide xi - Intermec CV61 | CV61 Vehicle Mount Computer (Windows 7) User Guide - Page 12
xii CV61 Vehicle Mount Computer (Windows 7) User Guide - Intermec CV61 | CV61 Vehicle Mount Computer (Windows 7) User Guide - Page 13
1 About the Vehicle Mount Computer This chapter introduces the CV61 Vehicle Mount Computer with Windows® 7 operating system. Use this chapter to learn about the basic features and available accessories. 1 - Intermec CV61 | CV61 Vehicle Mount Computer (Windows 7) User Guide - Page 14
these standard features: • 12.1" color sunlight-readable XGA display • two USB ports, two COM ports, a CANBUS port, keyboard connector, an Ethernet port, a speaker output jack, and a microphone/line stereo jack • 40 GB solid-state hard drive 2 CV61 Vehicle Mount Computer (Windows 7) User Guide - Intermec CV61 | CV61 Vehicle Mount Computer (Windows 7) User Guide - Page 15
and Bluetooth® radios • Accelerometer • Intel D425 1.8 GHz processor The CV61 Vehicle Mount Computer has an IEEE 802.11a/b/g/n radio installed and is Wi 802.11a/b/g/n wireless LAN devices. CV61 Ports and Buttons Power connector Power button Keyboard connector Ethernet port Reset switch COM - Intermec CV61 | CV61 Vehicle Mount Computer (Windows 7) User Guide - Page 16
headphones to the CV61. Connect a microphone to the CV61. CV61 Accessories The CV61 does not ship with any accessories. All accessories are sold and ordered separately. For help, contact your local Intermec sales representative. CV61 Accessories Accessory AC Power Supply CV61 Adapter Cable Kit - Intermec CV61 | CV61 Vehicle Mount Computer (Windows 7) User Guide - Page 17
to attach the CV61 keyboard to the CV61. Screen Protector Kit Use the screen protector to protect the CV61 screen from scratches and debris. SDRAM Upgrade Kit Use the SDRAM upgrade to add memory to the CV61. You can purchase a 1 or 2 GB upgrade. External 802.11 a/b/g antenna Dual band 2.4 GHz - Intermec CV61 | CV61 Vehicle Mount Computer (Windows 7) User Guide - Page 18
more information on installing the mounting kits, see one of the mounting kit instructions located on the Intermec website at www.intermec.com. Connect the CV61 to Power For the CV61 to operate, you must provide power to the CV61 through a DC/DC or AC/DC power supply. There are a variety of power - Intermec CV61 | CV61 Vehicle Mount Computer (Windows 7) User Guide - Page 19
supply options, contact your local Intermec representative. Understand the Backup Power System The CV61 has backup battery that has CV61 Properties. The backup battery status is shown in the System Information section of the CV61 Properties screen. CV61 Vehicle Mount Computer (Windows 7) User Guide - Intermec CV61 | CV61 Vehicle Mount Computer (Windows 7) User Guide - Page 20
displays Fault, you need to replace the backup battery. About the Ready-to-Work Indicator The Ready-to-Work indicator shows the status of the CV61. Ready-to-Work Indicator Location Ready-to-Work indicator 8 CV61 Vehicle Mount Computer (Windows 7) User Guide - Intermec CV61 | CV61 Vehicle Mount Computer (Windows 7) User Guide - Page 21
the CV61 volume, for sounds you hear when you tap the screen or scan bar codes with a scanner. 1 Tap the speaker icon in the taskbar. 2 Move the speaker slider up or down, or tap the speaker icon in the slider to turn the volume on or off. CV61 Vehicle Mount Computer (Windows 7) User Guide 9 - Intermec CV61 | CV61 Vehicle Mount Computer (Windows 7) User Guide - Page 22
brightness of the CV61. 1 Tap Start > Control Panel. 2 In the View by: drop-down menu, select either Large or Small icons. 3 Double-tap CV61 Properties. The screen brightness is shown in the Screen Control section of the CV61 Properties screen. 10 CV61 Vehicle Mount Computer (Windows 7) User Guide - Intermec CV61 | CV61 Vehicle Mount Computer (Windows 7) User Guide - Page 23
manually adjust the screen brightness, make sure Adaptive Brightness Control is not selected and use the slider to change the screen CV61 Properties menu. Enable the Heated Touch Screen Defroster If you have a heated touch screen automatically turns on when the external temperature reaches 3 °C (37 - Intermec CV61 | CV61 Vehicle Mount Computer (Windows 7) User Guide - Page 24
is shown in the Heater section of the CV61 Properties screen. 4 Select Heater On, Heater Off, or Automatic On/Off. 5 Tap Apply to save your changes. 6 Tap OK to exit the CV61 Properties menu. Install an External Antenna You can purchase an antenna to mount on a wall, forklift, or other flat - Intermec CV61 | CV61 Vehicle Mount Computer (Windows 7) User Guide - Page 25
Panel. 2 In the View by: drop-down menu, select either Large or Small icons. 3 Double-tap CV61 Properties. The external antenna information is shown in the External Antenna section of the CV61 Properties screen. 4 Select Force External Antenna. CV61 Vehicle Mount Computer (Windows 7) User Guide 13 - Intermec CV61 | CV61 Vehicle Mount Computer (Windows 7) User Guide - Page 26
either a PS/2 or USB keyboard with the CV61. Intermec recommends you use the CV61 rugged keyboard to input text. For more information on purchasing an Intermec keyboard, contact your local Intermec representative. CV61 External PS/2 Keyboard 14 CV61 Vehicle Mount Computer (Windows 7) User Guide - Intermec CV61 | CV61 Vehicle Mount Computer (Windows 7) User Guide - Page 27
2 Understand the User Interface and Intermec Applications Use this chapter to learn about the Windows 7 user interface and how to interact with the screen. You can also use this chapter to learn about the Intermec applications on the CV61, as well as additional Intermec applications you can download - Intermec CV61 | CV61 Vehicle Mount Computer (Windows 7) User Guide - Page 28
screen contains the Desktop and the Taskbar. Windows 7 Default Screen Windows Desktop Windows 7 Taskbar Start button Tap Start > Help and Support, then select a topic on the computer to find additional information on Windows 7 components. 16 CV61 Vehicle Mount Computer (Windows 7) User Guide - Intermec CV61 | CV61 Vehicle Mount Computer (Windows 7) User Guide - Page 29
and Intermec Applications Learn the Basic Skills Learning to use the computer is easy. This section describes the basic concepts of using and customizing the vehicle mount computer and Windows 7. Use the Touch Screen Use your finger or stylus to move around the CV61 user interface. Touch Screen - Intermec CV61 | CV61 Vehicle Mount Computer (Windows 7) User Guide - Page 30
the User Interface and Intermec Applications external keyboard, enter information on the vehicle mount computer by using the onscreen keyboard or write using Transcriber. 1 Make sure that the Input Panel icon is displayed on the taskbar. 18 CV61 Vehicle Mount Computer (Windows 7) User Guide - Intermec CV61 | CV61 Vehicle Mount Computer (Windows 7) User Guide - Page 31
User Interface and Intermec Applications Input panel If the input panel is not displayed, tap and hold your stylus or finger on the taskbar until a circle appears, and remove your stylus or finger from the screen . 2 Tap the Transcriber icon. CV61 Vehicle Mount Computer (Windows 7) User Guide 19 - Intermec CV61 | CV61 Vehicle Mount Computer (Windows 7) User Guide - Page 32
troubleshoot, and connect your computer to other devices and networks. You can also download additional applications from the Intermec website to help you use all of the features of your computer. Applications Available on the CV61 scanner. 20 CV61 Vehicle Mount Computer (Windows 7) User Guide - Intermec CV61 | CV61 Vehicle Mount Computer (Windows 7) User Guide - Page 33
that go out of range, go to sleep, or are suspended. About Intermec Terminal Emulator (ITE) Intermec Terminal Emulator (ITE), part of Intermec Client Pack (ICP), is a terminal emulation client designed for enterprise-level data collection. CV61 Vehicle Mount Computer (Windows 7) User Guide 21 - Intermec CV61 | CV61 Vehicle Mount Computer (Windows 7) User Guide - Page 34
of limited IT resources, and lower the total cost of ownership for Intermec data collection equipment. SmartSystems Foundation can be downloaded at no charge from the Intermec website. For more information, visit www.intermec.com/SmartSystems. 22 CV61 Vehicle Mount Computer (Windows 7) User Guide - Intermec CV61 | CV61 Vehicle Mount Computer (Windows 7) User Guide - Page 35
3 Manage the Computer Use this chapter to learn how to remotely update, configure, and monitor the CV61. You will also find information on installing and developing software applications as well as how to upgrade the system software. 23 - Intermec CV61 | CV61 Vehicle Mount Computer (Windows 7) User Guide - Page 36
way to manage updates, configure all of the devices, and remotely troubleshoot problems. Intermec provides a free device management software platform called SmartSystems™ Foundation to help on SmartSystems-enabled computers and peripherals. 24 CV61 Vehicle Mount Computer (Windows 7) User Guide - Intermec CV61 | CV61 Vehicle Mount Computer (Windows 7) User Guide - Page 37
Console You can use the SmartSystems console to drag-and-drop Intermec applications onto your computer. The console is part of SmartSystems Foundation. 1 Download your application file from the Intermec website and unzip it on your desktop PC. CV61 Vehicle Mount Computer (Windows 7) User Guide 25 - Intermec CV61 | CV61 Vehicle Mount Computer (Windows 7) User Guide - Page 38
Intermec representative. 1 Copy your application file to the USB storage device. 2 Connect the CV61 USB cable and the USB storage device into the computer. 3 Click Open folder to view files when the pop-up screen to map to certain drives. 26 CV61 Vehicle Mount Computer (Windows 7) User Guide - Intermec CV61 | CV61 Vehicle Mount Computer (Windows 7) User Guide - Page 39
Network Drive. The Map Network Drive screen appears. 2 In the Drive menu, intermec.com/SmartSystems and click the Downloads tab. • the SmartSystems bundles you want to install. These SmartSystems bundles are available from the Intermec website at CV61 Vehicle Mount Computer (Windows 7) User Guide - Intermec CV61 | CV61 Vehicle Mount Computer (Windows 7) User Guide - Page 40
.intermec.com. Go to Support > Downloads > OS/Firmware/Drivers list. • a USB storage device. After you have located these items, you can update your computer. 1 Download the SmartSystems bundle to your PC and note the download location. 2 Transfer the bundle file to the USB storage device. 28 CV61 - Intermec CV61 | CV61 Vehicle Mount Computer (Windows 7) User Guide - Page 41
Chapter 3 - Manage the Computer 3 Insert the USB storage device into the CV61. 4 Run the CV61 installer .exe from within the bundle. 5 Follow the onscreen instructions to update your computer. CV61 Vehicle Mount Computer (Windows 7) User Guide 29 - Intermec CV61 | CV61 Vehicle Mount Computer (Windows 7) User Guide - Page 42
Chapter 3 - Manage the Computer 30 CV61 Vehicle Mount Computer (Windows 7) User Guide - Intermec CV61 | CV61 Vehicle Mount Computer (Windows 7) User Guide - Page 43
4 Configure the Computer Use this chapter to learn about the available methods for configuring the CV61 and how to use Intermec Settings. You can also use this chapter to learn how to configure network communications and wireless security. 31 - Intermec CV61 | CV61 Vehicle Mount Computer (Windows 7) User Guide - Page 44
. External bar code scanners are supported by connecting the scanner to a COM port, USB port, or by Bluetooth. When configuring a scanner using Intermec Settings, the scanner symbologies can be updated through the CV61 data collection software. 32 CV61 Vehicle Mount Computer (Windows 7) User Guide - Intermec CV61 | CV61 Vehicle Mount Computer (Windows 7) User Guide - Page 45
screens available in the next level. If you see ... next to a menu option, there is only one more screen available. Most parameters are saved as soon as you tap OK. Some settings require you to reboot the computer for the changes to take effect. CV61 Vehicle Mount Computer (Windows 7) User Guide - Intermec CV61 | CV61 Vehicle Mount Computer (Windows 7) User Guide - Page 46
settings • Bluetooth scanner settings • Scanner port settings • Decode security Bluetooth-configure on connect Enable USB scanner auto-detect Parameters You Can Configure Device name 34 CV61 Vehicle Mount Computer (Windows 7) User Guide - Intermec CV61 | CV61 Vehicle Mount Computer (Windows 7) User Guide - Page 47
Menu Device Settings Options Antenna Date and Time IDL Runtime Versions Power Management PS/2 Screen System Component Versions Parameters You Can Configure Force external antenna Date and time be using the Wireless Printing application. CV61 Vehicle Mount Computer (Windows 7) User Guide 35 - Intermec CV61 | CV61 Vehicle Mount Computer (Windows 7) User Guide - Page 48
Tag separator • User-defined tag separator • End of message • User-defined end of message • RFID reader grid Common Lockdown Service Menu Common Lockdown Service Options Parameters You Parameters You Can Configure About settings (read-only) 36 CV61 Vehicle Mount Computer (Windows 7) User Guide - Intermec CV61 | CV61 Vehicle Mount Computer (Windows 7) User Guide - Page 49
detail) Information Device Notes (read-only) Core Messaging Service Menu Core Messaging Service Options Parameters You Can Configure Server IP Associated Server in Intermec Settings, see the Intermec Settings Command Reference Manual. CV61 Vehicle Mount Computer (Windows 7) User Guide 37 - Intermec CV61 | CV61 Vehicle Mount Computer (Windows 7) User Guide - Page 50
Yes. After several minutes, all of the default settings are restored. Hide Menu Items in Intermec Settings You can hide items in the Intermec Settings menus if you do not want to have them available for other users to access. Hidden items are not saved when you back up your settings in the - Intermec CV61 | CV61 Vehicle Mount Computer (Windows 7) User Guide - Page 51
Reference Manual. Create and Enable Custom Profile Settings You can create custom profile settings to ensure optimal performance of the CV61 in specific scenarios. Once you create a custom profile setting, enable it with Intermec Settings. CV61 Vehicle Mount Computer (Windows 7) User Guide 39 - Intermec CV61 | CV61 Vehicle Mount Computer (Windows 7) User Guide - Page 52
Make sure all components with antennas are at least 30 cm to support the TCP/IP network protocols. This section of the manual assumes Intermec Settings. 1 From the Intermec Settings main menu, tap Communications > 802.11 Radio > Radio Enabled. 40 CV61 Vehicle Mount Computer (Windows 7) User Guide - Intermec CV61 | CV61 Vehicle Mount Computer (Windows 7) User Guide - Page 53
and connect to other Bluetooth devices. By default, the radio is turned on. You can configure Bluetooth communications using Intermec Settings or from the Start menu. 1 From the Intermec Settings main menu, tap Communications > Bluetooth. CV61 Vehicle Mount Computer (Windows 7) User Guide 41 - Intermec CV61 | CV61 Vehicle Mount Computer (Windows 7) User Guide - Page 54
see the Bluetooth Resource Kit, which is part of the Intermec Developer Library (IDL), available from the Intermec website at www.intermec.com/idl. • select the current wireless printer on your drop-down menu, select either Large or Small icons. 42 CV61 Vehicle Mount Computer (Windows 7) User Guide - Intermec CV61 | CV61 Vehicle Mount Computer (Windows 7) User Guide - Page 55
Configure the Computer 4 Select Search, Manual, Previous Devices, Bluetooth COM Port and tap Acquire Printer. Follow the onscreen instructions to select the current wireless printer. and Dial-up Connections. 3 Double-tap Make New Connection. CV61 Vehicle Mount Computer (Windows 7) User Guide 43 - Intermec CV61 | CV61 Vehicle Mount Computer (Windows 7) User Guide - Page 56
screens to set up your VPN connection. Connect a Scanner to the CV61 You can connect a scanner to the CV61 CV61. If you are using an Intermec scanner, you can configure it using EasySet™. For more information, go to www.intermec 236-240-001. 1 From the Intermec Settings main menu, tap Data Collection - Intermec CV61 | CV61 Vehicle Mount Computer (Windows 7) User Guide - Page 57
following bar code to enable the keyboard HID profile: 4 Refresh Intermec Settings. 5 Configure the scanner using Intermec Settings. Connect to a Serially . 2 From the Intermec Settings main menu, select Tethered Scanner (COM 1 or COM 2). CV61 Vehicle Mount Computer (Windows 7) User Guide 45 - Intermec CV61 | CV61 Vehicle Mount Computer (Windows 7) User Guide - Page 58
Chapter 4 - Configure the Computer 3 Tap Scanner Settings. 46 CV61 Vehicle Mount Computer (Windows 7) User Guide - Intermec CV61 | CV61 Vehicle Mount Computer (Windows 7) User Guide - Page 59
scanner you are connecting: • For an SR30 or SR61T scanner, tap Scanner Settings, select SR Intermec Scanner, and then tap OK. • For an ASCII scanner, tap Scanner Settings, select ASCII, Bluetooth Scanning application appears. 5 Tap Add Scanner. CV61 Vehicle Mount Computer (Windows 7) User Guide 47 - Intermec CV61 | CV61 Vehicle Mount Computer (Windows 7) User Guide - Page 60
Computer 6 Select Search, Manual, Quick Connect, or Previous Devices. Follow the onscreen instruction to add a wireless scanner , "Choose Between Microsoft and Wireless Security." Intermec recommends that you always implement WPA2 security using CV61 Vehicle Mount Computer (Windows 7) User Guide - Intermec CV61 | CV61 Vehicle Mount Computer (Windows 7) User Guide - Page 61
you should use Wireless security, which offers CCX v4.0 compliance, support for LEAP,EAP-FAST, TLS, and TTLS, and configuration for a Wireless security profile. 1 Start Intermec Settings. For help, see "Start Intermec Settings" on page 33. 2 CV61 Vehicle Mount Computer (Windows 7) User Guide 49 - Intermec CV61 | CV61 Vehicle Mount Computer (Windows 7) User Guide - Page 62
Wireless security is selected as your security choice. 3 Start Intermec Settings. 4 Choose Communications > 802.11 Radio > Wireless a For Prompt for Credentials, choose Enter credentials now. b Enter a User Name and User Password. c For Validate Server Certificate, choose Yes. Note: The correct - Intermec CV61 | CV61 Vehicle Mount Computer (Windows 7) User Guide - Page 63
configured. 2 Make sure Wireless security is selected as your security choice. 3 Start Intermec Settings. 4 Choose Communications > 802.11 Radio > Wireless Security. 5 Select the match the passphrase on the authenticator. 9 Save your settings. CV61 Vehicle Mount Computer (Windows 7) User Guide 51 - Intermec CV61 | CV61 Vehicle Mount Computer (Windows 7) User Guide - Page 64
Wireless Security Use the following procedure to configure 802.1x-WEP security with Wireless security. Intermec recommends that you use WPA2-802.1x instead of 802.1x-WEP if possible. 1 choice, you can configure LEAP. 1 Start Intermec Settings. 52 CV61 Vehicle Mount Computer (Windows 7) User Guide - Intermec CV61 | CV61 Vehicle Mount Computer (Windows 7) User Guide - Page 65
are configured. 2 Make sure Wireless Security is selected as your security choice. 3 Start Intermec Settings. 4 Choose Communications > 802.11 Radio > Wireless Security. 5 Select the profile preceded by 0x and contain 5 or 13 hex pairs. CV61 Vehicle Mount Computer (Windows 7) User Guide 53 - Intermec CV61 | CV61 Vehicle Mount Computer (Windows 7) User Guide - Page 66
) • 802.1x • Static WEP Select Microsoft Security Use the following procedure to select Microsoft security. 1 Start Intermec Settings. For help, see "Start Intermec Settings" on page 33. 2 Choose Communications > 802.11 Radio > Security Choice. 54 CV61 Vehicle Mount Computer (Windows 7) User Guide - Intermec CV61 | CV61 Vehicle Mount Computer (Windows 7) User Guide - Page 67
method, choose either LEAP, EAP-FAST, PEAP, or Smart Card or other certificate. 8 If you choose LEAP: a Tap Settings. The Properties screen appears. b Enter a User Name and a Password. When you are finished, type in your password again in Confirm Password. c Tap OK to exit the Properties - Intermec CV61 | CV61 Vehicle Mount Computer (Windows 7) User Guide - Page 68
Certificate" on page 59. b Tap Settings. The Properties screen appears. c Select Validate server certificate. d Tap OK to exit the Properties screen. e Tap OK to save the Microsoft Security settings. the wireless network you want to configure. 56 CV61 Vehicle Mount Computer (Windows 7) User Guide - Intermec CV61 | CV61 Vehicle Mount Computer (Windows 7) User Guide - Page 69
following procedure to configure 802.1x security with Microsoft security. Intermec recommends that you use WPA2-802.1x instead of 802.1x certificate. 7 If you choose LEAP: a Tap Settings. The Properties screen appears. b Enter a User Name and a Password. When you are finished, type in your password - Intermec CV61 | CV61 Vehicle Mount Computer (Windows 7) User Guide - Page 70
screen. e Tap OK to save the Microsoft Security settings. Configure Static WEP Security With Microsoft Use the following procedure to configure static WEP security with Microsoft security. Intermec Security type, choose No authentication (Open). 58 CV61 Vehicle Mount Computer (Windows 7) User Guide - Intermec CV61 | CV61 Vehicle Mount Computer (Windows 7) User Guide - Page 71
, type the password and continue. 2 In the menu tree, select where you want to import the certificate. 3 Tap Actions > All Tasks > Import. Follow the onscreen instruction to import a certificate to the CV61. CV61 Vehicle Mount Computer (Windows 7) User Guide 59 - Intermec CV61 | CV61 Vehicle Mount Computer (Windows 7) User Guide - Page 72
Chapter 4 - Configure the Computer 60 CV61 Vehicle Mount Computer (Windows 7) User Guide - Intermec CV61 | CV61 Vehicle Mount Computer (Windows 7) User Guide - Page 73
5 Troubleshoot and Maintain the Computer If you encounter any problems while using the computer, look in this chapter to find a possible solution. You will also find information on routine maintenance. 61 - Intermec CV61 | CV61 Vehicle Mount Computer (Windows 7) User Guide - Page 74
Use the troubleshooting tables in this section to fix problems with the Wi-Fi connection, 802.1x security, or general problems with operating the computer. Note: If you send the computer in for service, it is your responsibility to save the computer data and configuration. Intermec is responsible - Intermec CV61 | CV61 Vehicle Mount Computer (Windows 7) User Guide - Page 75
troubleshoot problems with your 802.1x security that will prevent you from connecting to your network, such as an incorrect password. Problems With 802.1x Security Problem Solution The computer indicates it is not authenticated. Make sure that: • the User the user and have trouble connecting - Intermec CV61 | CV61 Vehicle Mount Computer (Windows 7) User Guide - Page 76
Intermec Product Support, this information can be helpful in troubleshooting Troubleshoot Reading Bar Codes Use this section to troubleshoot problems that may prevent you from being able to read a bar code with an Intermec scanner. If you cannot 64 CV61 Vehicle Mount Computer (Windows 7) User Guide - Intermec CV61 | CV61 Vehicle Mount Computer (Windows 7) User Guide - Page 77
Chapter 5 - Troubleshoot and Maintain the Computer find the solution in the following table, refer to your scanner user guide for more information. Problems with Connecting Scanners or Reading Bar Codes Problem Solution You cannot see the illumination • You may be too far away from the bar code - Intermec CV61 | CV61 Vehicle Mount Computer (Windows 7) User Guide - Page 78
Troubleshoot and Maintain the Computer Problems with Connecting Scanners or Reading Bar Codes (Continued) Problem the bar • Check to see if the Scanner Port Settings in Intermec code or is corrupted when it is Settings match those settings CV61 Vehicle Mount Computer (Windows 7) User Guide - Intermec CV61 | CV61 Vehicle Mount Computer (Windows 7) User Guide - Page 79
CV61. For more help, see show up in Intermec Settings. "Use Intermec Settings on the Computer" on page 32. • Enable the HID profile, by scanning one of the following bar codes: SR30 Scanner SR61T (Gen II) Scanner Troubleshoot Operating the Computer Use this section to troubleshoot problems - Intermec CV61 | CV61 Vehicle Mount Computer (Windows 7) User Guide - Page 80
problem in the "Troubleshooting the Computer" section, you can visit the Intermec technical knowledge base (Knowledge Central) at intermec.custhelp.com to review technical information or to request technical support on the side of the computer. 68 CV61 Vehicle Mount Computer (Windows 7) User Guide - Intermec CV61 | CV61 Vehicle Mount Computer (Windows 7) User Guide - Page 81
Versions Use the following procedure to find your operating system, BIOS and MCU versions. • Tap Start > Control Panel > CV61 Properties. The OS, BIOS, and MCU versions are shown in the System Information section of the CV61 Properties screen. CV61 Vehicle Mount Computer (Windows 7) User Guide 69 - Intermec CV61 | CV61 Vehicle Mount Computer (Windows 7) User Guide - Page 82
- Troubleshoot and Maintain the Computer Find Your Service Pack Version Use the following procedure to find your Service Pack version. 1 Tap Start > Control Panel. The Control Panel appears. 2 In the View by: drop-down menu, select either Large or Small icons. 3 Tap System. The System screen appears - Intermec CV61 | CV61 Vehicle Mount Computer (Windows 7) User Guide - Page 83
Troubleshoot and Maintain the Computer Reset the Computer If the computer does not reboot, reset the computer. When you reset the computer, the CV61 does the touch screen. Do not allow any abrasive material to touch these surfaces. 4 Wipe dry. CV61 Vehicle Mount Computer (Windows 7) User Guide 71 - Intermec CV61 | CV61 Vehicle Mount Computer (Windows 7) User Guide - Page 84
Chapter 5 - Troubleshoot and Maintain the Computer 72 CV61 Vehicle Mount Computer (Windows 7) User Guide - Intermec CV61 | CV61 Vehicle Mount Computer (Windows 7) User Guide - Page 85
6 Upgrade the CV61 Vehicle Mount Computer Use this chapter to learn how to upgrade the CV61 hard drive, memory, or install an SD card. 73 - Intermec CV61 | CV61 Vehicle Mount Computer (Windows 7) User Guide - Page 86
torque screwdriver After you install the hard drive, you also need to load Microsoft Windows 7 and the Intermec system software. 1 Turn off the CV61. 2 Remove the power cable. 3 Remove the eight screws that secure the back cover to the CV61. 74 CV61 Vehicle Mount Computer (Windows 7) User Guide - Intermec CV61 | CV61 Vehicle Mount Computer (Windows 7) User Guide - Page 87
Chapter 6 - Upgrade the CV61 Vehicle Mount Computer x8 4 Disconnect the two cables connected to the CV61. 5 Remove the four screws that secure the hard drive bracket to the CV61. CV61 Vehicle Mount Computer (Windows 7) User Guide 75 - Intermec CV61 | CV61 Vehicle Mount Computer (Windows 7) User Guide - Page 88
Chapter 6 - Upgrade the CV61 Vehicle Mount Computer x4 6 Remove the four screws that secure the hard drive to the hard drive bracket. x4 7 Remove the two cables that are connected to the hard drive. 76 CV61 Vehicle Mount Computer (Windows 7) User Guide - Intermec CV61 | CV61 Vehicle Mount Computer (Windows 7) User Guide - Page 89
the screws to a final value of 0.73 Nm (6.5 lbf-in). 1 5 3 7 4 8 62 9 Reconnect the power cable. 10 Install Microsoft Windows 7. 11 Install the Intermec system software. For more information, see "Update the System Software" on page 27. CV61 Vehicle Mount Computer (Windows 7) User Guide 77 - Intermec CV61 | CV61 Vehicle Mount Computer (Windows 7) User Guide - Page 90
Computer Upgrade Memory Upgrade the CV61 system memory to increase system performance. The CV61 supports a maximum of 3 GB of SODIMM memory. You can purchase your own SODIMM memory or purchase it from Intermec. For more information, contact your local Intermec representative. To upgrade the memory - Intermec CV61 | CV61 Vehicle Mount Computer (Windows 7) User Guide - Page 91
Chapter 6 - Upgrade the CV61 Vehicle Mount Computer x8 4 Remove the memory by pushing on the two prongs that secure the memory onto the CV61. 5 Remove the memory from the CV61. CV61 Vehicle Mount Computer (Windows 7) User Guide 79 - Intermec CV61 | CV61 Vehicle Mount Computer (Windows 7) User Guide - Page 92
6 - Upgrade the CV61 Vehicle Mount Computer 6 Insert the new memory and close the CV61. Use the next illustration for the tightening sequence for the back cover. Tighten the screws to a final value of 0.73 Nm (6.5 lbf-in). 1 5 3 7 4 8 62 80 CV61 Vehicle Mount Computer (Windows 7) User Guide - Intermec CV61 | CV61 Vehicle Mount Computer (Windows 7) User Guide - Page 93
capacity SD card. To install an SD card, you need to have a small Phillips screwdriver. 1 Turn off the CV61. 2 Remove the power cord. 3 Using a small Phillips screwdriver, remove the eight screws that secure the radome cover to the CV61. CV61 Vehicle Mount Computer (Windows 7) User Guide 81 - Intermec CV61 | CV61 Vehicle Mount Computer (Windows 7) User Guide - Page 94
Chapter 6 - Upgrade the CV61 Vehicle Mount Computer Screw (8 places) 4 Gently lift up the radome cover to expose the SD card slot. 5 Insert the SD card into place. 6 Close the radome cover and replace the 8 screws. 7 Reattach the power cord. 82 CV61 Vehicle Mount Computer (Windows 7) User Guide - Intermec CV61 | CV61 Vehicle Mount Computer (Windows 7) User Guide - Page 95
Chapter 6 - Upgrade the CV61 Vehicle Mount Computer 8 Press the Power button. The computer turns on. CV61 Vehicle Mount Computer (Windows 7) User Guide 83 - Intermec CV61 | CV61 Vehicle Mount Computer (Windows 7) User Guide - Page 96
Chapter 6 - Upgrade the CV61 Vehicle Mount Computer 84 CV61 Vehicle Mount Computer (Windows 7) User Guide - Intermec CV61 | CV61 Vehicle Mount Computer (Windows 7) User Guide - Page 97
A Specifications and Default Settings 85 - Intermec CV61 | CV61 Vehicle Mount Computer (Windows 7) User Guide - Page 98
Environmental Specifications Physical Dimensions CV61 dimensions CV61 weight 27.4 wheeled vehicles Power and Electrical Specifications Hardware Input power External power supply Backup battery (CMOS) Electrical rating DC Atom D425 1.8 GHz 86 CV61 Vehicle Mount Computer (Windows 7) User Guide - Intermec CV61 | CV61 Vehicle Mount Computer (Windows 7) User Guide - Page 99
to 32 GB user-accessible SD card slot Integrated accelerometer Audio port, microphone port, two USB ports, two RS-232 COM ports, a CANBUS port, and a DC power input. Internal antenna or optional external antenna. Secure Digital Microsoft Windows XP or 7 Professional Touch Screen Specifications XGA - Intermec CV61 | CV61 Vehicle Mount Computer (Windows 7) User Guide - Page 100
supported on the computer. If you restore the computer to factory default settings, the computer uses these values. The settings are grouped by function and reflect the organization of Intermec see the Intermec Settings Command Reference Manual. Data CV61 Vehicle Mount Computer (Windows 7) User Guide - Intermec CV61 | CV61 Vehicle Mount Computer (Windows 7) User Guide - Page 101
Disable Disable Disable Disable Disable Disable Symbology Option Settings Symbology Option Settings Preamble Postamble Symbology Identifier Multicode Default Value None (Disable) None (Disable) Disable Disable CV61 Vehicle Mount Computer (Windows 7) User Guide 89 - Intermec CV61 | CV61 Vehicle Mount Computer (Windows 7) User Guide - Page 102
Aimer Flashing Illumination Mode Illumination Level Initial 1D Search Area Horizontal Focus Factor Horizontal Focus Threshold Vertical Focus Factor Default Value SR Intermec Scanner Level Typical aimer Enable 2 500 Enable/One-shot One Default Value 57600 Default Value 1D and 2D standard 0 2D imager - Intermec CV61 | CV61 Vehicle Mount Computer (Windows 7) User Guide - Page 103
with the network. Communications Settings Communications Setting Device Name Default Value Intermec CV61 802.11 Radio Settings 802.11 Radio Setting Radio Enabled Security Off Microsoft Security Disable Profile 1 Enable None None None False CV61 Vehicle Mount Computer (Windows 7) User Guide 91 - Intermec CV61 | CV61 Vehicle Mount Computer (Windows 7) User Guide - Page 104
settings on the computer. Antenna Settings Antenna Setting Force External Antenna Default Value Disable Power Antenna Setting PS/2 Port Access Default Value Enable Heater Settings Screen Setting Screen Heater Default Value Disabled 92 CV61 Vehicle Mount Computer (Windows 7) User Guide - Intermec CV61 | CV61 Vehicle Mount Computer (Windows 7) User Guide - Page 105
RFID Service Default Value Off Virtual Wedge Settings Use virtual wedge settings to configure the virtual wedge. Virtual Wedge Settings Virtual Wedge Settings Virtual Wedge Virtual Wedge Method Default Value Enable Adapt to Application CV61 Vehicle Mount Computer (Windows 7) User Guide 93 - Intermec CV61 | CV61 Vehicle Mount Computer (Windows 7) User Guide - Page 106
Null Common Lockdown Service Settings Use common lockdown service settings to configure the common lockdown service. Common Lockdown ServiceSetting Common Lockdown Service Settings Port Disable Disable Disable Disable Disable Enable Disable 94 CV61 Vehicle Mount Computer (Windows 7) User Guide - Intermec CV61 | CV61 Vehicle Mount Computer (Windows 7) User Guide - Page 107
to learn about the ports pin assignments on the CV61. COM 1 and COM 2 Ports By default, Pin 9 is configured to provide + 5 V for an external bar code scanner, or it can be configured Transmit data (output) 4 DTR Data terminal ready (output) CV61 Vehicle Mount Computer (Windows 7) User Guide 95 - Intermec CV61 | CV61 Vehicle Mount Computer (Windows 7) User Guide - Page 108
client data signal USB host 1 (5 V output power) Common ground USB host 2 (5 V output power) Common ground USB client data signal USB2_D+ USB client data signal 96 CV61 Vehicle Mount Computer (Windows 7) User Guide - Intermec CV61 | CV61 Vehicle Mount Computer (Windows 7) User Guide - Page 109
high 8 - No connect 9 CAN V+ Optional CAN external power supply Power Connector If you are connecting to an external DC/DC supply, you must apply power to DC+. If you are connecting to 10 to 60 V vehicle power, connect power to V In+ CV61 Vehicle Mount Computer (Windows 7) User Guide 97 - Intermec CV61 | CV61 Vehicle Mount Computer (Windows 7) User Guide - Page 110
Connector Pin Signal 1 GND 2 DC+ 3 DC-/V In- 4 HTR- 5 HTR+ 6 V In+ Description Chassis ground 12 V, 4 A from external DC supply Input Input 12 V, 4 A from external DC supply (only required if the CV61 has optional heated defroster) 10 to 60 V (Input to internal DC/DC power supply) 98 - Intermec CV61 | CV61 Vehicle Mount Computer (Windows 7) User Guide - Page 111
B ScanNGo Wi-Fi Configuration Bar Codes You can use the ScanNGo Wi-Fi configuration bar codes to quickly configure the 802.11 radio in your computer. 99 - Intermec CV61 | CV61 Vehicle Mount Computer (Windows 7) User Guide - Page 112
you scan the bar codes, you will still need to use Intermec Settings or another configuration program to set network-specific settings on your code from the table and wait for the program to start. 2 Follow any instructions on the device. 2D Imager Radio Configuration Bar Codes When You Want To: - Intermec CV61 | CV61 Vehicle Mount Computer (Windows 7) User Guide - Page 113
the table and wait for the program to start. 2 Scan the 1/9 bar code. 3 Scan the rest of the bar codes in any order. 4 Follow any instructions on the device. CV61 Vehicle Mount Computer (Windows 7) User Guide 101 - Intermec CV61 | CV61 Vehicle Mount Computer (Windows 7) User Guide - Page 114
To: Scan This Bar Code • Set all communication settings to defaults (Wi-Fi, WWAN if applicable) • Enable Wi-Fi - set Wireless security to defaults 102 CV61 Vehicle Mount Computer (Windows 7) User Guide - Intermec CV61 | CV61 Vehicle Mount Computer (Windows 7) User Guide - Page 115
When You Want To: Appendix B - ScanNGo Wi-Fi Configuration Bar Codes Scan This Bar Code • Set all communication settings to defaults (Wi-Fi, WWAN if applicable) • Enable Wi-Fi - set Wireless security to defaults CV61 Vehicle Mount Computer (Windows 7) User Guide 103 - Intermec CV61 | CV61 Vehicle Mount Computer (Windows 7) User Guide - Page 116
Appendix B - ScanNGo Wi-Fi Configuration Bar Codes When You Want To: Scan This Bar Code • Set all communication settings to defaults (Wi-Fi, WWAN if applicable) • Enable Wi-Fi - set Microsoft security to defaults 104 CV61 Vehicle Mount Computer (Windows 7) User Guide - Intermec CV61 | CV61 Vehicle Mount Computer (Windows 7) User Guide - Page 117
Appendix B - ScanNGo Wi-Fi Configuration Bar Codes When You Want To: Scan This Bar Code • Set all communication settings to defaults (Wi-Fi, WWAN if applicable) • Enable Wi-Fi - set Microsoft security defaults CV61 Vehicle Mount Computer (Windows 7) User Guide 105 - Intermec CV61 | CV61 Vehicle Mount Computer (Windows 7) User Guide - Page 118
Appendix B - ScanNGo Wi-Fi Configuration Bar Codes 106 CV61 Vehicle Mount Computer (Windows 7) User Guide - Intermec CV61 | CV61 Vehicle Mount Computer (Windows 7) User Guide - Page 119
- Intermec CV61 | CV61 Vehicle Mount Computer (Windows 7) User Guide - Page 120
Worldwide Headquarters 6001 36th Avenue West Everett, Washington 98203 U.S.A. tel 425.348.2600 fax 425.355.9551 www.intermec.com © 2012 Intermec Technologies Corporation. All rights reserved. CV61 Vehicle Mount Computer (Windows 7) User Guide *935-043-001* P/N 935-043-001
-
 1
1 -
 2
2 -
 3
3 -
 4
4 -
 5
5 -
 6
6 -
 7
7 -
8
-
9
-
10
-
11
-
12
-
13
-
14
-
15
-
16
-
17
-
18
-
19
-
20
-
21
-
22
-
23
-
24
-
25
-
26
-
27
-
28
-
29
-
30
-
31
-
32
-
33
-
34
-
35
-
36
-
37
-
38
-
39
-
40
-
41
-
42
-
43
-
44
-
45
-
46
-
47
-
48
-
49
-
50
-
51
-
52
-
53
-
54
-
55
-
56
-
57
-
58
-
59
-
60
-
61
-
62
-
63
-
64
-
65
-
66
-
67
-
68
-
69
-
70
-
71
-
72
-
73
-
74
-
75
-
76
-
77
-
78
-
79
-
80
-
81
-
82
-
83
-
84
-
85
-
86
-
87
-
88
-
89
-
90
-
91
-
92
-
93
-
94
-
95
-
96
-
97
-
98
-
99
-
100
-
101
-
102
-
103
-
104
-
105
-
106
-
107
-
108
-
109
-
110
-
111
-
112
-
113
-
114
-
115
-
116
-
117
-
118
-
119
-
120
 |
 |

CV
61
Vehicle Mount Computer (Windows 7)
Model 1011CM01
User Guide