Intermec PX6i Intermec Printer Language (IPL) Developer's Guide (old) - Page 31
Working With RFID Tags, How to Write Data to an RFID Tag
 |
View all Intermec PX6i manuals
Add to My Manuals
Save this manual to your list of manuals |
Page 31 highlights
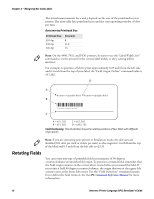
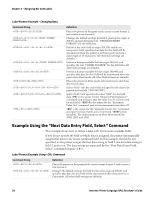
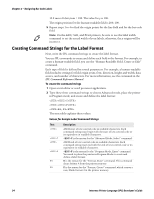
Chapter 2 - Designing Bar Code Labels Label Format Example Using Command (continued) Command String Definition H1;o200,200;d0,20 H2;o300,300;d0,20 H3;o400,400;d0,20 RE6 FIRST FIELD SECOND FIELD THIRD FIELD FOURTH FIELD Defines a human-readable field at origin 200,200. All other settings are identical to H0. Defines a human-readable field at origin 300,300. All other settings are identical to H0. Defines a human-readable field at origin 400,400. All other settings are identical to H0. Places the printer in Print mode, selects format 6, and clears all previous data. Specifies the data to be assigned to the four fields requiring input. separates the individual data strings. The first data string (FIRST FIELD) is assigned to field 0, the second (SECOND FIELD) to field 1, and so on. Prints the label. The label looks like this when printed: FIRST FIELD SECOND FIELD THIRD FIELD FOURTH FIELD Working With RFID Tags If a printer has an RFID module installed, the RFID mode is automatically turned on. You need to configure the printer, declare a format that includes commands to read and write to the tag, and print the format to a label. The printer aligns the tag with the antenna, executes the RFID commands, repositions the label, prints the image buffer to the label, and then positions the next label for printing. How to Write Data to an RFID Tag To write data to an RFID tag you need to do two things: specify an area in the tag's memory and define the data that will be written to the tag. To specify an area in the tag's memory, you define an RFID tag write field. This field specifies which segment is written to, the start position, length of data (in bytes) and the format of the data. Intermec Printer Language (IPL) Developer's Guide 21
-
 1
1 -
2
-
3
-
4
-
5
-
6
-
7
-
8
-
9
-
10
-
11
-
12
-
13
-
14
-
15
-
16
-
17
-
18
-
19
-
20
-
21
-
22
-
23
-
24
-
25
-
 26
26 -
 27
27 -
 28
28 -
 29
29 -
 30
30 -
 31
31 -
 32
32 -
 33
33 -
 34
34 -
 35
35 -
 36
36 -
37
-
38
-
39
-
40
-
41
-
42
-
43
-
44
-
45
-
46
-
47
-
48
-
49
-
50
-
51
-
52
-
53
-
54
-
55
-
56
-
57
-
58
-
59
-
60
-
61
-
62
-
63
-
64
-
65
-
66
-
67
-
68
-
69
-
70
-
71
-
72
-
73
-
74
-
75
-
76
-
77
-
78
-
79
-
80
-
81
-
82
-
83
-
84
-
85
-
86
-
87
-
88
-
89
-
90
-
91
-
92
-
93
-
94
-
95
-
96
-
97
-
98
-
99
-
100
-
101
-
102
-
103
-
104
-
105
-
106
-
107
-
108
-
109
-
110
-
111
-
112
 |
 |
