JVC GZ MG555 Software Guide - Page 9
Connecting the Camera to the PC
 |
UPC - 046838030406
View all JVC GZ MG555 manuals
Add to My Manuals
Save this manual to your list of manuals |
Page 9 highlights
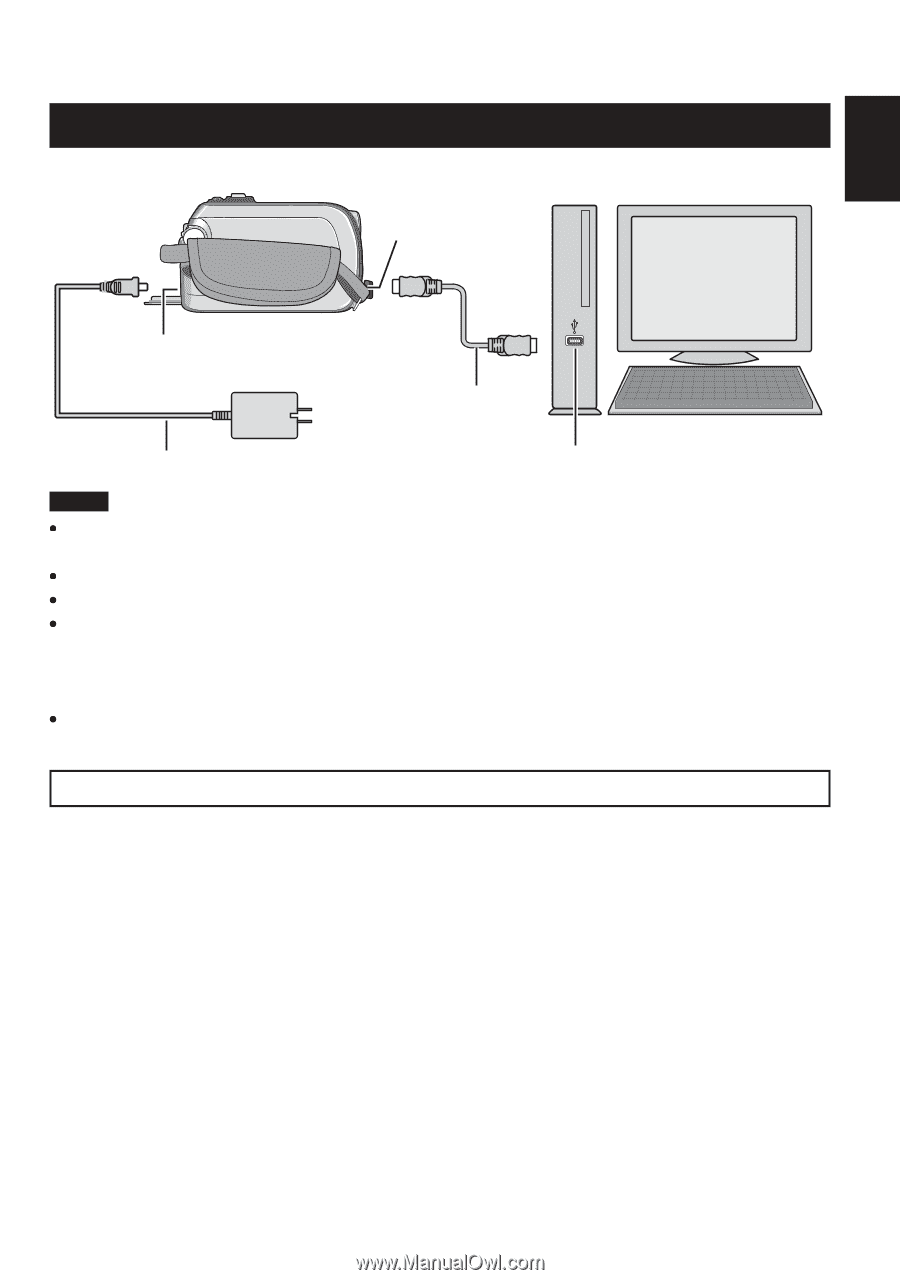
ENGLISH Connecting the Camera to the PC Preparation: Set the camera's power/mode switch to OFF. USB Connector DC Connector USB Cable AC Adapter AC Outlet USB Connector NOTE When the USB cable is connected, turning on or off the camera causes malfunctions of the PC. Connect the camera directly to the PC, not through the hub. Do not use an extension USB cable. Saving the wrong kinds of files in a recording medium or deleting files or folders from a recording medium can cause problems with the operation of the camera. When it is necessary to delete a file from a recording medium, delete it through the camera. Also, do not move or rename folders and files in the medium on PC. Never disconnect the USB cable while the access/charge lamp on the camera lights or blinks. When you have finished operation Always follow the procedures below when disconnecting the camera, or turning off the camera/computer power. Failing to do so may cause damage to the camera and computer. A Confirm that the access/charge lamp on the camera does not light or blink. If the access/charge lamp lights or blinks, wait until it is turned off before proceeding. B Double-click the [Safely Remove Hardware] or [Unplug or Eject Hardware] icon in the status bar. C Select [USB Mass Storage Device] or [USB Disk], and then click [Stop]. D Click [OK]. The model name depends on the connected camera. E Disconnect the USB cable. F Turn off the camera and PC. 9
-
 1
1 -
2
-
3
-
 4
4 -
 5
5 -
 6
6 -
 7
7 -
 8
8 -
 9
9 -
 10
10 -
 11
11 -
 12
12 -
 13
13 -
 14
14 -
15
-
16
-
17
-
18
-
19
-
20
-
21
-
22
-
23
-
24
-
25
-
26
-
27
-
28
-
29
-
30
-
31
-
32
-
33
-
34
-
35
-
36
-
37
-
38
-
39
-
40
-
41
-
42
-
43
-
44
-
45
-
46
-
47
-
48
 |
 |