JVC KW-R910BT Instruction Manual - Page 20
Display Settings - wiring
 |
View all JVC KW-R910BT manuals
Add to My Manuals
Save this manual to your list of manuals |
Page 20 highlights
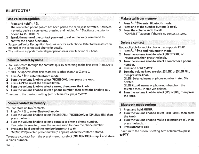
DISPLAY SETTINGS ALL ZONE Default: XX 1 Press and hold MENU. 2 Turn the volume knob to make a selection (see the following table), then press the knob. Repeat step 2 until the desired item is selected. 3 Press MENU.to exit. To return to the previous setting item or hierarchy, press~ PTY. Default: XX DIMMER Selects the display ahd button illumination adjusted in the [BRIGHTNESS] setting. · AUTO: Changes between the.day and night adjustments when you turn off or on the car headlights. *1 ; ON: Selects the night adjustments.; OFF: Selects the day adjustments. BRIGHTNESS Sets the button, display and USB input terminal brightness for day and night separately. 1 DAY I NIGHT: Select day or night. 2 Select azone for setting. (•Illustration above) 3 Set the brightness level (00 to 31 ). (Default: DAY: 31 ; NIGHT: ill SCROLL *2 ONCE: Scrolls the display information once.; AUTO: Repeats scrolling at 5-second intervals.;OFF: Cancels. *1 The illumination control wire connection is required. (• 25) *2 Some characters or symbols wilt not be shown correctly (or will be blanked). 18 PRESET You can select a color for [ALL ZONE], [ZONE 1], [DISP ZONE), or [ZONE 2] separately. For [All ZONE], you can also select acolor pattern. Default color: All ZONE: [COLOR 06], ZONE 1: [COLOR 06), DISP ZONE: [COLOR 01], ZONE 2: [COLOR 271 1 Select a zone for setting. (•Illustration on the left column) 2 Select a color for the selected zone. • COLOR 01 to COLOR 29 • USER: The color you have created for [DAY COLOR] or [NIGHT COLOR] is shown. • COLOR FLOW 01 to COLOR FLOW 03: Color changes at different speeds. • SPECTRUM/ GROOVE/ TECHNO/ EMOTION/ RELAX/ · NIGHT SWEEP: The selected color pattern is shown.* (Selectable only when [All ZONE] is selected in step 1.) .* If one of these color pattern is selected, the [ZONE 1], [DISP ZONE], [ZONE 2) illumination color will change to the default color. DAY COLOR Store your own day and night colors for different zone. 1 Select a zone for setting: (•Illustration on the left column) 2 RED I GREEN I BLUE: Select a primarycolor. 3 00 to 31: Select the level. NIGHT COLOR . Repeat steps 2 and 3 for all the primary colors. • Your setting is stored to [USER] in [PRESET]. • If [00] is selected for all primary colors for [DISP ZONE], nothing appears on the COLOR GUIDE ON: Changes the button, display and USB input terminal illumination when settings are performed on menu and lis_t search. Display zone will automatically change depending on volume level.; OFF: Cancels. . [NIGHT COLOR] or [DAY COLOR] is changed by turning on or off your car's headlight.
-
 1
1 -
2
-
3
-
4
-
5
-
6
-
7
-
8
-
9
-
10
-
11
-
12
-
13
-
14
-
 15
15 -
 16
16 -
 17
17 -
 18
18 -
 19
19 -
 20
20 -
 21
21 -
 22
22 -
 23
23 -
 24
24 -
 25
25 -
26
-
27
-
28
-
29
-
30
-
31
 |
 |
