JVC UX-EP25 Instruction Manual
JVC UX-EP25 Manual
 |
View all JVC UX-EP25 manuals
Add to My Manuals
Save this manual to your list of manuals |
JVC UX-EP25 manual content summary:
- JVC UX-EP25 | Instruction Manual - Page 1
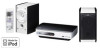
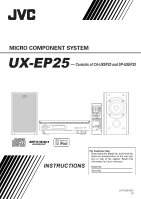
MCIOCRMOPACCOTMCPOOMNPEONNTESNYTSTSEYMSTEM UX-EP25 - Consists of CA-UXEP25 and SP-UXEP25 INSTRUCTIONS For Customer Use: Enter below the Model No. and Serial No. which are located either on the rear, bottom or side of the cabinet. Retain - JVC UX-EP25 | Instruction Manual - Page 2
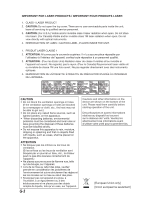
intended to alert the user to the presence of important operating and maintenance (servicing) instructions in the literature accompanying the appliance. (For U.S.A.) WARNING: TO REDUCE THE Changes or modifications not approved by JVC could void the user's authority to operate the equipment. G-1 - JVC UX-EP25 | Instruction Manual - Page 3
çant sur un support d'au moins dix centimètres de hauteur. Front Face 15 cm (5-15 /16 ") 2 cm (13/16 ") 15 cm (5-15 /16 ") 2 cm (13/16 ") 15 cm (5-15 /16 ") 15 cm (5-15 /16 ") 15 cm (5-15 /16 ") Side Côté SP-UXEP25 CA-UXEP25 SP-UXEP25 10 cm (3-15 /16 ") CA-UXEP25 * About the cooling - JVC UX-EP25 | Instruction Manual - Page 4
top cover. There are no user serviceable parts inside the unit; leave all servicing to qualified service personnel. 3. CAUTION: (For U.S.A.) as lighted candles, on the apparatus. • When discarding batteries, environmental problems must be considered and local rules or laws governing the disposal of - JVC UX-EP25 | Instruction Manual - Page 5
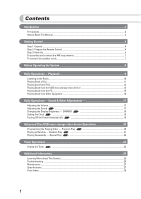
Precautions...2 How to Read This Manual ...3 Getting Started ...4 Step 1: Unpack ...4 Step 2: Prepare the Remote Control ...4 Step 3: Hook Up...5 To assemble and connect the AM loop antenna 7 To connect the speaker cords...7 Before Operating the System 8 Daily Operations- Playback 9 Listening to - JVC UX-EP25 | Instruction Manual - Page 6
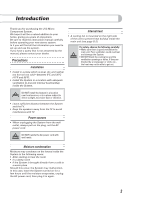
Introduction Thank you for purchasing the JVC Micro Component System. We hope it will be a valued addition to your home, giving you years of enjoyment. Be sure to read this instruction manual carefully before operating your new stereo system. In it you will find all the information you need to set - JVC UX-EP25 | Instruction Manual - Page 7
using the remote control is mainly explained; however, you can use the buttons and controls on the main unit if they have the same (or similar) name and marks. • Some related tips and notes are explained later in the sections "Learning More about This System" and "Troubleshooting," but not - JVC UX-EP25 | Instruction Manual - Page 8
• Remote control (1) • Batteries (2) • iPod connection cable (1) • iPod stand (1) If any item is missing, consult your dealer immediately. Step 2: Prepare the Remote Control Insert the batteries into the remote control by matching the polarity (+ and -) correctly. 1 Step 3: Hook up the components - JVC UX-EP25 | Instruction Manual - Page 9
the input/output terminals below are typical examples. When you connect other components, refer also to their manuals since the terminal names actually printed on the rear may vary. Turn the power off to all components before connections. For better FM/AM reception Outdoor FM antenna (not supplied - JVC UX-EP25 | Instruction Manual - Page 10
FM antenna (supplied) Extend it so that you can obtain the best reception. AM loop antenna (supplied) Turn it until the best reception is obtained. Speaker cord (supplied) Connect the black cord to the black (−) terminal. Speaker cord (supplied) Connect the white cord to the red (+) terminal. 6 - JVC UX-EP25 | Instruction Manual - Page 11
the vinyl. • Make sure the antenna conductors do not touch any other terminals, connecting cords and power cord. Also, keep the antennas away from metallic parts of the System, connecting cords, and the AC power cord. This could cause poor reception. To connect the speaker cords Make sure the both - JVC UX-EP25 | Instruction Manual - Page 12
teach you a lot of things while you are operating the System. Before operating the System, be familiar with when and how the indicator illuminates on the number Elapsed playing time While playing an MP3*: While selecting iPod: Current track number Source name Elapsed playing time Current status - JVC UX-EP25 | Instruction Manual - Page 13
Daily Operations - Playback - Remote control Numeric buttons DISPLAY 4,1,7, 33, ¢ 1 2 3 4 STANDBY/ON 1 SET/RESUME PRESET UP, PRESET DOWN 2 FM MODE 3 1 Turn on the power. The STANDBY lamp on the main unit turns off. • Without pressing STANDBY/ON , the System turns on by pressing one of the - JVC UX-EP25 | Instruction Manual - Page 14
the System is turned on... If the received FM station is hard to listen Remote ONLY • Press the button again, to return to the source information. Listening to the Radio To select the band (FM or AM) FM USB AUDIO AM AUX To tune in to a station While FM or AM is selected... Remote control - JVC UX-EP25 | Instruction Manual - Page 15
Remote control: Main unit: Playable media and files This system can playback following types of media and files. Media File format Audio CD Audio CD CD-R CD-RW • This System may not playback some USB mass storage class devices and does not support DRM (Digital Rights Management). • This system - JVC UX-EP25 | Instruction Manual - Page 16
and start play Remote ONLY Examples: iPod, see the iPod instruction manual. • JVC is not responsible for any loss of or damage to iPod that might result from the use of this product. • When you connect your iPod to the cable, make sure it connects all the way in. • Do not carry the System with iPod - JVC UX-EP25 | Instruction Manual - Page 17
iPod To start: To pause: To connect the USB mass storage class device When connecting a USB mass storage class device, refer also to its manual such as a USB flash memory device, Digital Audio Player (DAP), etc. to this System.This System cannot recognize a USB mass storage class device whose - JVC UX-EP25 | Instruction Manual - Page 18
selection of the MP3/WMA. GROUP: 4 / ¢, and number buttons work for the group selection of the MP3/WMA. MP3/WMA groups/tracks configuration This System plays back MP3/WMA tracks as follows. The play order in the figure is for MP3/WMA tracks on the disc. MP3/WMA tracks on - JVC UX-EP25 | Instruction Manual - Page 19
playback again from the beginning of the same track. To activate/cancel resume play Remote ONLY 2 Select USB AUDIO for the source. FM USB AUDIO AM AUX 3 Connect the System to the PC using a USB cable (not supplied). RESUME ON RESUME OFF memo • Pressing OPEN/CLOSE (for Disc), or disconnecting - JVC UX-EP25 | Instruction Manual - Page 20
is not stereo mini plug type, Use a plug adapter to convert the stereo mini plug to the corresponding plug to the audio output. • Refer to the manuals supplied with the other equipment. ✎ IMPORTANT • Always set volume to "VOLUME MIN" when connecting or disconnecting the other equipment. To select - JVC UX-EP25 | Instruction Manual - Page 21
the Volume You can adjust the volume level from level 0 (VOLUME-MIN) to level 30 (VOLUME-MAX). Remote control: Main unit: CANCEL SET/RESUME CLOCK/TIMER SLEEP To drop the volume in a moment Remote ONLY To restore the volume, press again, or adjust the volume level. FADE MUTING VOLUME +/BASS - JVC UX-EP25 | Instruction Manual - Page 22
the Display Brightness - DIMMER Remote ONLY You can dim the display window. DIMMER ON DIMMER OFF (Canceled) Setting the Clock Remote ONLY Without setting the built- CLOCK Source information If there is a power failure The clock loses its setting and blinks. You need to set the clock again. 18 - JVC UX-EP25 | Instruction Manual - Page 23
Turning Off the Power Automatically Remote ONLY To turn off the System after playback is over - Auto Standby This function works only when the source is CD. To turn off the System after a certain period of time - Sleep Timer 1 Specify the time (in minutes). A.STANDBY Canceled When Auto Standby is - JVC UX-EP25 | Instruction Manual - Page 24
Advanced Disc/USB mass storage class device Operations Remote control 2 Select tracks you want for Program Play. For CD Numeric buttons CD 6 PROGRAM REPEAT CANCEL 4, 7, ¢ USB MEMORY 6 RANDOM Programming the Playing Order - Program Play Remote ONLY You can arrange the playing order of the tracks - JVC UX-EP25 | Instruction Manual - Page 25
the PRGM indicator is shown on the display and before play back... In the reverse order. In the programmed order. Playing at Random - Random Play Remote ONLY You can play back all the tracks on the disc and the USB mass storage class device at random. To modify the program While - JVC UX-EP25 | Instruction Manual - Page 26
Playing Repeatedly - Repeat Play Remote ONLY You can repeat playback. ALL Canceld (No indication) CD MP3/WMA (Track mode) MP3/WMA (Group mode) Repeats the current track. Repeats all the - JVC UX-EP25 | Instruction Manual - Page 27
Remote control 4 / ¢ STANDBY/ON CANCEL SET/RESUME CLOCK/ TIMER When the on-time comes The System time everyday until the timer is turned off manually (see the next column). 2 Make the "TUNER AM," "CD," "USB MEMORY," "AUX" or "iPod". When selecting tuner: Select a preset number or "FM (AM) - - JVC UX-EP25 | Instruction Manual - Page 28
4 Set the volume. • "SET OK" appears on the display followed by the timer settings you have entered. 3 Turn off the System (on standby) if you have set the timer with the System turned on. STANDBY/ON To turn off the Timer after its setting is done Since Daily Timer is activated at the - JVC UX-EP25 | Instruction Manual - Page 29
that number will be erased. • When you unplug the AC power cord or if a power failure occurs, the preset stations will be erased in a few days. If this happens, preset the stations again. Playing Back a Disc/USB mass storage class device: • This System cannot play "packet write" discs. • For MP3/WMA - JVC UX-EP25 | Instruction Manual - Page 30
due to external electrical interference. Unplug the AC power cord and then plug it back in. Unable to operate the System from the remote control. @The path between the remote control and the remote sensor on the System is blocked. @Point it at the remote sensor on the font panel. @Signals cannot - JVC UX-EP25 | Instruction Manual - Page 31
Audio ver. 1.1 USB Host ver. 1.1 Compatible device Mass Storage Class Compatible file system FAT16, FAT32 Bus power supply Max. 5V/500 mA Compatible iPod types See Page 12 Bus power (each unit) SP-UXEP25 Type Full range bass-reflex type Speaker Unit 8 cm (3-3/16") cone × 1 Power handling Capacity 10 - JVC UX-EP25 | Instruction Manual - Page 32
Parts Index Refer to the pages to see how to use the buttons and controls. Remote control 10-12, 20 10, 18 10-14, 18, 21 23, 24 10, 11, 13, 15, 16, 20, 21 20, 21 22 19 11, 15 17 9, - JVC UX-EP25 | Instruction Manual - Page 33
ASSISTANCE ON HOW TO OPERATE? NEED TO LOCATE A JVC SERVICE CENTER? LIKE TO PURCHASE ACCESSORIES? IS HERE TO HELP! TOLL FREE: 1(800)252-5722 http://www.jvc.com Remember to retain your Bill of Sale for Warranty Service. Do not attempt to service the product yourself Caution To prevent electrical shock - JVC UX-EP25 | Instruction Manual - Page 34
cabinets or mounting systems. 3. Operational adjustments covered in the Owner's Manual, normal maintenance, video and audio head cleaning; 4. Damage that occurs in shipment, due to act of God, and cosmetic damage; 5. Signal reception problems and failures due to line power surge; 6. User Removal - JVC UX-EP25 | Instruction Manual - Page 35
EN © 2006 Victor Company of Japan, Limited 0706NYMCREBET UX-EP25 MICRO COMPONENT SYSTEM
-
 1
1 -
 2
2 -
 3
3 -
 4
4 -
 5
5 -
 6
6 -
 7
7 -
8
-
9
-
10
-
11
-
12
-
13
-
14
-
15
-
16
-
17
-
18
-
19
-
20
-
21
-
22
-
23
-
24
-
25
-
26
-
27
-
28
-
29
-
30
-
31
-
32
-
33
-
34
-
35
 |
 |
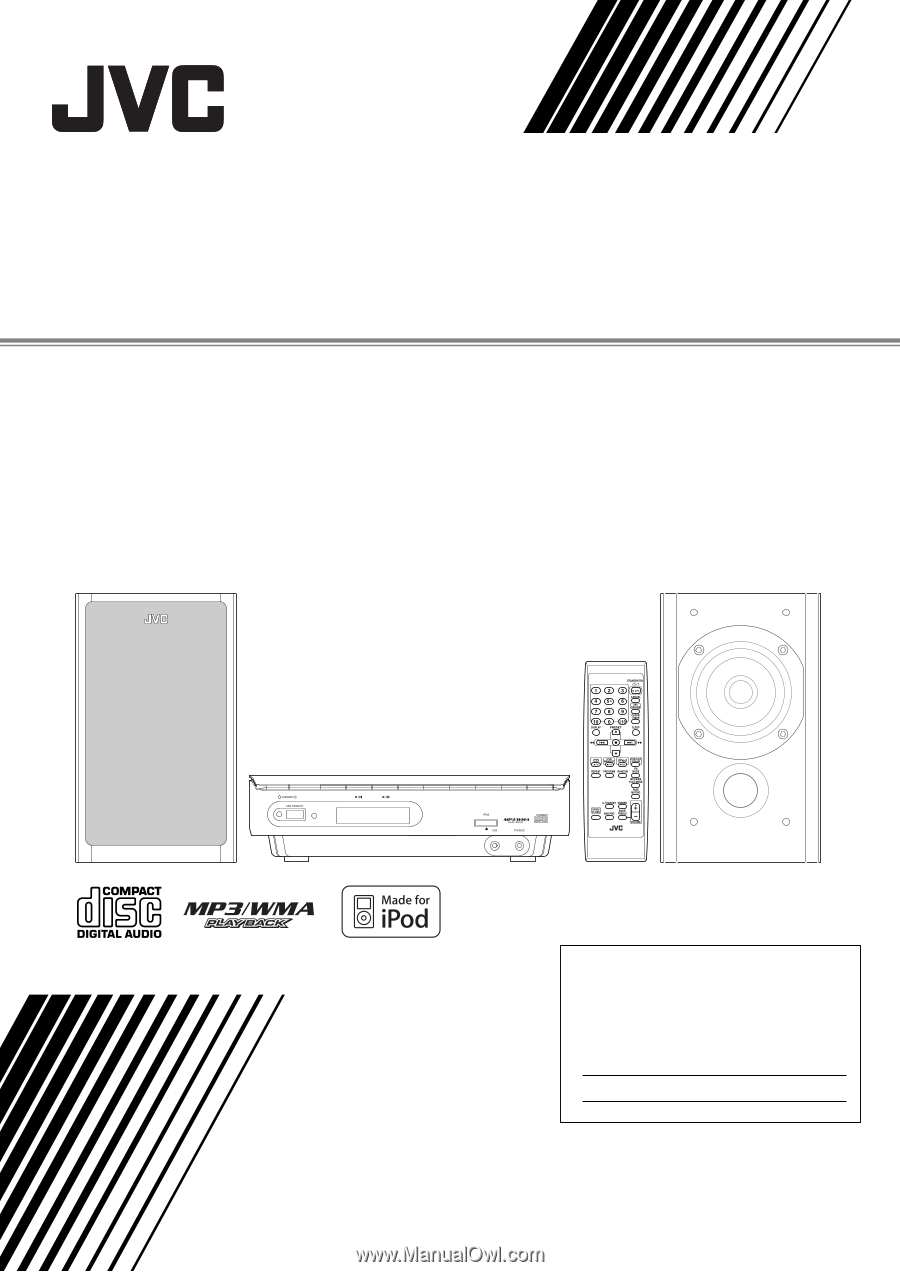
UX-EP25
—
Consists of CA-UXEP25 and SP-UXEP25
COMPACT COMPONENT SYSTEM
MICRO COMPONENT SYSTEM
INSTRUCTIONS
LVT1598-001C
[
J]
For Customer Use:
Enter below the Model No. and Serial No.
which are located either on the rear, bot-
tom or side of the cabinet. Retain this
information for future reference.
Model No.
Serial No.