Jensen VM9020TS Operation Manual - Page 3
Preparation - install
 |
View all Jensen VM9020TS manuals
Add to My Manuals
Save this manual to your list of manuals |
Page 3 highlights
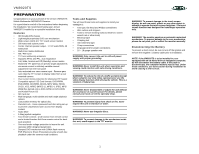
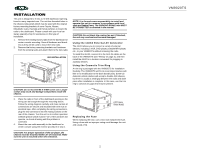
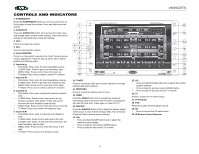
VM9020TS PREPARATION Congratulations on your purchase of the Jensen VM9020TS Mobile Multimedia AM/FM/DVD Receiver. It's a good idea to read all of the instructions before beginning the installation. We recommend having your Jensen VM9020TS installed by a reputable installation shop. Features • ISO Double-DIN chassis • Light weight proprietary DVD core mechanism • Wide screen (16:9) 6.5" TFT touch screen monitor • 280 watts total system power • Center channel speaker output - 1 X 22 watts RMS, 40 watts peak • Multi-Zone media distribution • AM / FM Tuner • TV Tuner w/diversity antenna's • Supports NTSC and PAL, auto negotiation • Full, Wide, Normal and Off (Standby) screen modes • Motorized TFT panel has 16 precise angle adjustments via remote control or infinitely variable manual adjustment from the front panel • Auto-activated rear view camera input - Reverse gear over rides the TFT screen to display video from a rear mounted camera • Over current motor protection for obstructed TFT panel • Compatible optical / SD Card formats: DVD-R/RW, DVD+R/RW, CD-R/RW, CD-DA, MP3, WMA, HDCD, SVCD, VCD, MPEG (MPEG 1), MPEG 4, JPEG, MP3/ WMA files burned onto a DVD+R/RW or DVD-R/RW and Kodak Picture CD • SD Card slot • Multi-language, multi-subtitle and multi-angle playback options • Last position memory for optical disc. • Parental Lock - Uses a password and disc rating set-up to prevent unauthorized user access from display content • Audio Mute • 5-Way joystick navigation • Two remote controls - a full function front remote control and a limited function Kid-Zone remote control for back seat operation • Over and under voltage protection to insure the unit operates within designed parameters • Damped DVD mechanism with 16Mbit flash memory ESP (Electronic Shock Protection) provide smooth disc playback under the severest road conditions Tools and Supplies You will need these tools and supplies to install your VM9020TS: • Torx type, flat-head and Philips screwdrivers • Wire cutters and strippers • Tools to remove existing radio (screwdriver, socket wrench set or other tools) • Electrical tape • Crimping tool • Volt meter/test light • Crimp connections • 18 gauge wire for power connections • 16 - 18 gauge speaker wire WARNING! Only connect the unit to a12-volt power supply with proper grounding. WARNING! Never install this unit where operation and viewing could interfere with safe driving conditions. WARNING! To reduce the risk of a traffic accident (except when using for rear view video camera) never use the video display function while driving the vehicle. This is a violation of federal law. WARNING! Never disassemble or adjust the unit without the assistance of a professional. For details, please consult your local car stereo specialty shop. WARNING! To prevent injury from shock or fire, never expose this unit to moisture or water. WARNING! Never use irregular discs. WARNING! To prevent damage to the mechanism inside this unit, avoid impact to the TFT monitor. WARNING! To prevent damage to the touch screen display, do not use metal, plastic or any other object to attempt to operate the touch screen functions. The touch screen function was designed for hand/finger operation only. WARNING! The monitor employs an automatic motorized mechanism. To prevent damage to the core mechanism, please do not push, pull or swivel the monitor manually. Disconnecting the Battery To prevent a short circuit, be sure to turn off the ignition and remove the negative (-) battery cable prior to installation. NOTE: If the VM9020TS is to be installed in a car equipped with an on-board drive or navigation computer, do not disconnect the battery cable. If the cable is disconnected, the computer memory may be lost. Under these conditions, use extra caution during installation to avoid causing a short circuit. 1
-
 1
1 -
 2
2 -
 3
3 -
 4
4 -
 5
5 -
 6
6 -
 7
7 -
 8
8 -
 9
9 -
10
-
11
-
12
-
13
-
14
-
15
-
16
-
17
-
18
-
19
-
20
-
21
-
22
-
23
-
24
-
25
-
26
-
27
-
28
 |
 |