Kenmore 7531 Use and Care Guide - Page 14
Then attach the cap cover on the opposite
 |
View all Kenmore 7531 manuals
Add to My Manuals
Save this manual to your list of manuals |
Page 14 highlights
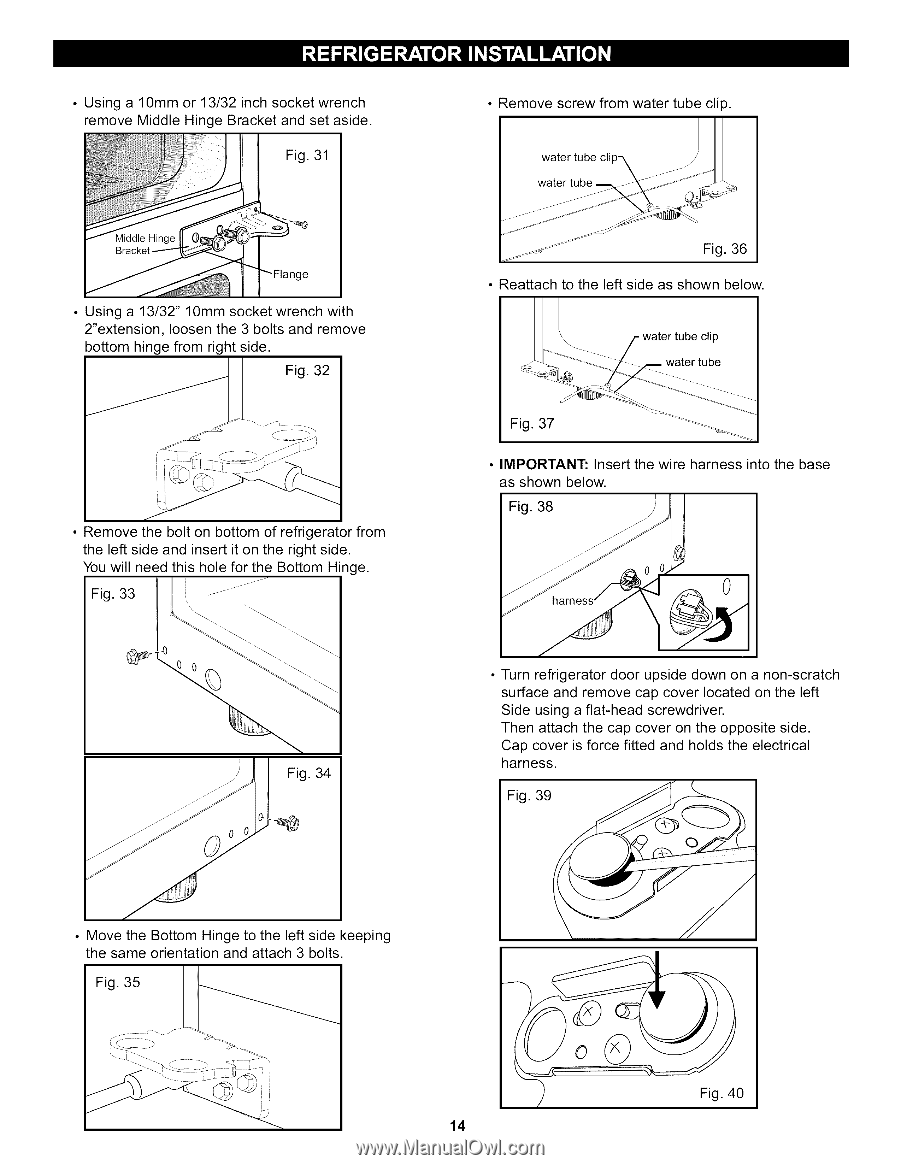
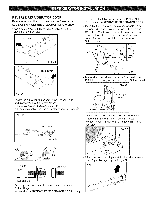
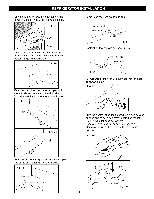
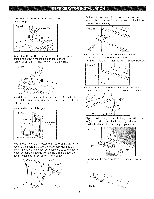
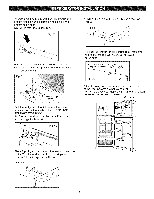
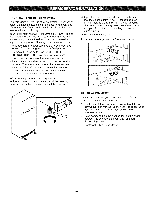
• Using a 10mm or 13/32 inch socket wrench remove Middle Hinge Bracket and set aside. Fig. 31 • Remove screw from water tube clip. water tube cli • Using a 13/32" 10mm socket wrench with 2"extension, loosen the 3 bolts and remove bottom hinge from right side. Fig. 32 • Remove the bolt on bottom of refrigerator from the left side and insert it on the right side. You will need this hole for the Bottom Hinge. Fig. 33 ............ ¼ Fig. 34 • Reattach to the left side as shown below. c water tube ctlp water [uiee Fig. 37 i.i_i • IMPORTANT: Insert the wire harness into the base as shown below. Fig. 38 • Turn refrigerator door upside down on a non-scratch surface and remove cap cover located on the left Side using a flat-head screwdriver. Then attach the cap cover on the opposite side. Cap cover is force fitted and holds the electrical harness. Fig. 39 • Move the Bottom Hinge to the left side keeping the same orientation and attach 3 bolts. Fig. 35 14 Fig. 40
-
 1
1 -
2
-
3
-
4
-
5
-
6
-
7
-
8
-
 9
9 -
 10
10 -
 11
11 -
 12
12 -
 13
13 -
 14
14 -
 15
15 -
 16
16 -
 17
17 -
 18
18 -
 19
19 -
20
-
21
-
22
-
23
-
24
-
25
-
26
-
27
-
28
-
29
-
30
-
31
-
32
-
33
-
34
 |
 |