Kenmore 7755 Use and Care Guide - Page 13
Warmer, Drawer, Removal
 |
View all Kenmore 7755 manuals
Add to My Manuals
Save this manual to your list of manuals |
Page 13 highlights
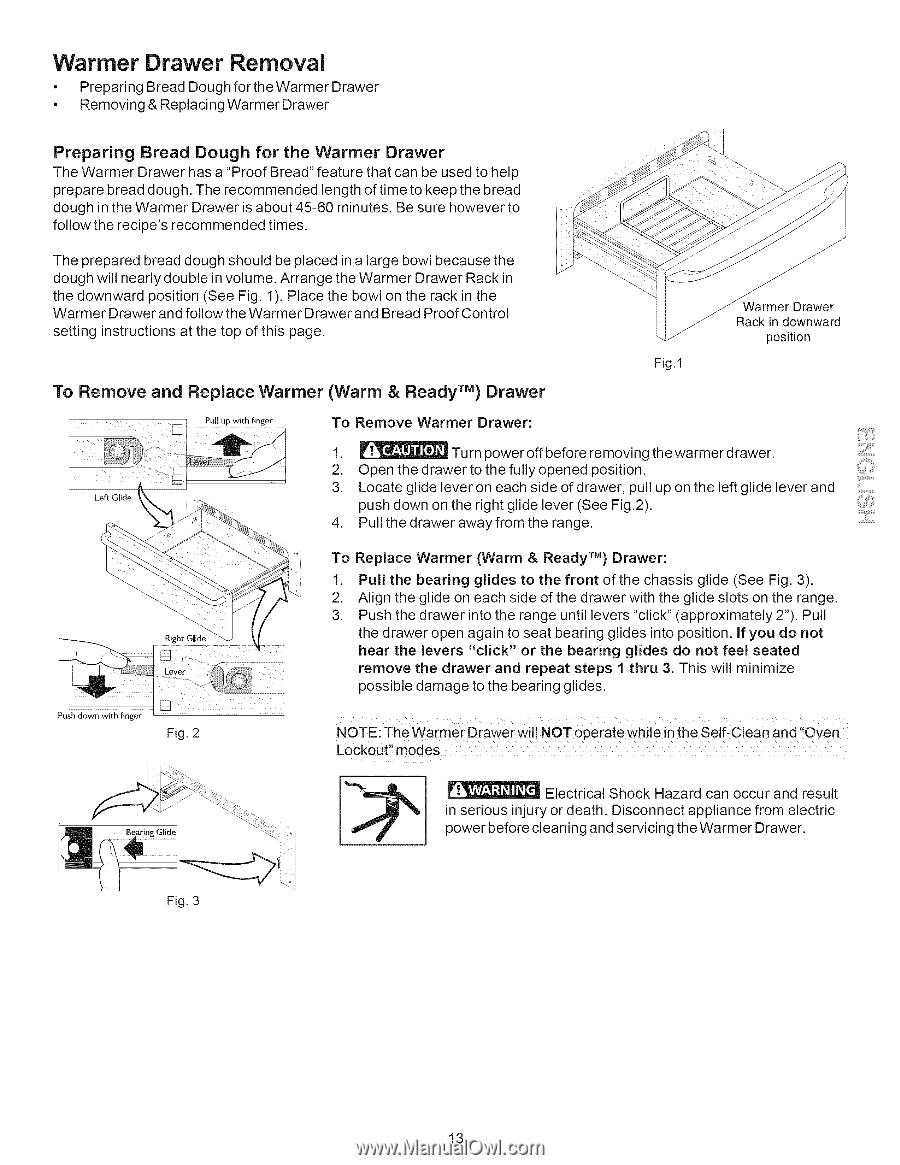
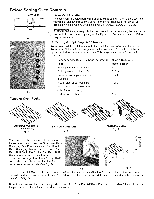
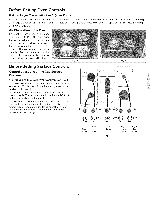
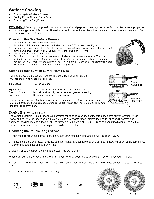
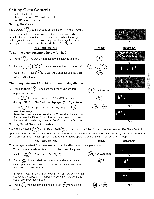
Warmer Drawer Removal • Preparing Bread Dough for the Warmer Drawer • Removing & Replacing Warmer Drawer Preparing Bread Dough for the Warmer Drawer The Warmer Drawer has a "Proof Bread" feature that can be used to help prepare bread dough. The recommended length of time to keep the bread dough in the Warmer Drawer is about 45-60 minutes. Be sure however to follow the recipe's recommended times. The prepared bread dough should be placed in a large bowl because the dough will nearly double in volume. Arrange the Warmer Drawer Rack in the downward position (See Fig. 1). Place the bowl on the rack in the Warmer Drawer and follow the Warmer Drawer and Bread Proof Control setting instructions at the top of this page. To Remove and Replace Warmer (Warm & Ready TM) Drawer Pull up with finger To Remove Warmer Drawer: Rack in downward position Fig.l Left Glide 1. _ Turn poweroffbefore removing thewarmer drawer. 2. Open the drawer to the fully opened position. 3. Locate glide lever on each side of drawer, pull up on the left glide lever and push down on the right glide lever (See Fig.2). 4. Pull the drawer away from the range. Right Glide Push down with finger Fig. 2 To Replace Warmer (Warm & Ready TM) Drawer: 1. Pull the bearing glides to the front of the chassis glide (See Fig. 3). 2. Align the glide on each side of the drawer with the glide slots on the range. 3. Push the drawer into the range until levers "click" (approximately 2"). Pull the drawer open again to seat bearing glides into position. If you do not hear the levers "click" or the bearing glides do not feel seated remove the drawer and repeat steps 1 thru 3. This will minimize possible damage to the bearing glides. NOTE:TheWarmerDrawerwillNOToperatewhileinthe Lockout'modes Self-Cleanand"Oven Electrical Shock Hazard can occur and result n serious injury or death. Disconnect appliance from electric GlAde power before cleaning and servicing the Warmer Drawer. Fig. 3 13
-
 1
1 -
2
-
3
-
4
-
5
-
6
-
7
-
 8
8 -
 9
9 -
 10
10 -
 11
11 -
 12
12 -
 13
13 -
 14
14 -
 15
15 -
 16
16 -
 17
17 -
 18
18 -
19
-
20
-
21
-
22
-
23
-
24
-
25
-
26
-
27
-
28
-
29
-
30
-
31
-
32
-
33
-
34
-
35
-
36
-
37
-
38
-
39
-
40
-
41
-
42
 |
 |