Kenmore 7952 Use and Care Guide - Page 21
Self-Cleaning, cont'd, Adjusting
 |
View all Kenmore 7952 manuals
Add to My Manuals
Save this manual to your list of manuals |
Page 21 highlights
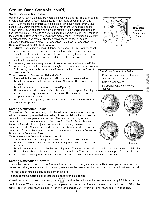
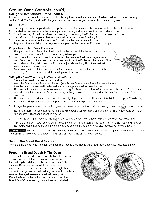
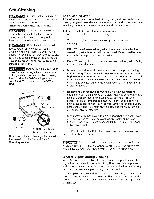
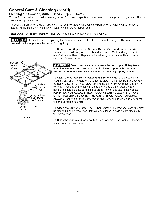
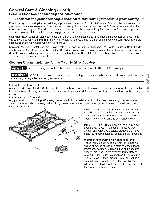
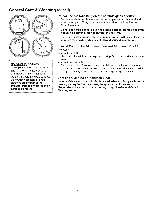
Self-Cleaning (cont'd) Self=Clean Cycle Time Length If you are planning to use the oven directly after a self-clean cycle remember to allow time for the oven to cool down and the oven door to unlock. This normally takes about 11/2hour. So a self-clean cycle (3 hours) will actually take about 41/2hours to complete. The time remaining for the self-clean cycle will be displayed in the oven control display. To avoid possible burns use care when opening the oven door after the Self-Cleaning cycle. Stand to the side of the oven when opening the door to allow hot air or steam to escape. To set the controls for a Self=Cleaning cycle 1. Be sure the oven door is closed. 2. Turn both, the selector and the temperature control knobs to Clean position. 3. As soon as the control is set, the motor driven oven door lock will begin to close automaticallWy.hilethedoorislockingt,he iconwi,flashandthenwi, remain visible for the entire self-clean cycle. Note: Allow about 15 seconds for the oven door lock to close. When the Self=Clean Cycle is Completed 1. Turn the selector and the temperature control knobs back to Off position. 2. Once the oven has cooled down for approximately 11/2HOUR, the oven door can then be opened. While the door is unlocking, the _ icon will flash and then will disappear from the oven control display. DO NOT force the oven door open. This can damage the automatic door locking system. Use caution and avoid possible burns when opening the door after the Self-Cleaning cycle has completed. The oven may still be VERY HOT. Stopping or Interrupting a Self-Cleaning Cycle If it becomes necessary to stop or interrupt a self-cleaning cycle due to excessive smoke or fire in the oven: 1. Turn the selector and the temperature control knobs to Off position. 2. The oven door can only be opened after the oven has cooled down for approximately 11/2HOUR. Adjusting Oven Temperature The temperature calibration in the oven has been pre-set at the factory. When first using the oven, be sure to follow recipe times and temperatures, if you think the oven is cooking too hot or too cool for the temperature you select, you can adjust the actual oven temperature to be more or less than what is displayed. Before adjusting, test a recipe by using a temperature setting that is higher or lower than the recommended temperature. The baking results should help you to decide how much of an adjustment is needed. To adjust the oven temperature 1. Press and hold the _ button until "00" appears in the oven control display 2. To increase the temperature use the/_ button to enter the desired change; and to decrease the temperature use the button (a minus sign will appear in the display indicating the temperature is decreased). 3. Wait 5 seconds for the change to be accepted by the oven control. Note: The oven temperature adjustments made with this feature will not change the Self-Clean or Broil temperature. Once the temperature has been changed, the temperature indicator will still display the value set from the temperature knob but the actual temperature in the oven will be higher or lower. 21
-
 1
1 -
2
-
3
-
4
-
5
-
6
-
7
-
8
-
9
-
10
-
11
-
12
-
13
-
14
-
15
-
 16
16 -
 17
17 -
 18
18 -
 19
19 -
 20
20 -
 21
21 -
 22
22 -
 23
23 -
 24
24 -
 25
25 -
 26
26 -
27
-
28
-
29
-
30
 |
 |
