Kenmore SI3209ZA Use and Care Guide - Page 14
Electrode, Check
 |
View all Kenmore SI3209ZA manuals
Add to My Manuals
Save this manual to your list of manuals |
Page 14 highlights
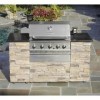
Install Ignitor Battery [] Unscrew Ignitor Cap from Control Panel. [] Place supplied AA battery into the Ignitor Slot with positive pole facing you. [] Position the Cap and Spring over the AA battery and tighten onto Control Panel. Install Cooking Components [] Place the Heat Diffusers above the Burners. [] Place the Cooking Grids on the ledge above the Heat Diffuser. [] Place the Secondary Cooking Rack into the holes on the upper left and right of the Back Burner frame with the bottom resting in the slots on either side of the Grill Bowl. [] Place the Griddle above the Side Burner. Ignitor Slot f AIAgnitBoarttCerayp_ , "...... Spring Secondary Cooking Rack Cooking Grids Heat DiffUS_rokirng With the assistance of another person, perform this Electrode Check before proceeding. This test will ensure that the Spark Electrode Tips are properly positioned so your grill lights easily and properly. [] Be sure all Control Knobs are set to "OFF" and open the Grill Lid. [] Have your assistant stand behind to the right of the grill and look toward the front of the grill bowl. Never put your face inside the Grill Head. [] Press the Ignitor Cap. You should hear a "clicking" sound. Your assistant should see a blue spark within each Gas Collector Box. If a spark is present the Electrode Tips are properly positioned. [] If no spark is seen, the Spark Gap needs to be adjusted as follows: • If the gap between the Spark Electrode Tip and Receiver is more than 3/16" use an adjustable wrench to gently squeeze the Gas Collector Box to narrow gap. • Recheck the Electrode again, if no "clicking" sound is heard: - AA Battery may be installed backwards. - Electric wires may be loose. Remove the AA Battery and inspect the Ignitor Junction Box found behind the Control Panel and reconnect any loose wires. Grid/Infrared Griddle 3/16" Spark Gap Gas Collector J ff I i!._ / Box ' Spark Electrode Tip Spark Receiver 14
-
 1
1 -
2
-
3
-
4
-
5
-
6
-
7
-
8
-
 9
9 -
 10
10 -
 11
11 -
 12
12 -
 13
13 -
 14
14 -
 15
15 -
 16
16 -
 17
17 -
 18
18 -
 19
19 -
20
-
21
-
22
-
23
-
24
-
25
-
26
-
27
-
28
-
29
-
30
-
31
-
32
-
33
-
34
-
35
-
36
-
37
-
38
-
39
-
40
-
41
-
42
-
43
-
44
-
45
-
46
-
47
-
48
-
49
-
50
-
51
-
52
-
53
-
54
-
55
-
56
-
57
-
58
-
59
-
60
-
61
-
62
-
63
-
64
-
65
-
66
-
67
-
68
-
69
-
70
-
71
-
72
-
73
 |
 |
