Kenmore SI3209ZA Use and Care Guide - Page 18
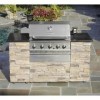
Check, end of each Burner Tube is, located over each, Valve Orifice
 |
View all Kenmore SI3209ZA manuals
Add to My Manuals
Save this manual to your list of manuals |
Page 18 highlights
Check that the end of each Burner Tube is properly located over each Valve Orifice 1. Remove the Drawer and the Grease Draining Tray. I R / ,/ Push LEVER down on right side and up on left side to unlock Air shutter /- View from under the grill head If you have a gas leak that cannot be repaired by tightening, turn off the gas at the source, disconnect fuel line from your grill and call 1-888-317-7642 or your gas supplier for repair assistance. Never disconnect the gas regulator or any gas fitting while your grill is lit. A lit grill can ignite leaking gas and cause a fire or explosion which could result in property damage, personal injury or death. 18
-
 1
1 -
2
-
3
-
4
-
5
-
6
-
7
-
8
-
9
-
10
-
11
-
12
-
 13
13 -
 14
14 -
 15
15 -
 16
16 -
 17
17 -
 18
18 -
 19
19 -
 20
20 -
 21
21 -
 22
22 -
 23
23 -
24
-
25
-
26
-
27
-
28
-
29
-
30
-
31
-
32
-
33
-
34
-
35
-
36
-
37
-
38
-
39
-
40
-
41
-
42
-
43
-
44
-
45
-
46
-
47
-
48
-
49
-
50
-
51
-
52
-
53
-
54
-
55
-
56
-
57
-
58
-
59
-
60
-
61
-
62
-
63
-
64
-
65
-
66
-
67
-
68
-
69
-
70
-
71
-
72
-
73
 |
 |

Check
that the
end of each Burner Tube is
properly
located over each
Valve Orifice
1.
Remove
the
Drawer
and
the
Grease
Draining
Tray.
I
/
,/
Push LEVER down
on right side and up
on left side to
unlock
R
Air
shutter
/-
View
from
under
the
grill
head
If you
have a gas
leak
that
cannot
be
repaired
by
tightening,
turn off the gas at the
source,
disconnect
fuel
line
from
your
grill
and
call
1-888-317-7642
or
your
gas
supplier
for
repair
assistance.
Never
disconnect
the
gas
regulator
or
any
gas
fitting
while
your
grill
is
lit.
A
lit
grill
can
ignite
leaking
gas
and
cause
a
fire
or
explosion
which
could
result
in
property
damage,
personal
injury
or
death.
18