Kenwood 702IR Instruction Manual - Page 5
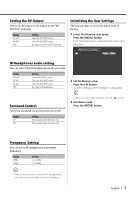
Picture Quality setting, Swithing the Display off mode, IR Headphones audio setting
 |
UPC - 019048167002
View all Kenwood 702IR manuals
Add to My Manuals
Save this manual to your list of manuals |
Page 5 highlights
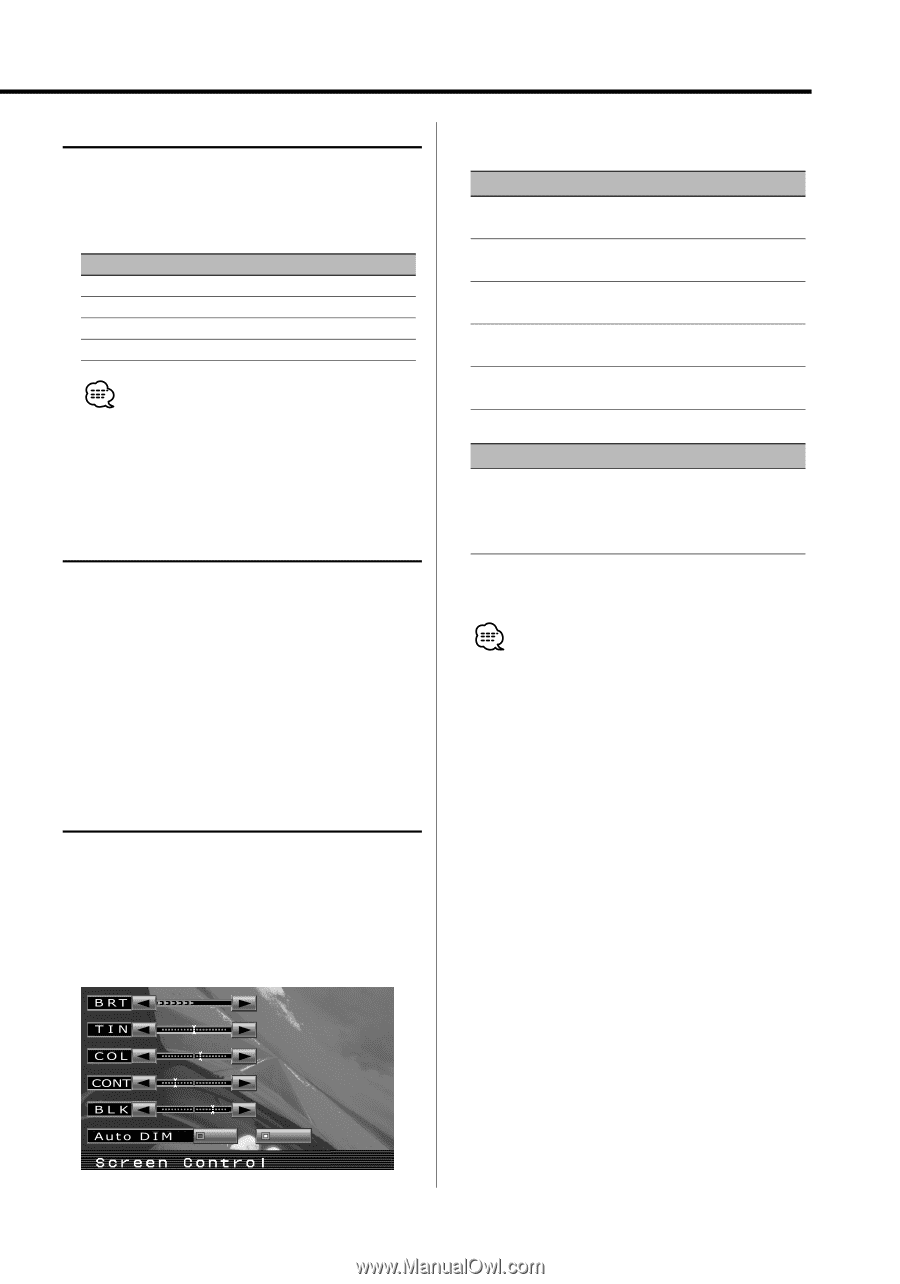
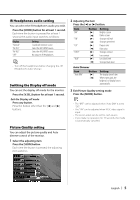
IR Headphones audio setting You can select the IR Headphones audio you wish. Press the [MODE] button for at least 1 second. Each time the button is pressed for at least 1 second, the audio input switches as follows: Display "Normal" "AV-IN1" "AV-IN2" "Off" Setting Sound with monitor source. Select the AV1 INPUT source. Select the AV2 INPUT source. No output to IR Headphones. • Turn off the headphones before changing the . Swithing the Display off mode You can set the display off mode for the monitor. Press the [V.SEL] button for at least 1 second. Exit the Display off mode Press any button. Press the button other than the [2] and [3] buttons. 2 Adjusting the item Press the [2] or [3] button. Item "BRT" "TIN" "COL" "CONT" "BLK" Button [3] [2] [3] [2] [3] [2] [3] [2] [3] [2] Setting Brighter screen Darker screen Stronger red level Stronger green level Deeper color Paler color Stronger contrast Less contrast Less black level Stronger black level Auto Dimmer Item "Auto DIM" Button [3] [2] Setting The display doesn't dim. When it gets dark, the brightness of display lowers automatically. 3 Exit Picture Quality setting mode Press the [MODE] button. • The "BRT" can be adjusted when "Auto DIM" is set to "Off". • The "TIN" can be adjusted when NTSC video signal is input. • The screen select can be set for each source. • If you make no operation for 15 seconds, this mode is automatically canceled. Picture Quality setting You can adjust the picture quality and Auto dimmer control of the monitor. 1 Select the adjusting item Press the [SCRN] button. Each time the button is pressed, the adjusting item switches. On Off English | 5
-
 1
1 -
 2
2 -
 3
3 -
 4
4 -
 5
5 -
 6
6 -
 7
7 -
 8
8 -
 9
9 -
 10
10 -
 11
11 -
12
-
13
-
14
-
15
-
16
-
17
-
18
-
19
-
20
-
21
-
22
-
23
-
24
-
25
-
26
-
27
-
28
-
29
-
30
-
31
-
32
-
33
-
34
-
35
-
36
-
37
-
38
-
39
-
40
-
41
-
42
-
43
-
44
-
45
-
46
-
47
-
48
-
49
-
50
-
51
-
52
-
53
-
54
-
55
-
56
-
57
-
58
-
59
-
60
-
61
-
62
-
63
-
64
-
65
-
66
-
67
-
68
-
69
-
70
-
71
-
72
-
73
-
74
-
75
-
76
-
77
-
78
-
79
-
80
-
81
-
82
-
83
-
84
-
85
-
86
-
87
-
88
-
89
-
90
-
91
-
92
-
93
-
94
-
95
-
96
 |
 |