Kenwood KTC-H2A1 Instruction Manual - Page 4
Installation in a vehicle continued, Installation in a vehicle with the KPA-H2C kit available - no audio
 |
UPC - 019048148148
View all Kenwood KTC-H2A1 manuals
Add to My Manuals
Save this manual to your list of manuals |
Page 4 highlights
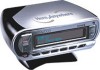
Installation in a vehicle with the KPA-H2C kit (available separately) Note: Do not put Here2Anywhere in the docking station until you have completed the installation. 1. Determine where you want to mount 2. You can bend the leaves on the base to Here2Anywhere. conform to curved mounting surfaces. • Do not it may ionbstsatrlluHcteryeo2uArnyvwiehwertehwrohuegrhe the windshield or your view of your vehicle's indicator displays. • Do not it will ihnisntdaellrHyeoreu2rAancywcehsesretwohtehree vehicle's controls. • Do not it may install hinder Htheeref2uAnncytiwohneoref where safety devices such as an airbag. Doing so may prevent the air-bag from functioning properly in the event of an accident. • Find a location that provides good 3. Peel the covering away from the adhesive on visibility of and access to the bottom of the base and adhere it to the Here2Anywhere's front panel. • Kenwood strongly recommends that mounting surface. Use the provided screws to securely attach the base to the surface. lyoocuatmionouwntheHreereth2eAnbyawsheerceanin a be • If using screws, be sure that you do not damage wiring or other systems on the attached with the provided screws. other side of the mounting surface. 4. Plug the cigarette lighter adapter into the back of the cradle, as shown. Don't plug the adapter into the cigarette lighter until the installation is completed (see pg. 10, Step 10). 6 Here2Anywhere Instruction Manual (ver. 2) Installation in a vehicle (continued) 5A. Plug the cassette adapter into the back of the cradle, as shown on the left. 5B. If your car stereo has an aux input, plug the supplied audio cable (instead of the cassette adapter) into the back of the cradle, as shown on the right. Plug the audio cable's white (L ch,) and red (R ch.) connectors into your car stereo. 6. Temporarily plug the antenna into the "1-Sat/Terr (Main)" connector on the back of the cradle until it is firmly seated, as shown. Here2Anywhere Instruction Manual (ver. 2) 7
-
 1
1 -
 2
2 -
 3
3 -
 4
4 -
 5
5 -
 6
6 -
 7
7 -
 8
8 -
 9
9 -
 10
10 -
11
-
12
-
13
-
14
-
15
-
16
-
17
-
18
-
19
 |
 |
