Kenwood MP6025 Instruction Manual - Page 26
Security Code, Touch Sensor Tone, Manual Clock Adjustment, DSI Disabled System Indicator
 |
UPC - 019048151322
View all Kenwood MP6025 manuals
Add to My Manuals
Save this manual to your list of manuals |
Page 26 highlights
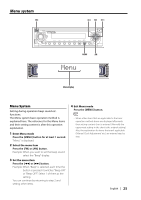
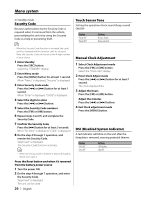
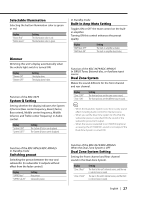
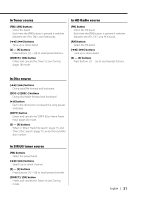
Menu system In Standby mode Security Code Because authorization by the Security Code is required when it's removed from the vehicle, personalizing this unit is by using the Security Code is a help in preventing theft. Touch Sensor Tone Setting the operation check sound (beep sound) ON/OFF. Display "Beep ON" "Beep OFF" Setting Beep is heard. Beep canceled. • When the Security Code function is activated, the code can't be changed and the function can't be released. Note, the Security Code can be set as the 4 digit number of your choice. 1 Enter Standby Press the [SRC] button. Select the "STANDBY" display. 2 Enter Menu mode Press the [MENU] button for at least 1 second. When "Menu" is displayed, "Security" is displayed. 3 Enter Security Code mode Press the [4] or [¢] button for at least 1 second. When "Enter" is displayed, "CODE" is displayed. 4 Select the digits to enter Press the [4] or [¢] button. 5 Select the Security Code numbers Press the [FM] or [AM] button. 6 Repeat steps 4 and 5, and complete the Security Code. 7 Confirm the Security Code Press the [¢] button for at least 3 seconds. When "Re-Enter" is displayed, "CODE" is displayed. 8 Do the step 4 through 7 operation, and reenter the Security Code. "Approved" is displayed. The Security Code function activates. • When the wrong Code is entered in steps 4 through 6, repeat from step 4. Press the Reset button and when it's removed from the battery power source 1 Turn the power ON. 2 Do the step 4 through 7 operation, and enter the Security Code. "Approved" is displayed. The unit can be used. 26 | English Manual Clock Adjustment 1 Select Clock Adjustment mode Press the [FM] or [AM] button. Select the "Clock ADJ" display. 2 Enter Clock Adjust mode Press the [4] or [¢] button for at least 1 second. The clock display blinks. 3 Adjust the hours Press the [FM] or [AM] button. Adjust the minutes Press the [4] or [¢] button. 4 Exit Clock adjustment mode Press the [MENU] button. DSI (Disabled System Indicator) A red indicator will blink on the unit after the faceplate is removed, warning potential thieves. Display "DSI ON" "DSI OFF" Setting LED flashes. LED OFF.
-
 1
1 -
2
-
3
-
4
-
5
-
6
-
7
-
8
-
9
-
10
-
11
-
12
-
13
-
14
-
15
-
16
-
17
-
18
-
19
-
20
-
 21
21 -
 22
22 -
 23
23 -
 24
24 -
 25
25 -
 26
26 -
 27
27 -
 28
28 -
 29
29 -
 30
30 -
 31
31 -
32
-
33
-
34
-
35
-
36
-
37
-
38
-
39
-
40
 |
 |