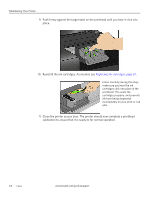
Kodak ESP 7 User Guide - Page 69
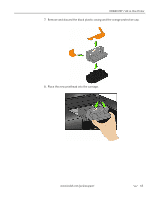
Insert the ink cartridges into the newly installed printhead as soon - print head
 |
View all Kodak ESP 7 manuals
Add to My Manuals
Save this manual to your list of manuals |
Page 69 highlights
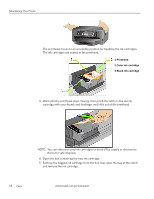
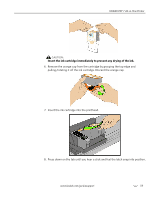
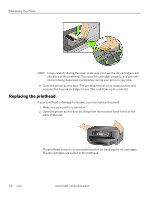
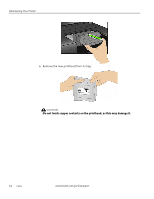
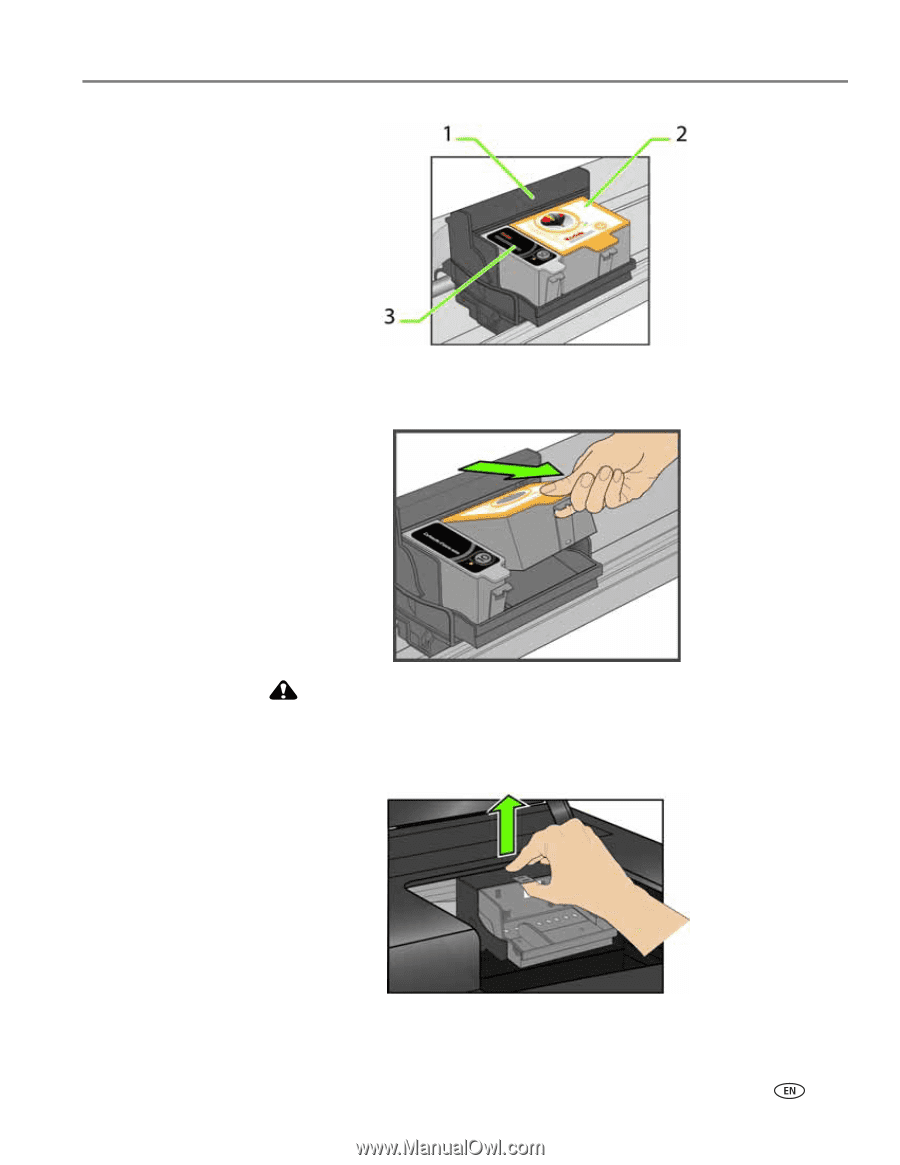
KODAK ESP 7 All-in-One Printer 1 Printhead 2 Color ink cartridge 3 Black ink cartridge 3. Pinch the latch on the ink cartridge with your thumb and forefinger and lift it out of the print head. Remove both ink cartridges. CAUTION: Insert the ink cartridges into the newly installed printhead as soon as possible to prevent any drying of the ink. 4. Unlatch the printhead by lifting the rectangular latch on the top of the printhead. 5. Remove the old printhead from the carriage. www.kodak.com/go/aiosupport 61
-
 1
1 -
2
-
3
-
4
-
5
-
6
-
7
-
8
-
9
-
10
-
11
-
12
-
13
-
14
-
15
-
16
-
17
-
18
-
19
-
20
-
21
-
22
-
23
-
24
-
25
-
26
-
27
-
28
-
29
-
30
-
31
-
32
-
33
-
34
-
35
-
36
-
37
-
38
-
39
-
40
-
41
-
42
-
43
-
44
-
45
-
46
-
47
-
48
-
49
-
50
-
51
-
52
-
53
-
54
-
55
-
56
-
57
-
58
-
59
-
60
-
61
-
62
-
63
-
 64
64 -
 65
65 -
 66
66 -
 67
67 -
 68
68 -
 69
69 -
 70
70 -
 71
71 -
 72
72 -
 73
73 -
 74
74 -
75
-
76
-
77
-
78
-
79
-
80
-
81
-
82
-
83
-
84
-
85
-
86
-
87
-
88
-
89
-
90
-
91
-
92
-
93
-
94
-
95
-
96
-
97
-
98
-
99
-
100
-
101
-
102
-
103
-
104
-
105
-
106
-
107
-
108
-
109
-
110
-
111
-
112
-
113
-
114
-
115
-
116
-
117
-
118
-
119
-
120
 |
 |
www.kodak.com/go/aiosupport
61
KODAK ESP 7 All-in-One Printer
3.
Pinch the latch on the ink cartridge with your thumb and forefinger and lift it out
of the print head. Remove both ink cartridges.
CAUTION:
Insert the ink cartridges into the newly installed printhead as soon as
possible to prevent any drying of the ink.
4.
Unlatch the printhead by lifting the rectangular latch on the top of the printhead.
5.
Remove the old printhead from the carriage.
1 Printhead
2 Color ink cartridge
3 Black ink cartridge